littlebill31
Smells of Raw Fuel
Bleeding your brakes is quite easy and very important. Air in the lines can cause brake fade and failure, which can result in severe injury. However, bleeding the braking system is not to be used as a "quick fix" for other problems. Proper understanding of the master cylinder and brake caliper units is paramount. Brake bleeding is normally reserved for AFTER the braking system has been overhauled and/or rebuilt. These systems work in conjunction with each other and should be serviced, properly, together. Do Not overlook one for the other. Though separate, these units should be treated as one.
NOTE: Read manufacturer's suggested DOT fluid rating and NEVER mix two different types of brake fluids. If you plan to bleed your brakes, bleed them entirely and replace fluid from a new, unopened container. Only use brake fluid!! Not oil, not hydraulic fluid, ect., only brake fluid.
Brake fluid is a dangerous substance. DO NOT let it come into contact with painted surfaces. Immediately clean up any spill and wash hands thoroughly. Keeping a "more than normal" clean area when working with brake parts is very important!
Makes sure you read this in it's entirety and thoroughly before beginning.
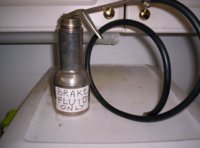
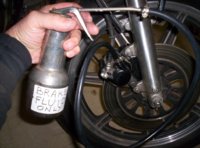
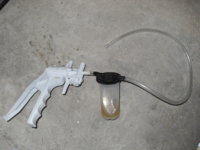
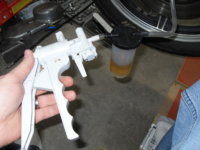
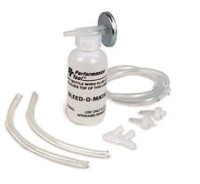
This will cover the standard procedure for bleeding brakes. Both vacuum bleeding and "oil can" bleeding is covered at the end of this tutorial. Ok, lets begin.
First, read what type of DOT rated fluid you will need. It is on the master cylinder (m/c) reservoir cover or in your motorcycle owners manual (mom).
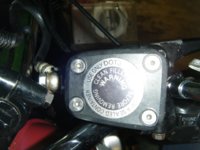
Next, you will want to reset the brake m/c position. When you open the m/c fluid will spill everywhere if the m/c is not level.
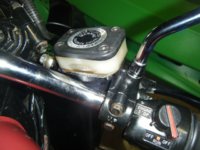
Place the bike on it's center stand and/or level the machine as much as possible. Using a 10mm socket, loosen the bolts enough to move the m/c level, slighty retighten to hold it in place.
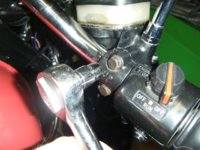
Now, remove the 4 bolts that hold the m/c cover on. Note: I have replaced my original bolts with new, stainless steel M5 / 3mm, tappered allen head. The originals will strip!
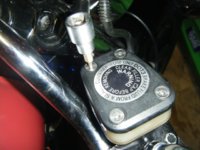
Check the fluid level of the m/c and clean it out if necessary.
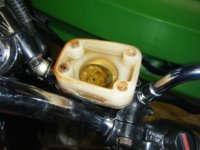
Find a sutible container to hold brake fluid in.
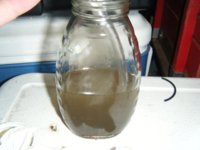
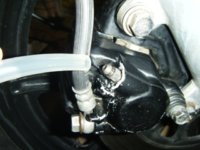
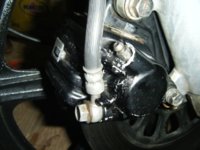
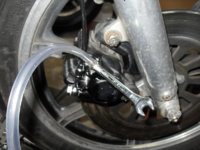
The object of bleeding the brakes is to remove air from the lines, thus you want to push fluid thru, and out of, the system. To do this you must attach one end of a tube, preferably clear, to the bleeding nipple...
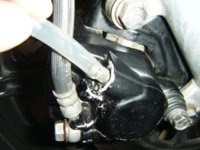
...and submerge the other end in a container full of brake fluid.
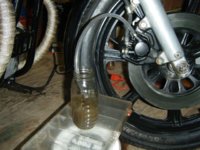
This will allow air to exit the caliper and be forced under the fluid level. Since the end of the tube is submerged, air can not go back into the system once the tube is full of fluid. Try to keep the end of the tube submerged under the fluid level. If the tube comes out it is ok, just make sure that the fluid does not flow back into the system, bringing air with it. This can be avoided by tightening the nipple during the bleeding process.
4 step process here. 1) You will be pulling the brake lever in. 2) opening the bleeding nipple and pumping the lever. 3) retightening the nipple (just snug). 4) Releasing the lever.
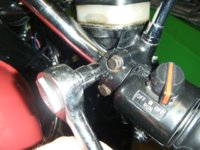
So, using a 5/16 wrench, pull the lever in...
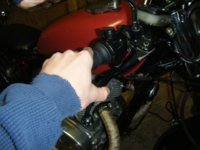
...and open the nipple. Do not completely remove the nipple. Just "crack" it open enough to allow fluid to flow out. Pump the lever a few times. The tube will fill with fluid and go into the container. Again, try to keep the tube submerged and do not let the fluid fall back into the caliper letting air in. Make sure you have fluid in the tube at all times. This will insure fluid does not flow back in followed by air. NOTE: Because the tube is on the nipple you will need to use the open end of the wrench. Opening the nipple with the wrench, with the tube on, is a pain, but after a few times it becomes easier to work around.
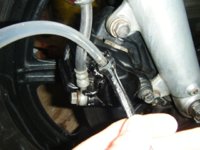
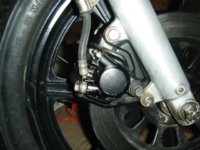
Then tighten the nipple while holding the lever in and then releasing the lever. Since the nipple is on top of the caliper, and the tube needs to curve down, tightening the nipple each time prevents fluid from falling back into the caliper and letting air in. It also keeps you from having to constantly pump the lever in order to prevent air going back in. Believe me, you will understand once you do this.
You will need to do this several times.
You want to do a little "dance". So it's "lever, nipple, pump-pump, nipple, lever", repeat.
Pulling the lever in pressurises the system, opening the nipple lets air and fluid escape, closing the nipple keeps fluid and air from going back in (Kind of a secondary safety), then release the lever. You may want to pump the lever a couple times to push air down to the nipple.
NOTE!!!! make sure you are watching the m/c reservoir. DO NOT let it run empty. You will need to keep adding fluid throughout this process. If you let it run dry, air will go into the system and you will have to start over.
What am I looking for?
You want to get all the air out. To know when this has happened you will, 1, see no more air bubbles coming out of the nipple and through the tube. And 2, the brake lever will no longer feel "spongy". If you have to "pump" the lever to build-up pressure, air is still present in the system. Everytime you pull the lever in it should feel nice, smooth, and be the same "pull" pressure each time. Remember to tighten the nipple each time. Do not "wrench" it tight, just snug it. This makes it a little easier to manage. Especially if you have to stand up and refill the reservoir.
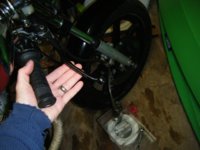
Once all the air is out, no more bubbles and no spongy feeling, top off the reservoir with fluid.

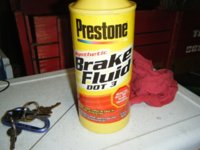
Then put the cover back on and tighten the bolts.

Collaborative article written by members of XS650.com / 2011
NOTE: Read manufacturer's suggested DOT fluid rating and NEVER mix two different types of brake fluids. If you plan to bleed your brakes, bleed them entirely and replace fluid from a new, unopened container. Only use brake fluid!! Not oil, not hydraulic fluid, ect., only brake fluid.
Brake fluid is a dangerous substance. DO NOT let it come into contact with painted surfaces. Immediately clean up any spill and wash hands thoroughly. Keeping a "more than normal" clean area when working with brake parts is very important!
Makes sure you read this in it's entirety and thoroughly before beginning.
This will cover the standard procedure for bleeding brakes. Both vacuum bleeding and "oil can" bleeding is covered at the end of this tutorial. Ok, lets begin.
First, read what type of DOT rated fluid you will need. It is on the master cylinder (m/c) reservoir cover or in your motorcycle owners manual (mom).

Next, you will want to reset the brake m/c position. When you open the m/c fluid will spill everywhere if the m/c is not level.

Place the bike on it's center stand and/or level the machine as much as possible. Using a 10mm socket, loosen the bolts enough to move the m/c level, slighty retighten to hold it in place.

Now, remove the 4 bolts that hold the m/c cover on. Note: I have replaced my original bolts with new, stainless steel M5 / 3mm, tappered allen head. The originals will strip!

Check the fluid level of the m/c and clean it out if necessary.

Find a sutible container to hold brake fluid in.

The object of bleeding the brakes is to remove air from the lines, thus you want to push fluid thru, and out of, the system. To do this you must attach one end of a tube, preferably clear, to the bleeding nipple...

...and submerge the other end in a container full of brake fluid.

This will allow air to exit the caliper and be forced under the fluid level. Since the end of the tube is submerged, air can not go back into the system once the tube is full of fluid. Try to keep the end of the tube submerged under the fluid level. If the tube comes out it is ok, just make sure that the fluid does not flow back into the system, bringing air with it. This can be avoided by tightening the nipple during the bleeding process.
4 step process here. 1) You will be pulling the brake lever in. 2) opening the bleeding nipple and pumping the lever. 3) retightening the nipple (just snug). 4) Releasing the lever.
So, using a 5/16 wrench, pull the lever in...

...and open the nipple. Do not completely remove the nipple. Just "crack" it open enough to allow fluid to flow out. Pump the lever a few times. The tube will fill with fluid and go into the container. Again, try to keep the tube submerged and do not let the fluid fall back into the caliper letting air in. Make sure you have fluid in the tube at all times. This will insure fluid does not flow back in followed by air. NOTE: Because the tube is on the nipple you will need to use the open end of the wrench. Opening the nipple with the wrench, with the tube on, is a pain, but after a few times it becomes easier to work around.

Then tighten the nipple while holding the lever in and then releasing the lever. Since the nipple is on top of the caliper, and the tube needs to curve down, tightening the nipple each time prevents fluid from falling back into the caliper and letting air in. It also keeps you from having to constantly pump the lever in order to prevent air going back in. Believe me, you will understand once you do this.
You will need to do this several times.
You want to do a little "dance". So it's "lever, nipple, pump-pump, nipple, lever", repeat.
Pulling the lever in pressurises the system, opening the nipple lets air and fluid escape, closing the nipple keeps fluid and air from going back in (Kind of a secondary safety), then release the lever. You may want to pump the lever a couple times to push air down to the nipple.
NOTE!!!! make sure you are watching the m/c reservoir. DO NOT let it run empty. You will need to keep adding fluid throughout this process. If you let it run dry, air will go into the system and you will have to start over.
What am I looking for?
You want to get all the air out. To know when this has happened you will, 1, see no more air bubbles coming out of the nipple and through the tube. And 2, the brake lever will no longer feel "spongy". If you have to "pump" the lever to build-up pressure, air is still present in the system. Everytime you pull the lever in it should feel nice, smooth, and be the same "pull" pressure each time. Remember to tighten the nipple each time. Do not "wrench" it tight, just snug it. This makes it a little easier to manage. Especially if you have to stand up and refill the reservoir.

Once all the air is out, no more bubbles and no spongy feeling, top off the reservoir with fluid.


Then put the cover back on and tighten the bolts.

Collaborative article written by members of XS650.com / 2011
Last edited:

