Minton Mod observations

Downeaster

Everything in XS
Top Contributor
Messages
3,001
Reaction score
18,608
Points
513
Location
Downeast Maine
Spring isn't far off, and it's warm enough to start on the pre-season maintenance and upgrades on my '79 Special.

First project is doing the Minton mods to my forks. I have one side done, just took a lunch break before starting on the other, and had a few observations:

forktool.jpg


1. I made the tool for removing the dampers by welding a 17mm bolt to a spare extension I had in my junk toolbox. Less chance of dropping things inside the tube that way. Also have a 24" extension so I don't have to stack extensions to reach the damper.

2. I'm doing it without taking the fork tubes out of the triple clamps. Dropped the wheel, fender and brake caliper, then when the bolt is out, I can just drop the lowers off the fork tubes. Saves all that dicking around with the headlight mounts.

3. I have a 36" tube brush that just happens to be the right size so I can stick it down the fork tube, shove it into the bore of the damper and haul the whole thing out through the top. Just have to undo the handlebars.

Two things I noticed about the writeup:

1. The instructions call for a #54 bit to "slightly enlarge" the small hole on the top of the damper and drill it through to the other side. The hole in my dampers is much closer to a #48.

2. The instructions call for two new 1/4" holes in the bottom of the damper. The holes in my damper are much closer to 3/16ths.

Are these differences likely due to changes over the different model years?

I adjusted drill sizes to match what I had, on the assumption that the mods will still be valid. Did I screw up there?

Also have new shocks and springs for the rear coming from 650 Central, carb boots from JBM and throttle shaft seals from Boats.net

C'moooooooooooooooon, SPRING! :bike:
 
The area of your original damping orifices is roughly 0.054 square inches. doubling that is .108 square inches, which is what you accomplished with another through hole set. if you went to the 1/4 inch, you would be at 0.196 square inches which is a significant jump ahead of stock. Big difference in area between a 3/16 and 1/4 inch!
The #54 vs #48 just means your rebound should act faster than a standard Minton mod. Are you changing the front springs as well? The original setup was under-sprung and over damped. If you open (quicken) the damping and still work with the stock springs, It may be pretty spongy going without a lot of preload. Even then, the new stuff on the back is going to put the pressure on the front to perform as well.
 
Yes, the original "Minton Mods" article has some errors in the fork section. Keep in mind that while on the staff of Motorcyclist, Joe Minton wrote many, many hop-up and how-to articles for all different bikes. I'm sure there were times he was working on several at once. I think he mixed some things up here and might have been referring to another bike he was concurrently working on.

So, let's set things straight and correct his errors, shall we? Minton states you'll find two large holes (1/4") at the bottom of your damper rods. He tells you to drill two more for a total of 4. As you've discovered, you already have 4 holes but they are smaller, about 3/16" (they're actually very close to a #9 drill bit size). If you drilled 2 more as he suggested, that would give you a total of 6 and may be too much. I simply enlarged the 4 existing holes to near 1/4" (I used a #1 bit) and didn't add 2 more.

The small hole at the top may have been a typo. As you've found, that small hole is already larger than a #54 drill bit. I think the numbers got transposed when the article went to print and he meant that you should enlarge the one existing hole using a #45 drill bit, continue on through out the other side of the rod and create a second hole.

So, to recap, enlarge the 4 existing holes at the bottom to about 1/4" and drill through the small upper and out the other side of the rod with a #45 drill bit, ending up with 2 #45 holes up there. Do not add additional holes at the bottom.
 
Last edited:
For the moment, stock springs on the front. I rode all last year with them set on the lowest preload, so I have a couple of clicks on the adjuster to play with.

'preciate the heads-up, I'll know what to look at if the handling goes wonky on me.
 
<snip>

So, to recap, enlarge the 4 existing holes at the bottom to about 1/4" and drill through the small upper and out the other side of the rod with a #45 drill bit, ending up with 2 #45 holes up there. Do not add additional holes at the bottom.

Ooops. Too late. I might be in the market for a new set of dampers then. We'll ride 'er and see what we see I guess.
 
On my 78SE I have the front springs set at the most firm preload. My rear springs are set at softest preload. They have been like that for 6 seasons and they suit me well.

I use 15W40 oil in my front shocks.
 
Last edited:
Here's what I ended up with on the bottom, a total of 4 holes just enlarged slightly from stock .....

0CcHQdx.jpg


Something else you can do while the rods are out is polish them with some 600 paper. Theoretically, this should make them slide through their bushing easier and maybe improve the fork action a bit. It's easy to do and only takes a couple minutes .....

2oE3Jzu.jpg


I got this idea from a set of '77 forks I had apart. The damper rods were polished right from the factory. Probably as a cost cutting measure, Yamaha quit doing that after that 1st year of the 35mm forks. I've never found polished damper rods in any of the later forks I've been into.
 
Last edited:
I never tried the minton mods. The cartrige emulators are a better way to go my opinion. You can adjust them the valve controls dampning not the holes. Before the mod tar strips would transfer shock to the bars. Now this is not a problem. Modern bikes use valves not holes. This was the best mod I did to my bike.
 
I can't say this makes a big improvement in the handling but it certainly doesn't make it any worse. What it does do is improve the ride. If you read the Minton article, one of the stock fork's shortcomings that he mentions is their inability to react to the little bumps or a series of little bumps. I found this to be spot on in regards to my stock forks. They worked fine on the big stuff but would jolt you on the little bumps. These mods fix that and make the normal, every day ride much more supple. I really like the results.

I know the emulators are supposed to be the hot set-up but I would urge anyone considering them to try these Minton Mods 1st. You can go to the emulators afterward if you feel the need by simply enlarging the damper rod holes even more (rendering them useless). However, you just may find the Minton Mods to be enough of an improvement. I know that's the way I feel and don't plan on spending money on emulators any time soon.
 
You should. I felt the same way but once I amassed some spares .... well, then I could modify and put back originals if need be. There was no need. This is a good mod and upgrade. Of course, you should use more oil (about 7 oz. instead of 6) but these mods compliment that. And the springs usually need changing too. I did quite a bit of fork fooling last summer. I really wanted the stock springs to work but I found them too weak. What I never got around to trying was about a 1" preload spacer on top of them. That just may be the missing link. The original springs are a progressive wind but after 30+ years, they're usually a bit weak. A little added preload may be just the ticket. But, referring to the "Minton Mods" article (for the SR500), it can be done and help for a while, but the stock springs will continue to weaken.

I did this to my SR500 - added extra preload to the stock springs - and loved it. Since the Minton article said that wouldn't last long, I "upgraded" to the progressive springs - they sucked compared to my shimmed originals. I continued to run them and grew used to them but I never thought the bike rode as well as it did before with shimmed stock springs.
 
Extra preload also decreases the amount of travel available to the point of bound compression. With springs that are weakening, added preload is a band aid at best. May very well work for years for most people's riding style. Me, being a larger rider, and probably more agressive than most, I lean toward getting the boingers and brakes as well sorted as possible, so springs and emulators (once you have ridden a well sorted setup like this, nothing less is satisfying) are on my SV, on the bench for my Road Star, and on the "buy" list for my XS. If buying is not an option by the time the primary work is done on the motor, electrics, and brakes, then I will Minton the forks in the meantime.
 
I agree with 5twins on the Minton mods A very good step in improving the forks. I also found the fork springs a bit on thw weak side.
With a bit of research I found the Harley useed a 35 mm fork in the 70'and 80's for the sportsters and FX models
The springs I got from J&P. item number 230-584, $44.95 I have the measurements some where but to suffice the wire they are wound from is larger, the outside diameter is just a few thousands bigger and about 19 5/8 long. Long enough so when dropped into the forks they come up to about even with the fork tubes. It was a grunt to get the adjustable caps on after setting the oil level tio 6 inches down.
Now with the caps in the first settinmg I get about 25 mm sag, in the second setting I get about 13 mm sag. Can't get the third setting.
Using atf as fork oil they handle well. A lot stiffer than stock. Hot harsh but not soft or mushy like stock.
I have been thinking of the emulators but it feels great now. I might try them just to see.
Leo
 
Acquire another set of damper rods and you can have both, one Minton modded and one set up for emulators.
 
I have a set of forks off an 82 to use. I'll do the emulators on them with a set of Harley springs and the flat caps, non adjustable, with spacers cut to get proper preload. Experiment with fork oil weights and emulator adjustments to see just how much they improve things.
Maybe when it gets warm enough i'll get the emulators to play with.
Leo
 
I just did the mod following 5twins direction I am very pleased.
I used a 5/64th drill bit on the top hole drilling all the way though, and 1/4 to make the bottom holes bigger.
polished the rods with 600 and 1200 wet dry sandpaper.
new allballs seals.
I used 200ml (almost 7oz) 15wt belray fork oil in each, I think it would be even better with 10wt.
I added a 1" pvc spacer to the top of the spring and have it on the 2nd adjustment notch.
Took a few miles to settle in.
Now I really want some good shocks for the back!
I put 751 miles on it this weekend and really liked the change. (ride report to follow)
it really made the small bumps less harsh

Thanks for everyones help and info in this thread!
 
Last edited:
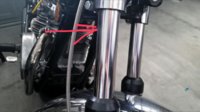
I did the Minton mods awhile back and my front end use to be stiff...with mods it has more cushioning not as stiff. I used 15w fork oil at 7oz. The forks travel up pretty high...still have stock springs to. I was thinking do the springs have to go in a certain way? I can't remember or find any info if there's tighter wound side or not. If it matters. Also what exactly do you use for a 1" spacer on top of spring. Maybe I'll try that out.2014-07-25 12.53.55.jpg this is how hi they go...is that ok? Well did some research and found info about pvc spacer...so just need to know if springs go in a certain way. Thanks
 
Last edited:
Back
Top