"Turbo Woody" Bobber Build Yes real wood!

wallywheels

"savage"
Messages
104
Reaction score
0
Points
16
Location
Western MA
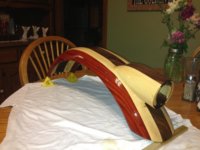
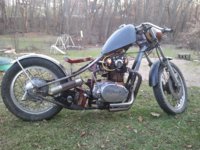
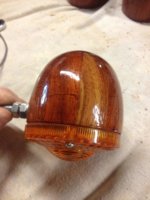
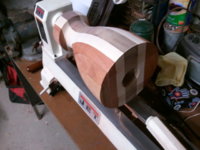
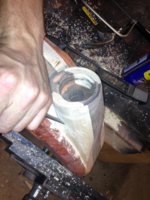
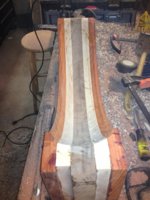
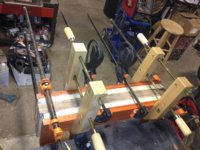
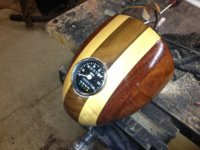
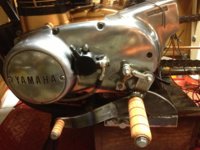
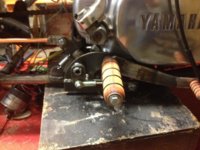
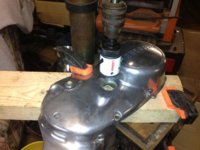
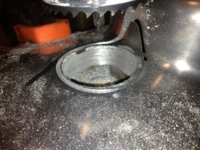
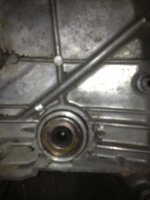
First off, I am starting this thread 3 years into my build. It has gone many ways but it is now on the home stretch. It is a 1975 XS650 that originally had 7000 or so miles, purchased form upstate New York. I bought the bike with intentions of doing a rat build and that quickly went out the window. In my spare time which is 0, I like to do custom woodworking as a hobby. One day I got the bright idea to put some wood accents on my build and before you know it I was hand carving some fenders and turning headlights and blinkers. I do not want to ramble so I will just post pics for all to see. I would also like to thank "Plattey" for some tips and inspiration with my turbo portion of the build, and pandemonium for the great service.

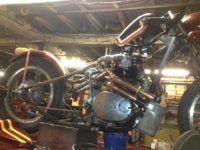
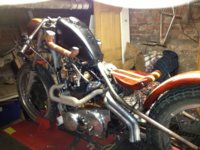
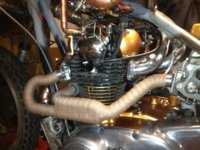
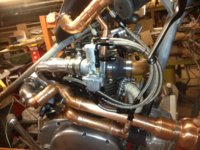
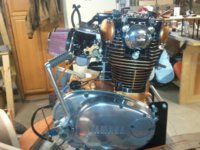
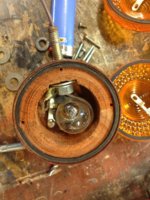
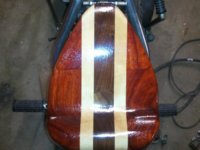
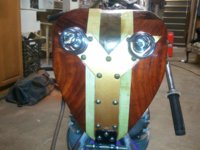
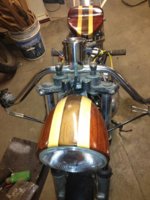
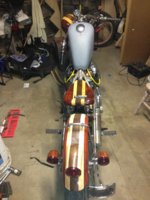
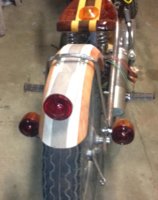
The photos below are where I am at now. Starting today I will post a build history in case anyone is interested:
 

Attachments

  • IMG_0656.jpg
    IMG_0656.jpg
    255.5 KB · Views: 1,556
  • IMG_0672.jpg
    IMG_0672.jpg
    244.3 KB · Views: 1,481
  • IMG_0296.jpg
    IMG_0296.jpg
    167 KB · Views: 967
Ok thread under way I will list everything I can remember about what parts I have used on this build.
-1975 XS650 Chopped in half
-Elswick Cycles Drop tail Hard tail with no drop and I believe 3 inches of stretch(I live in New England to many Potholes to lower)
-Engine
-Mikes High performance clutch plates and springs
-Hugh's PMA kit
-Pamco Ignition
-New Piston rings, Cam Chain slide, Gaskets, and soon to be re-phased as I already blew through rings and I just want it(whoops) Ext.
-Custom Hydraulic clutch into the side cover from honda 750
-VZ21 Turbo
-Rhino 650 intercooler
-copper intake piping
-Custom 1.25" exhaust 2-1 into turbo(to keep spool) and exits as 2 1.5" pipes
-30GPH fuel pump
-Mallory Boost compensated fuel pressure regulator
-All hand made by me -AN Stainless steel braided lines for fuel and boost
-Summit fuel check valve and filter for -AN lines
-Sparx capacitor as I am making this system run without a battery(I hope)but so far good
-TC Bros Sportster tank with -6 AN fuel bungs welded in place of factory bung for fuel pump and return line
-5 wire ATF gauge with O2 sensor for ease of tuning
-Wiseguys 2-1 intake and VM 36 Mikuni carb with different jetting still playing with that
-Mikuni carb is tapped all over with 1/8 NPT to pressurize carb to make up for boost pressure
-Custom candleholder intake air filter
-Stock aluminum rims(for some reason I love them)
-Pandemonium dual Brembo Front brake caliper setups with Ducatti brake reservoir
-Custom drilled rotors I went crazy knowing I had 2 rotors to make up for the lost surface area
-Wood is African Paduck, Black Walnut, and Hard Maple


There is much more but I will get to it as I go through the build process. Here is where I will start, it is the first time I rode it for its maiden voyage! Before I went crazy, I have older pics but it would take years to re-document all of the build. I will get right to the fun stuff
 

Attachments

  • 2011-12-11 15.46.35.jpg
    2011-12-11 15.46.35.jpg
    315.2 KB · Views: 704
First issue at hand was the power plant which 3 years ago this was adequate clearly not any more. I rebuilt only the top and sides if you will. It got new rings and a good cleaning along with Mikes High performance clutches, Hughs PMA and much more Details not needed as another full rebuild is in store to handle the increase in (power). The first Photo is my first XS650 motor build. I now have a few more under my belt as since I have started this project I have built or helped with the build of 5 other XS bobbers. The second and third photo is where that motor stands today and sadly it is considered my mock up motor now, it once was very pretty.
 

Attachments

  • IMG_0640.jpg
    IMG_0640.jpg
    240.2 KB · Views: 1,667
  • IMG_0659.jpg
    IMG_0659.jpg
    257 KB · Views: 1,162
  • 2011-02-09 13-1.59.23.jpg
    2011-02-09 13-1.59.23.jpg
    219.9 KB · Views: 710
Wow im very excited to see more..

The wood work is stunning..

I must say, although I imagine your not keeping it, I have always felt a motor with painted fins that instead of polishing, have different coloured edges would look good. And it does.

Anyways, great work!
 
I too dabble in woodworking and have had similar thoughts about incorporating wood into a motorcycle. It's very nice to see someone actually do it and the work itself is well done.
 
Alright here is some photos of the wooden parts that took 100s of hours to create and make sturdy enough to last on a bike. The redish brown wood is Paduck. The brown wood is Black Walnut and the yellowish white wood is Hard maple.
 

Attachments

  • IMG_0152.jpg
    IMG_0152.jpg
    177.6 KB · Views: 564
  • IMG_0130.jpg
    IMG_0130.jpg
    262.2 KB · Views: 536
  • 2011-02-09 13.58.48.jpg
    2011-02-09 13.58.48.jpg
    168.9 KB · Views: 466
  • 2011-02-09 13-1.58.57.jpg
    2011-02-09 13-1.58.57.jpg
    183.8 KB · Views: 540
  • IMG_0016.jpg
    IMG_0016.jpg
    233.2 KB · Views: 565
  • 2011-05-18 06-1.18.12.jpg
    2011-05-18 06-1.18.12.jpg
    101.4 KB · Views: 540
....and my favorite wooden part. All the lights will be LEDs accept for the headlight to minimize draw on the electrical system and also to reduce heat against the wood.
 

Attachments

  • IMG_0295.jpg
    IMG_0295.jpg
    218.5 KB · Views: 452
  • IMG_0280.jpg
    IMG_0280.jpg
    189.6 KB · Views: 464
  • IMG_0276.jpg
    IMG_0276.jpg
    217.2 KB · Views: 446
  • IMG_0269.jpg
    IMG_0269.jpg
    209.6 KB · Views: 450
  • IMG_0265.jpg
    IMG_0265.jpg
    230.3 KB · Views: 433
Headlight with speedo inset and also my foot pegs before clear coat I made all the linkages for the mid mounts set back a few inches further than normal to keep the look I am going for originally they were almost by the rear tire but it was to far to be comfortable.
 

Attachments

  • IMG_0614.jpg
    IMG_0614.jpg
    199.7 KB · Views: 462
  • IMG_0567.jpg
    IMG_0567.jpg
    228.9 KB · Views: 484
  • IMG_0568.jpg
    IMG_0568.jpg
    232.9 KB · Views: 460
On to the hydraulic clutch. The slave cylinder is off of a 1991 VFR750 And the master cylinder is a generic 13mm I am looking for a matching Ducati clutch master cylinder to my brake side but no luck so far. So what I did was use a hole saw to cut out a circle the size of the slave cylinder and then used a hole saw a bit bigger to cut the side cover a bit bigger than the overall size of the slave cylinder allowing it to sit flat all the way down on the side cover. When I cut the larger hole I went far enough as to be able to make the surface level and flat and then used a hand file to bring the surrounding aluminum to the same depth as the hole saw creating a flat surface to mount it. Then I used 3 tapped holes with 6mm x 1.25 Bolts to secure it. On the clutch pushrod I drilled and tapped the end enabling me to put an allen head bolt with set screw on. This allowed for adjustment of the clutch pushrod out to the slave cylinder. All in all it was pretty easy
 

Attachments

  • IMG_0520.jpg
    IMG_0520.jpg
    172.4 KB · Views: 529
  • IMG_0521.jpg
    IMG_0521.jpg
    310.8 KB · Views: 520
  • IMG_0522.jpg
    IMG_0522.jpg
    195.8 KB · Views: 509
  • IMG_0523.jpg
    IMG_0523.jpg
    107.2 KB · Views: 475
  • IMG_0527.jpg
    IMG_0527.jpg
    190.6 KB · Views: 524
The next subject will be the turbo install but to get you all excited about it here is my video of the first start up! Video was taken with my Iphone so not top notch but gets the job done.

 
Turbo is a VZ21 RHB31 it is super small and as I found out spools very fast. I started out by cutting my center frame down tube and welding in a 3/8 thick by 6" round loop of steel 1" wide in place. This allowed me to put the turbo right behind the engine where I wanted it. I wanted it as high as possible so the oil would drain out easier. So far I don't believe I will need an oil sump but time will tell. For the cold side piping I used 1.5" copper and silicone elbows from columbia river mandrel bending. It goes into a 36mm Mikuni VM Round slide carb( I will be switching shortly to a flatside or something different).For the hot side exhaust I used builder kits also from columbia river mandrel bending and went with a 1.25" pressure side hot pipe in order to achieve spool up it goes 2 into 1 which then goes into the turbo exhaust inlet. When it comes out of the turbo it is side by side 1.5" pipes to have the least amount of back pressure as possible. In order to have 2 into 1 in the front I used a pipe union to connect the exhaust so it is possible to remove the pipes form the cylinders.
 
Back
Top