|
|||||||
| Welcome to XS650.com! |
| XS650.com is dedicated to the Yamaha XS650 twin motorcycles and to the people who love to ride, restore, and customize them. As a guest you can view the forum and photo galleries full of xs650 choppers, bobbers, trackers, cafe racers, and restorations, but you have to register before you can post or view attachments. It’s free and only takes a minute. Proceed to registration. (This notice will go away once you log in) |
| The Garage Motorcycle Related Discussion (Yamaha XS650, other makes and models, and anything else motorcycle related including tools and gear) |
![]() |
|
|
Thread Tools | Search this Thread |
|
|
#1 |
|
XS650 Enthusiast
Join Date: Sep 2009
Posts: 38
|
Does anyone know how to get the rust out of the inside of a gas tank? It's not too rusty but there is some loose stuff. Has anyone tried Kreem or POR15?
|
|
|
|
|
|
#2 |
|
XS650 Addict
Join Date: Sep 2009
Location: Tucson, AZ
Posts: 350
|
I've used the pour-15 stuff on my VW tank. seems to work well.
|
|
If you don't do it this year, you'll be another year older when you do. Warren Miller
|
|
|
|
|
|
|
#3 |
|
Staff Member
Join Date: Aug 2009
Location: River Falls, WI, USA
Posts: 3,781
|
I've used electrolysis with pretty good results. You basically fill the tank with water that has washing soda in it. Use a scrap metal rod to hang down into the tank, and hook it up to a manual battery charger. It basically reverses the rusting process (it's magic).
I'll post more about my setup later. Here's a good link. http://www.motorcycleanchor.com/moto..._tankrust.html |
|
- Travis
|
|
|
|
|
|
|
#4 |
|
Staff Member
Join Date: Aug 2009
Location: River Falls, WI, USA
Posts: 3,781
|
Ok, so here's what I use:
The rubber thing is a toilet tank flap that I got at the hardware store for $1. It fits the fill neck of the tank perfectly. The plate and rubber squares are to seal the petcock opening. I use the oval gasket that is on the petcock under the plate and the rubber squares are used as washers to seal between the bolts and the plate. The sacrificial electrode (steel rod) needs to be regular mild steel and not stainless steel. Apparently, using stainless will turn the electrolyte (water and washing soda) into a hazardous material because chromium is released into the solution. It will also turn yellow and not the normal reddish color. ![]() I just mocked this up quick to give you an idea of what it looks like all hooked up. The negative clamp needs a good ground with the tank. You can clamp it to the petcock bolt or the rear mounting tab on the tank if you grind some of the paint off. You need to make sure the metal rod you stick in the tank doesn't touch the tank. The process is somewhat “line of sight” so you want to rod to bend like I have it. You'll also need a manual battery charger for this because "automatic" chargers won't work. Make sure the positive is attached to the sacrificial electrode and the negative is attached to the tank. ![]() This is what you want to use, Arm and Hammer washing soda. As far as I know, it's pure sodium carbonate. Don’t use baking soda. It’s not the same. I went to several stores looking for it but the only place I could find it was at the grocery store. You don’t need much. About ¼ cup in the tank should do. ![]() You can use this method for cleaning anything that’s rusty. You can use a plastic bucket and clean rusty tools or parts in it. You’ll still need the sacrificial electrode and the good part needs to be hooked up to the negative clamp. If you’re doing it in a bucket, you can use sheet metal to surround the inside of the bucket to create a large sacrificial electrode since the process is somewhat “line of sight”. This process is great because it gets rid of only the rust and not any good metal. Make sure you do this in a ventilated area and check it every few hours. You'll have to pull out the rod and clean it off every now and then. You'll be amazed at how much crap it collects. |
|
- Travis
|
|
|
|
|
|
|
#5 |
|
XS650 Enthusiast
Join Date: Sep 2009
Posts: 38
|
Thanks for the replies. I think I'm going to look into the electrolysis method. It sounds interesting!
|
|
|
|
|
|
#6 |
|
XS650 Addict
Join Date: Nov 2009
Location: Central New York
Posts: 346
|
Travis,pardon my ignorance,but by "manual battery charger" do you mean one that cycles continously until you disconnect it? I sure hope so,because that is the type I have. Not to mention several rusty tanks...
|
|
|
|
|
|
#7 |
|
Staff Member
Join Date: Aug 2009
Location: River Falls, WI, USA
Posts: 3,781
|
Yes, non-automatic ones. Since most automotive battery chargers you buy in stores these days are automatic, they now have to label the non-automatic ones "manual". If it's an old charger, it's probably a manual charger and should work fine. And to answer your question directly, yes, one that charges continuously until you disconnect it and can overcharge a battery is the type you want.
|
|
- Travis
|
|
|
|
|
|
|
#8 |
|
XS650 Junkie
Join Date: Sep 2009
Location: prince george Va.
Posts: 649
|
![]()
|
|
|
|
|
|
#9 |
|
xs650 addict
Join Date: Dec 2009
Posts: 728
|
Never done it, but all I've read on it says it's beter to use a battery with the charger.
Probably doesn't matter what charger then either I guess! |
|
|
|
|
|
#10 |
|
Staff Member
Join Date: Aug 2009
Location: River Falls, WI, USA
Posts: 3,781
|
So you're saying wire a battery in parallel with the setup? Any reason why that's better? I'd be worried about ruining or overcharging the battery. Works fine without a battery in-line, at least with the cheap manual charger.
|
|
- Travis
|
|
|
|
|
|
|
#11 |
|
xs650 addict
Join Date: Dec 2009
Posts: 728
|
Supposed to smooth out the lumpy power provided by the charger is the theory. Makes a faster & better job of it. Like I said, I've never done it. Retiredgentleman did a great write up on it on the site that was.....If he could step in right now, that'd be fantastic.....Over to you RG
|
|
|
|
|
|
#12 |
|
Staff Member
Join Date: Aug 2009
Location: River Falls, WI, USA
Posts: 3,781
|
Well I'd be very interested in hearing about it as I only have limited experience with the method. Anything that makes the process work better sounds great!
|
|
- Travis
|
|
|
|
|
|
|
#13 |
|
xs650 addict
Join Date: Dec 2009
Posts: 728
|
From this site:
http://users.eastlink.ca/~pspencer/n...ctrolysis.html » A 12 volt battery or other DC power source with high current capability. A battery (in conjunction with a charger)will always give superior results. A trickle ( 4 to 12 amps) battery charger can be used for small parts. A shop grade "booster" battery charger is quite effective for even large parts. 6 volt DC works as long as the current ability is high. Higher voltage DC sources will work of course BUT then it becomes a shock hazard. (see safety rules below). |
|
|
|
|
|
#14 |
|
XS650 Addict
Join Date: Dec 2009
Location: Camp Hill, PA
Posts: 125
|
Goto the dollar store or anywhere that carries the bowl toilet works. Fill tank let sit over night, dump and the rust is gone. I like caswell plating tank sealer over POR.
|
|
1 rigid done and one brat on the way.
|
|
|
|
|
|
|
#15 |
|
XS650 Guru
Join Date: Jan 2010
Location: Calgary Alberta, Canada
Posts: 3,069
|
yamaman..............you dragged me into this
. I have used my bike battery with my automatic charger and it works well. My charger just cycles on and off every few minutes. I found that I was using about 1 amp of current flow through the electrolyte...........it doesn't take much current.If a charger works by itself with no battery, then thats OK too. The current flow would be a little lumpy, because the battery acts as a filter like a capacitor. I suspect you will get good results from either method.
|
|
78SE, Pamco Ignition with E-advancer and Accel #140403S Coil, dual bridge rectifiers, VR-115 regulator, LED tail/brake, BS38 carbs, OEM air boxes, OEM manifolds, OEM exhaust, Heiden Oil filter/cooler, 17/33 gearing, analog voltmeter, Brembo 4 piston calipers front and rear, "All Balls" roller steering bearings
|
|
|
|
|
|
|
#16 |
|
XS650 rider
Join Date: Dec 2009
Location: S.W. MO
Posts: 2,266
|
My auto charger reads it as a dead short and shuts off. The battery in line fixes that.
The manual charger doesn't care it just keeps putting the juice out. Keeping the anode clean speeds the process. The larger the area(surface) the quicker the fix. I used welding rod with thin plate tacked to it. Don't care for Kreme. POR-15 has rave reviews from those who've used it. I like redkote |
|
You can't hackjack an XS.
If words didn't matter, lawyers wouldn't make money. |
|
|
|
|
|
|
#17 |
|
Staff Member
Join Date: Aug 2009
Location: River Falls, WI, USA
Posts: 3,781
|
I guess that settles it then, you need a battery when using an automatic charger and a battery probably helps a little with a manual charger.
weekendrider, that's a nice looking electrode! |
|
- Travis
|
|
|
|
|
|
|
#18 |
|
XS650 Enthusiast
Join Date: Jan 2010
Location: Duluth Mn usa
Posts: 54
|
Yeah kreem products work great. Follow the instructions exactly. if your worried about the finish being damaged by the product, coat the outside of the tank with petroleum jelly before using the product, this will protect the finish from any splashover from acid or MEK. When you're all done the vaseline can be washed off with dish detergent and water.
|
|
With your chrome heart shining in the sun, long may you run-- Neil Young
|
|
|
|
|
|
|
#19 |
|
ex spurt not expert
Join Date: Jan 2010
Location: Australia
Posts: 2,118
|
Here is another link to "Kens Frenches Electrolysis" set up http://www.altelco.net/~jacil/clay/m...ElecSetup.html
|
|
1 80SG
1 80SH for sale 1 74TXA. I'm not a stalker, you just happen to be where i am |
|
|
|
|
|
|
#20 |
|
xs650 addict
Join Date: Dec 2009
Posts: 728
|
This was posted by bluebikerblan on another site:
Gents - In addition to lot of bikes & lots of years, I'm a degreed chemist (retired) and would like to add my two cents re the acid/electrolysis/coating discussion. Primarily with a concern for safety in using any of these chemicals. Here's a long standing write up from another forum that's tried and true in my opinion on using a diluted form of phoshporic acid which is widely used in the Dairy & Food Services Industries called MSR (Milk Stone Remover) which is comparatively safe to use, readily available and comparatively inexpensive.....Best, Blue Gas Tank Cleaning with Milk Stone Remover - MSR Rust Removal with Phosphoric Acid based 'Milk Stone Remover' This tip is from another forum.....I too had mixed results using electrolysis and Kreem and was better pleased with MSR (Milk Stone Remover) and a tank lining product called Red Kote which used to be red but now is blue in color. The tip is written by Bill Lane and posted on a CB 45O forum 
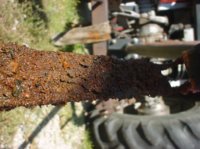
"MSR is about 70% phosphoric acid, with an orange dye. Mix it 50% with water, fill the tank, come back later. It will save even the worse tanks. It's hell on rust, won't touch chrome. It will mess up paint if left long enough. Some tanks will get de-funkified in a few hours, some may take much longer - days or even a week or more, if they're really nasty. Those of you who have used Naval Jelly to remove rust are already familiar with how phosphoric acid removes (reduces) rust by reducing red iron (ferric oxide) to loose black (ferrous) oxide and iron phosphate (also gray-black) It (MSR) is also way less dangerous than muriatic (hydrochloric) or sulfuric acid to work with. If you get some on you, at least you have a chance to make it inside and rinse it off before it burns the livin' snot out of you. No noxious fumes either. I'm a degreed chemist, I've seen what acids can do, so I stay with MSR, it's much safer to work with. I've also had unsatisfactory results with electrolysis. It works "line of sight", meaning that if the sacrificial electrode can't "see" the area nothing will happen . That means that convoluted volumes or parts (like tanks) will yield indifferent results. MSR also works better on flat pieces. I keep a big 60-quart cooler full of MSR solution which I process nearly everything with it. Some people claim it leaves some sort of protective coating that prevents further rust. I have not found that to be the case at all. In my experience, you can see the rust re-forming before your very eyes. So, you need to quickly either paint the piece, spray with WD 40 or light oil. For a tank case, fill quickly (or swish around) some heavy 2-stroke gas/oil mixture to coat it while you prepare to do something else with it. Everyone has a favorite tank "sealer" - I prefer Red-Kote myself, use what you prefer. Although Red-Kote has changed recently, it's now blue, but the same stuff. If you go with Red-Kote, mix it down a bit with acetone to make it easier to use. The stuff is really viscous out of the can." -endquote- Other tank lining products are POR 15 , which a lot of people like as well. And Kreem, both are products I have used with difficulty and mixed results. Milk Stone Remover, MSR, is available from a variety of Dairy Service products suppliers. I found and purchased MSR from a localTractor Supply store. Hope this helps with a rather messy and onerous task at best, It did for me and was clearly the best to use of the bunch for me. Best, Blue |
|
|
|
![]() |
Similar Threads (based on keywords)
|
||||
| Thread | Thread Starter | Forum | Replies | Last Post |
| For Sale - YDS7 Tank, Benelli Tank, Bobber Controls, XS special tank and rear tire | twinsarehot | Classifieds | 13 | 11-03-2011 08:05 PM |
| Rust in The Tank | Backroader | The Garage | 12 | 08-02-2011 10:37 PM |
| fiberglass tank | crash | The Garage | 15 | 10-11-2010 04:45 PM |
| For Sale - Paughco? tank | danno | Classifieds | 2 | 12-24-2009 03:32 PM |
| Gas tank | dlabkeeg | The Garage | 3 | 12-14-2009 12:54 AM |
| Tags |
| fuel, gas, how to, kreem, por15, rust, tank |
| Bookmarks |
| Thread Tools | Search this Thread |
|
|