XS650 Valve and Clutch Adjusters, Resurfacing

TwoManyXS1Bs

BBQ Hunter
Top Contributor
Messages
14,670
Reaction score
15,294
Points
813
Location
Fredericksburg, Texas
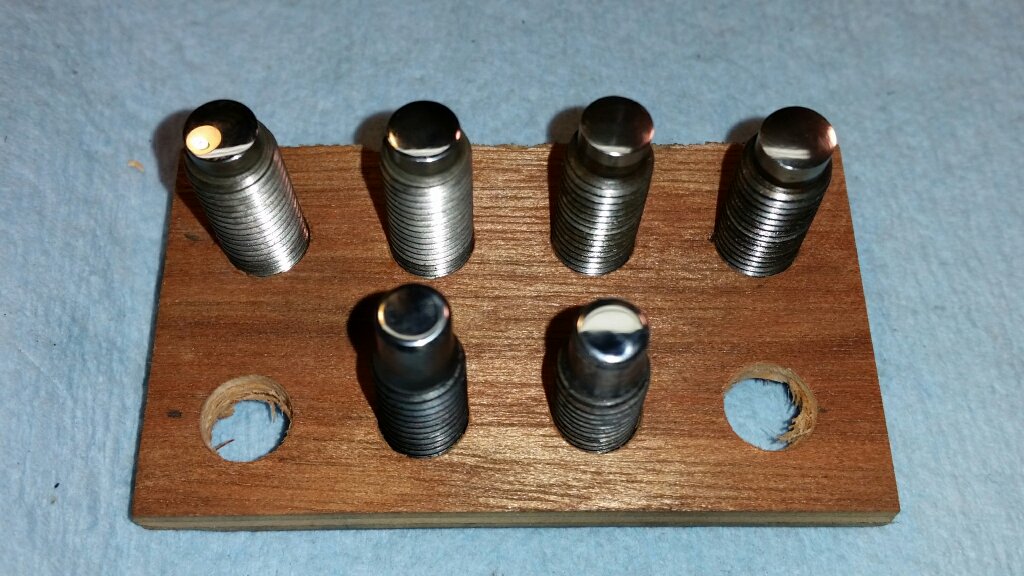
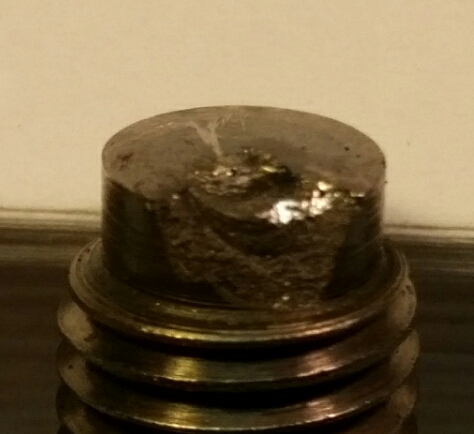
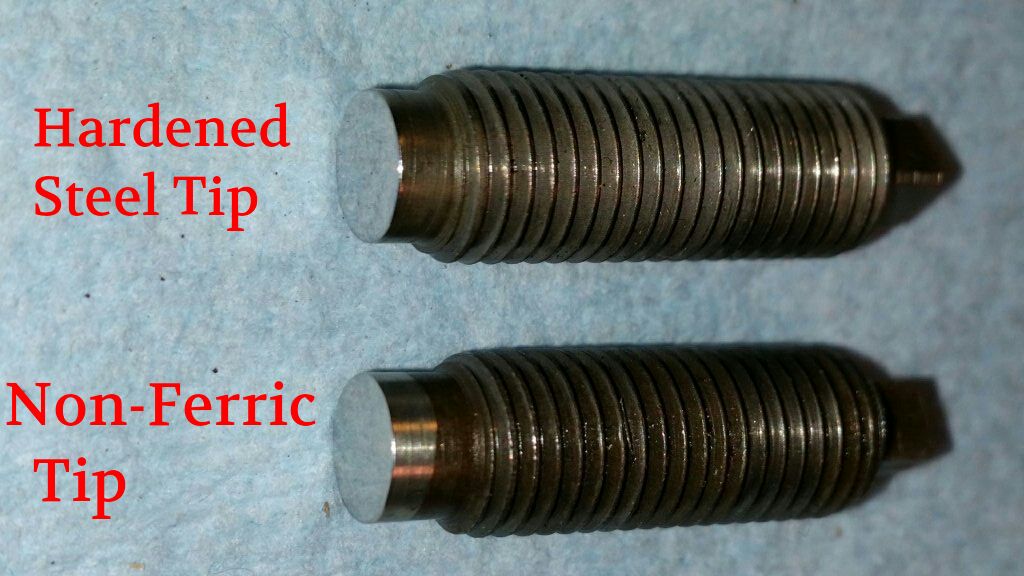
Here is a project to regrind 4 valve adjusters and 2 clutch adjuster screws.

This project uses the grinding fixture in the Valvetrain Geometry thread:

http://www.xs650.com/forum/showthread.php?t=40042

full


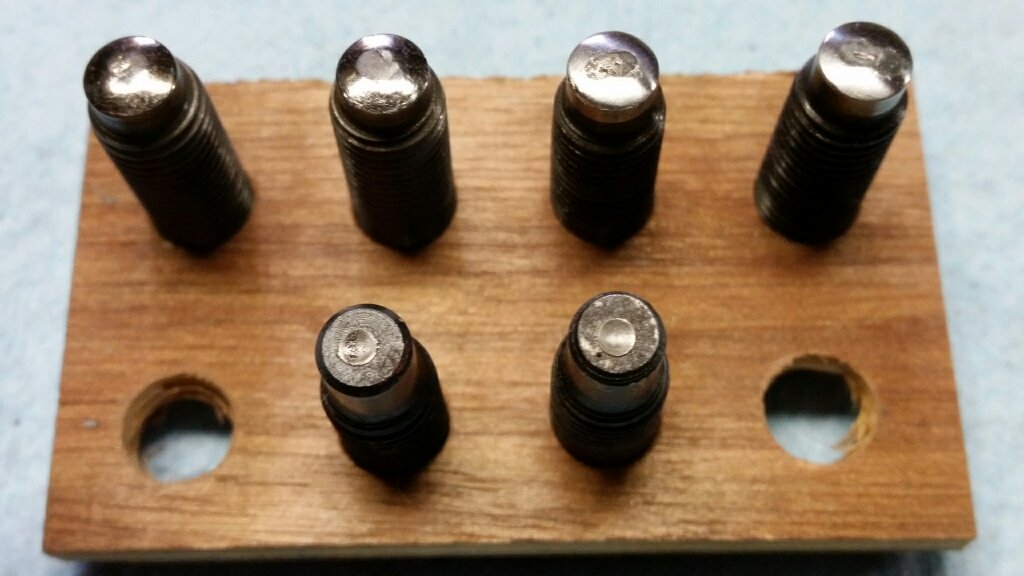
The valve adjusters are reground to a radius of 19mm.
The clutch pushrod adjuster screws are reground flat.

full
 
After polishing, the surface is checked for hardness with an old file. If the file skips over the surface, it's hard enough. If the file cuts, then the tip must be rehardened, a case-hardening process, followed by polishing.

Here's a damaged/cracked tip, revealing the hardened outer surface, about 0.030" thick. The file skips over the hard case, but cuts into the softer core. Difficult to see, but the bright spots are the file cut marks.

full
 
Now, here's the mystery.

Two of the valve adjusters in this project have a silver colored tip. During grinding, these tips did not produce a shower of sparks, which would be normal for carbon steel. So, this tip material may be a stainless or non-ferritic alloy.

The tips on these mystery adjusters ground and polished just as easily as the hardened steel tips.

full


Looking into the Yamaha XS650 Parts Manuals showed 3 different part numbers for the valve adjuster screws, with the final number superceding the previous two part numbers.

256-12159-00 = Original 70-73 valve adjuster screw part number
447-12159-01 = Next part number, unknown origin date
90149-08098-00 = Final/superceding part number, appears starting in 1977 XS650D parts manuals

If anyone could shed some light on this mystery dual-metal valve adjuster, please post up...
 
Now I did it! I can try to find what head connects to what adjuster but it's not real likely I can get a definitive match up between an adjuster and an engine SN.
 
Well, I guess that the real 'heads-up' on those mystery adjusters is:

They regrind and polish-out fine.
Whatever hardness is in that mystery material passes the file test, so no need to reharden.
Rehardening should NOT be attempted on those mystery adjusters, don't know what could happen.

BTW, the original wear pattern of those two mystery adjusters can be seen in pic #1, above, the upper/right two. The wear pattern is a bit different...
 
Hey, aldo5468! Thanx for the interest.

Yes, that terrifying thought did cross my mind.
However, my ability to offer services is hampered by my health and remote location.

The primary purpose to these threads is to show others how they might perform this type of reservicing, or ask intelligent questions if seeking the service.

The Elephants Foot mod sure looks to be the better upgrade, and that's what I'm planning for my daily rider. But, for folks who want to retain the original valvetrain, or, like for my own purposes, for my 9,000 rpm engine, this is just another option.

There are currently 2 offerings on eBay that are reasonably priced:

Item: YAMAHA XS650 VALVE TAPPET RE-GRINDING SERVICE

URL: http://pages.ebay.com/motors/link/?nav=item.view&id=300796750771&alt=web

Alt URL: http://www.ebay.com/itm/YAMAHA-XS650-VALVE-TAPPET-RE-GRINDING-SERVICE-/300796750771


Item: Yamaha XS650 Set of 4 tappet valve adjustment screw radius ground & polished XS

URL: http://pages.ebay.com/link/?nav=item.view&id=331333460449&alt=web

Alt URL: http://www.ebay.com/itm/Yamaha-XS65...screw-radius-ground-polished-XS-/331333460449
 
Thanx, Richard. Those adjuster screws were supplied by gggGary just for this thread. He'll let us know when his engine blows-up after installing them...
 
Yes, very good info on the valve adjusters.

For the clutch adjuster screw (and the push rod) , I followed a tip from XSJohn (rip), quite a few years ago. The tips are ground concave or "dimpled". With the ball bearing in between, it makes everything self alining, thus minimizing wear on the bushing and oil seal. I had the left side cover off just a few days ago, and my push rod has zero side play in the bushing/oil seal, so its a very long lasting modification.
 

Attachments

  • Dimpling push rod and worm screw.JPG
    Dimpling push rod and worm screw.JPG
    208.2 KB · Views: 318
Break in, 9 grand and drop the hammer!

Better get a couple of the 706 big bore kits down to my machine guy pronto....
 
Elephant's foot mod definitely a good one if you're going to have engine out of bike anyway - don't know that I'd pull an engine just to do it. Seems like the 19mm radius job might reduce the stress concentration a bit from stock, hopefully lengthen the life of the stock adjusters a bit - an easy swap. I've got fairly new Virago adjusters in my 650, so no need to do anything now. :bike:
 
Wow only a year has gone by, I installed a set of the ground adjusters in my 79 motor today. I was motivated because one tappet was getting a bit loud at start up. A little chip can be seen on one tappet end. Not sure it was the loud one. This motor was installed in the resto mod in late 2014. It was an all original motor with 5K in 35 years, all of that decades ago. It now has 8K miles. I had set these at .0025 and .006 Today the intakes were at about .003 and exhausts at .005 and .006 I set the new ones at .003 and .006. It was quieter immediately on start up.
I am riding Sunday, should put on 3-400 miles with some vigorous throttle apps. Might check the look and clearance in a couple weeks. Soner if it loudens up.

Some pics of the valves, new and old adjusters.

radian tappets 038.JPG radian tappets 048.JPG

radian tappets 040.JPG radian tappets 047.JPG

radian tappets 034.JPG radian tappets 051.jpg
 
took some (hopefully) better shots of the tappets that came out of the motor.

tappets 001.jpg tappets 003.jpg

tappets 005.jpg

Motor has been run fairly hard the last 3K and I expect that to continue. Just got a fresh change of 20-50 valvoline racing oil.
 
I wonder what radius those originals have. Do you have a radius gauge?

(Or, just send them down here.)

A metalurgy book I read long ago talked about the importance of high-zinc in motor oils when tappets of this type are used, stressing the shock absorption qualities provided to hardened tips that impact. Is that Valvoline high-zinc?
 
Valvoline™ VR1 Racing Oil's high zinc provides race-level protection for high performance engines on the race track and is compatible with passenger vehicles. Additional product benefits include:

High zinc/phosphorus for anti-wear protection, including push-rod and flat tappet applications
Formulated to increase horsepower
Enhanced anti-foam system protects engine during extreme stress
Recommended for engines burning gasoline and full or partial alcohol fuels

:thumbsup::thumbsup:

Kind of interesting they say high zinc, but don't have a warning about cat contamination....

also mentions friction modifiers, so far no clutch issues on stock 650cc motors or with my K1200LT :wink2:
 
Perhaps the mystery metal ones were an attemp to quiet the motor?
What year virago did the adjusters come out of? Ive got mikesxs ones in a motor i havent run yet. Heard they are soft.
 
Back
Top