My first ever bike build!!

Lookin sick bro. What size is that front tire?

Thanks Kinsy! It's a 19' believe it or not!

Lookin' at your pics, soaking it all in, just looks so comfortable, visualizing the ride, kept gazing at that unusually open space between the bars, so different, couldn't look away, drifted into la-la land, and imagined an android tablet fitted in there...


HAHA that made me chuckle!!!:laugh:

I'm thinking the speedo and tacho will go in there, dont have a tablet of any kind, why would I need an enlarged Iphone??!?LOL
 
That's better!!

9671548827_2ae996e57a_b.jpg


9674769208_b4eb3f5b23_b.jpg


9671548827_2ae996e57a_b.jpg


9671540623_b162a4b236_b.jpg


I also did a bit more painting, motor mounts, foot pegs and kickstart and brake lever. No pics needed, they all black now!

I'm running out of things to do so I may have to start the motor build soon!!!
 
So today I decided to start my engine rebuild!!!

I started with the shifter forks. I decided to try the upside down build like in the "german build log", sounded plausible with getting the forks and gears aligned. Turns out it's not that easy and straightforward! More on that later.

I first put the selector fork shaft in, (plug side on the outside!!) after first dipping it in a tub of oil to lubricate and fill the inside. One by one the forks were put in(hopefully the right way, let me know if they not!!).

Next came the gear selector drum.I covered it with a bit of oil, then I made sure the neutral indent is facing up(or in my case down, but to the top!), and then I carefully slid it all the way through the forks into the roller bearing at the back.

Next and finally, the cam follower pins went into their respective holes, making sure the roller side is going in first, and then the split pin goes through the hole above the pins, and bent over to hold them in.

Pics of the above so far....

9685611729_a7a81a4be9_b.jpg


9688848438_f288641b75_b.jpg


The stopper assembly and locating plate need to go on next to prevent the selector drum and shaft from falling out, it also gives the "notch for selecting gears!!(you will know what I mean when you put this together!) Make sure the disc AND the locating plate go into the groove, took me about 30 minutes to figure that one out!!
I found it's quite easy to place the stopper assembly in first, with the spring attached to it, then screw the bolt in a bit to hold it in it's place, and then hook the locating plate to the spring, push it into the groove, and add the nuts to tighten it down. Bend over the locking plate( I haven't yet!) and you are done with that!

Check to see if the forks move by rotating the star shaped plate on the side.

9688844816_514f6901f1_b.jpg


Next are the gears.

First, make sure the circlip is in position before you place the lot in!

9688846562_c4c4e8deec_b.jpg


Then the respective oil seals go on the ends.......

9688842984_38b3e71106_b.jpg


9685603143_bea5c70450_b.jpg


Then it's just a matter of aligning the forks with the gears so they fall into place.....

9689080142_1a961be875_b.jpg


9685840283_7853703383_b.jpg


9685838431_8cedd3a827_b.jpg


Before you go any further, make sure the forks move freely and the gears rotate without any thing catching.( Very satisfying thing to do!!)

And then comes the crank shaft. Wait, not yet. I don't have the shims that go between the crank and journal ballbearing!!!! :banghead::banghead::mad::mad: AAAARRGGH!!!!
So now my anxious build up to building the engine is on hold!! I don't know why I didn't check that before!!!! SO I just chucked everything in the shed and locked it, that's me for the night!:mad::cussing::doh:
 
nice one airwolfie ...
As the man falling from the top of a tower block was heard to say as he passed each floor ,..'so far so good':laugh:

What do you mean by ' I don't have the shims that go between the crank and journal ballbearing'?
 
nice one airwolfie ...
As the man falling from the top of a tower block was heard to say as he passed each floor ,..'so far so good':laugh:

What do you mean by ' I don't have the shims that go between the crank and journal ballbearing'?

Hehe that's funny!

I ACTUALLY don't have them, I didn't check before, and I only saw they needed to be there AFTER I put the bearing on the end!
I checked the box of bits I got with the bike, and I don't have any!!!
 
what the hell are they ? I am beginning to wonder if its something I left out of the crankcase ., Do you have a picture or can you describe where they go
Don't tell me I gotta strip this :banghead:
 

Attachments

  • xs650 almost finished.JPG
    xs650 almost finished.JPG
    265.4 KB · Views: 172
Airwolfie, fantastic pics. Two things about the assembly 1. did you put the mechanism into neutral? (that is the zero on the star will be pointed at 12 o'clock in that upside-down position, and 2. did you check/replace the springs at the star wheel and the neutral detent? I say that because I have begun translating the German manual into English, and it says that if a bike has experienced finding neutral when being run or warm then it is the loss of tension on those springs in combination that cause that problem.

Brilliant to follow the build.

Anlaf
 
Anlaf could you take a quick gander at my engine image and tell me if I've routed my alternator cable correctly please.:thumbsup:
 
Airwolfie, fantastic pics. Two things about the assembly 1. did you put the mechanism into neutral? (that is the zero on the star will be pointed at 12 o'clock in that upside-down position, and 2. did you check/replace the springs at the star wheel and the neutral detent? I say that because I have begun translating the German manual into English, and it says that if a bike has experienced finding neutral when being run or warm then it is the loss of tension on those springs in combination that cause that problem.

Brilliant to follow the build.

Anlaf

Thanks Anlaf! I'm going to try and log EVERYTHING I do with this engine build, and also note the snags or trickery I stumble across as to help other first timers!

When I put the drum back in, I made sure the neutral indent was right at the neutral plug, so I hope this is right!

The starwheel spring is mighty stiff! I really struggled to move it by hand, so I think that will be OK. I am yet to find the spring for the neutral detent! I have a sneaky feeling it's "missing" as well!

More to come maybe tomorrow!
 
Right, so the oil pump I had had a nice little crack in it, so I had to replace it.

When installing this lovely piece of engineering, you need to make sure the inside of the housing is CLEAN. ANY dirt and it won't fit or damage the pump. Make sure the little arrows line up when inserting them into the housing. It's easier to just pop it in the pump and rotate until the arrow line up.
I gave the lot a small coating of oil to ease assembly, and I also made sure it all spun easily by hand.

Don't forget the pin in the star, and also look for the little woodruff key that goes in the shaft.

A pic to show what I mean

9693745923_b37c4a1329_b.jpg


Next comes the big gear. It has a recess on one side, this faces down(well it did when I disassembled this lot!). Put that over the shaft, then place the woodruff key in the recess of the shaft and sprocket, makes it a bit easier to fit. A little grease or oil on it will help holding it in position.

9696972636_984959d28b_b.jpg


The wormgear is next. It also has a groove cut out so this goes to the side the key is at.

9696970880_95478ed705_b.jpg


Then the spring washer and nut go on top of this. Tighten it good, you don't want this coming undone!!

9693741565_059f011f45_b.jpg


9693739785_303b148720_b.jpg


My Tacho drive has been blocked off so I don't have the rest of the parts for the tacho drive.


Next was the oil filter on the side mount. Pretty straightforward. Make sure all fitting surfaces are clean. Insert gasket.

9696965746_5de357fd94_b.jpg


Put the filter in the hole, Make sure the side with the bigger hole is to the bottom.

Find the big bolt with a waist and a hole in it.

9693736561_4f14d23305_b.jpg


At the top, it has a spring and a ballbearing and a grommet/screw over them to hold it all in place. Mine was assembled, so I decided not to fiddle with it!

9693734895_c31036b2d2_b.jpg


Put the bolt in the hole of the filter and tighten it down.

9693733213_d8a241145d_b.jpg


Place the gasket of the filter cap in its place.

9696959688_30b3ffbd14_b.jpg


Place filter cap over the top and tighten bolts down. (forgot to take a pic of that!!)

On to the sump filter. I decided as mine needed replacing, I went with Heiden's upgraded version. Seems pretty sturdy and solid, and the mesh doesn't seem as fragile as the Yamaha version. It also comes with three allen hex bolts.

Make sure all mating surfaces are clean and grease free. Install filter, two bolts go through the round bit, and a third one has a rubber sleeve, goes at the end.

9693730351_063968f025_b.jpg


9693728625_5d45a9f0bf_b.jpg


Again clean the mating surfaces on the main engine shell, degrease, ready for assembly.

9693726973_129572c19a_b.jpg


I lightly greased the gasket to ease removal when it comes to clean the filter, I read that somewhere.

Place the cover over the hole, and tighten bolts(new bolts from Heiden on mine!) I started on the inside, cris crossing outwards as I tightened each bolt.

9693725283_0f8a74167a_b.jpg


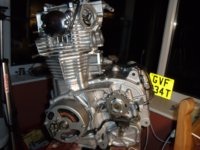
That's all I got done tonight. Oh I think I may have found my neutral detent spring...............

9696951196_b1cd7357f3_b.jpg


Anyone know where I can get one???
 
nice sequence of pics !:thumbsup:

I took my oil pressure bypass to pieces but decided like you to just put it in as it was. I presume there is a way to test the spring length for pressure lift off when the filter is blocked but I forgot to ask.

I'm glad you decided to do the build yourself :wink2: I have learnt so much about these engines from assembling mine.

How on earth did your detent spring end up like that ?

Love the sump filter ... I've ordered one from Heiden last week too.
 
nice sequence of pics !:thumbsup:

I took my oil pressure bypass to pieces but decided like you to just put it in as it was. I presume there is a way to test the spring length for pressure lift off when the filter is blocked but I forgot to ask.

I'm glad you decided to do the build yourself :wink2: I have learnt so much about these engines from assembling mine.

How on earth did your detent spring end up like that ?


Thanks Peanut!

I decided to bite the bullet and just do it! You inspired me to do it mate! Seeing we are in the same boat with a box of bits(seems like you have more parts than me though!!), I thought to myself, if you can do it, so should I!!

No idea how it ended up like that! I blame the PO!!!:mad:
 
Back
Top