Simebone
If it's not broke, wait week.
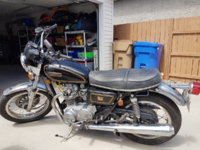
This is the ongoing saga of a black 1978 XS650E that had been salvaged, bought then sat parked for about 20 years. This post is an ongoing log of all the things I have found to be broken and how, with the help of this forum, 'fixed' them to the best of my ability.
I got the bike in September 2016 for a tidy $1000 with 16500km on the clock. The bike fired right up, but was vibrating to beat hell. I had checked the forum and it appeared that this vibration was part of the charm. OK no big deal. The first things I did was to put in a new sealed battery and a set of fresh tires as the ones on the bike were looking pretty hurting. The choke lever had broken off at some point in time, so i put on a new one. At this point the bike was running OK. TIME TO RIDE!
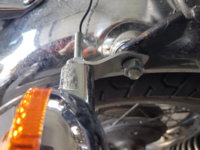
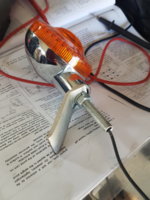
On my first ride to work, after about 3km of riding I noticed that my brake light indication was solid and my turn signals stopped blinking. It turned out that the bike vibrated enough to cause all the rear bulbs to shatter. The bikes vibration had caused the turn signals to rotate and point down. Once I got home I straightened the turn signals, retightened the bolts, and replaced the bulbs.
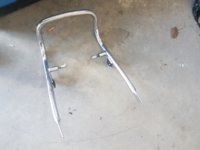
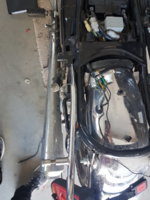
The next day the same thing happened, all bulbs smashed, only this time the threaded rod left turn signal had actually snapped in half and was dangling by a wire. After checking out the gallery I realized that the turn signals aren't supposed to be what holds the rear fender on. While I waited for new signal stocks to arrive I bought a couple bolts and washers and attached the fender properly. I figured over the winter I could figure out how to build a bracket for the lights. I replaced the brake light with an LED bulb from princess auto.
In the next two weeks I had found and resolved the following:
-There was no oil in the shocks, so clean, fill.
-The brake "fluid" that was left was brown and dank, bleed bleed bleed, fill.
-The left controls for turn signals had broken internally. Buy a new one and install.
-The rear brake switch had snapped in half. Buy a new one and install.
-The throttle would bind at 4000 rpm. Installed a new throttle cable.
-Rear brakes were for show only
-The clutch was hard to pull, and would skip a bit.
For the sake of maintenance I thought I'd take a look at the carbs/timing etc. Upon removing the vacuum lines from the carb holders, the barbs came with the hoses. JB Weld did the trick temporarily until new parts came. I adjusted the cam chain tension, cleaned up the points, and did the timing. Cleaned and adjusted the chain tension.
After all this the bike would still vibrate backwards on the center stand whenever the engine was revved. What fun! What Character!
Winter came and the bike sat in the garage until the spring.
The rear brakes worked about as well as dragging your feet. So I installed new rear pads.
When I put the wheel back on the bike, the axle wouldn't tighten without binding the rear wheel.
FRIG I WANT TO RIDE.
New rear bearings seemed to do the trick. Tightened the axle to spec and was good to go!
One more thing I thought. I better adjust that clutch. When i tried loosening the locknut on the adjuster I heard a filthy pop/crack, but thought it was the nut releasing. Tightened the screw, backed it off a 1/4 turn.
AWW YEAH!
I rolled the bike out to the driveway. Fired it up. Beauty. Helmet on, visor down. Clicked into first and NOTHING. The clutch wouldn't grab.
It turns out the famous worm mechanism had cracked. OK OK. No big deal. Ordered new worm gear and new cable (just to be safe)
Once again I rolled the bike out to the driveway. Released the lever. NOTHING HAPPENED.
I figured I'd take off the right crankcase cover to take a look at the actual clutch. HEY DID YOU KNOW THAT THE RIGHT SIDE IS FULL OF OIL! Well, better drain the oil, and check the bottom sump filter. It's full of holes. Also, the gaskets for the crankcase covers and sump were shredded to bits. The clutch just kept slipping when I'd roll the bike in gear, so I took apart the plates. Checked the thickness. OH MY! Too Thin! So new gaskets, sump filter, friction plates. Time to wait for parts....

