Large Spine Frame XS650 / Egli / Rau / Cafe Racer

So I used the combination of paper printed label, then heat shrink over it. Worked pretty well.
The FAA requires all wires be marked on an airplane. That's exactly how we did it when there wasn't access to a "real" wire marker. It works great.
Well done!!
 
I thought I had the monopoly on electronic stuff cluttering up the motorcycle lift? Looks like Great Minds think alike! :thumbsup:
Electronics lift 003.JPG
 
I was trying to take the photo without the clutter... :laugh:

Unfortunately, the front end of the bike/wiring harness does not have the labels. I highly doubt the shrink tubes will fit over the connectorized bits now.

One thought is to print a front end schematic on a label that I can stick onto the main tube above the engine where it will be hidden from sight until the tank is removed...

Maybe print onto the paper label, then apply an industrial strength/weather/oil/solvent resistant clear tape over the top?
 
Last edited:
Well, a bit of drama just now.

Got all the wiring harness done (for now). Set the menus on the Motogadget for Japanese switch control. Light, high beam, low beam pass, turn signals, brake light, horn everything working great.

Then, the engine as far as I know - has never been started. I don't have carbs (well connected), no fuel tank yet, only part of an exhaust, but - tempted by the new wiring harness, I wanted to see if I could spin the motor over with the start button. So - I removed the plugs, thought I'd set them on the head and I could check for spark too. Sounded like a good idea. So - just quick, apprehensive push on the start button for quickest tick over to see if I could even here the starter motor engage or not. It engaged! Everything spinning at full speed, wonderful! Then I realized, I'm not holding the start button, it should stop. It didn't. Another press on the starter, engine kept spinning. Oh, maybe the Motogadget double tap, still spinning. Panic setting in... still spinning... Quick - What to do - disconnect the battery. Can't reach it easily - tight packaging... Still spinning, no signs of battery slowing down yet... OK, what can I access, power and ground at the Motogadget - grab the 6mm allen - wrong... engine still spinning, darn those Germans and their 5mm bolts, grab the 5mm wrench, disconnect the power "+" cable... still spinning... Darn, when is the battery going to start slowing down... Disconnect all the grounds at one end of the unit.... still spinning... go for the final ground on the Motogadget unit... HUGE ARC while separating the final ground, once separated - engine finally stopped spinning.

Back to the manuals...
Tempted to try and rotate the battery 90 degrees for easier access. TBD...
Here is a pic of the electrics - post drama.
Post Drama first crank 042218.jpg
 
Got the throttle cable off to a shop to shorten it. It should be available before the next weekend.

Starter Issue, Problem solved. (And there was spark at the plugs! a bit weak though.) What not to do if you are using a Motogadget M-Unit and M-Button:
The starter solenoid I was using was hard wired on one lead. Wrong type apparently.

Wrong type of starter solonoid.
Starter Solonoid 042318.jpg
Schematic representation with the WRONG solenoid:
Schematic 042318a Non-stop Starter.jpg
Ordered a new Yamaha starter solonoid off ebay, similar to the one pictured here, no hardwire between the leads.
Tried it out today. Worked perfectly.
WP_20180423_21_13_40_Pro.jpg
Slightly corrected/updated schematic.
Schematic 042818a CORRECTED Starter Wiring.jpg
 
Last edited:
Got the throttle cables back, only partial success there. Spent some time generating a new frame in CAD - That might make a different thread sometime. But for fun, here is a pic.

large.jpg

Then, I had an opportunity to test drive a really nice 3D scanner. I gotta get one of these... (At around $100K, a bit out of range until I win the lotto)...
Anyway - this is the seat that I am using on this XS650 project bike... Still needs some finish up / post processing on the scan... interesting to see how it works out.
RH Capture.JPG Capture2.JPG Capture3.JPG
 
I guess you can say - the month of May was spent on Digital weekends. Scanning and designing chassis, which are now up on GrabCAD.
Feel free to check those out.
https://grabcad.com/rex/projects

Focused on an SR500 Racer from the 80s, and that designer went on to have both Suzuki and Gilera pick up and produce the design.
Warning, these are not XS650s... :) (Out of convenience, all three of these bikes use the same Suzuki swing arm, shock, links, etc... And - they are using the XR based engine block I made many many years ago).
Otani Motorsports Product Assy - on Stand side b.JPG 1 Gilera Saturno Assy - on Stand.JPG Suzuki Goose 350 Assy - on Stand.JPG Goose 350 rear suspension link.JPG 001 Otani Motorsports Product Assy - on Standz.JPG


Back to this XS650 Project:
Here is a horrific photo of the scan of the triumph tank. The holes on the top surface aren't really there, still need some post processing on that one.
On the bottom side, well, you can see how hacked up it is.
triumph tank a.JPG triumph tank b.JPG
Here is a pic o the underside. More material has been removed by the time the SCAN was done.
WP_20170827_18_41_58_Pro.jpg

So, hope to kick off work on the tank this weekend.
 
Last edited:
Well, the tank is going to be fun. I was hoping to drop the bike off, with tank and have a local fabricator have at it. This is one of those guys that "speaks to metal". And... he thinks it will be very challenging. So, bike and tank back in my garage.

I have the tank scanned. So I'll spend some digital time designing the underside of the tank. See how much I can simplify it. Then, cardboard and see where it goes from there.

So - I still need to finish the tank, finish the exhaust, add a left engine side cover and shift linkage. That said, everything else is pretty much there... Ah, missing paint too.

That said, I decided to weigh the bike.... Oil in the engine, battery mounted, all electrics, lights, mirrors, kickstand, everything pretty much there...
286lbs! There has got to be an error there somewhere.

Internet says "Dry weight XS650 = 428lbs dry.
That's 142lbs lighter.

I will definitely weigh it again as the bike becomes more complete. That would be great if I could keep it below 300lbs.
 
Couple more pics...
WP_20180628_17_25_20_Pro.jpg WP_20180628_17_25_26_Pro.jpg WP_20180628_17_25_31_Pro.jpg WP_20180628_17_25_37_Pro.jpg
Fuel capacity might be an issue.
That last remaining section on the bottom will need to go. Will drop that part of the tank down behind the spine and above the air filters. Probably pick up 0.3 gallon capacity?

This will give me a nice place for the petcock.

Of course, I'll have to relocate the coil, the starter solenoid and touch the wiring harness again...
 
Have you considered a tank custom built to fit the space you have available and then making a fibreglass cover the shape you want to fit over it.
 
Yes, I have thought about it. It's a great idea. The actual tank could be really ugly, aluminum. The cover Fiberglass, and if done nicely the whole thing could be lighter than the steel unit. Crash repair could be limited to the fiberglass part too (hopefully). There are good benefits for a cover. Thanks.
 
Sometimes you make forward progress, sometimes a step backward. Coil and mounts will be relocated for sure.
So many issues, venting plan is decided and nearly complete. Mounting scheme - Rubber fittings on the frame, rubber cups on the tank...
Petcock and fuel heights VS Carb fuel inlet heights are a bit of a concern... Considering a remote valve. Remote fuel filter a must, but very little space available. Quick release lines I like to use on all my bikes, not sure there is space for these either... (And the ones I have are too large of hose diameter...)

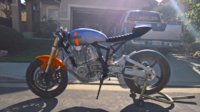
Photos from this weekend.
Hard to see, but trying to decide petcock location. Currently considering a remote mount/bracket mounted valve.
Two strong location contenders:
Deep under the tank at the rear and a bit forward by the head.
070718 a  WP_20180706_16_02_33_Pro.jpg 070718 b WP_20180706_16_01_55_Pro.jpg
Working with my friend Tony. He's really doing all the work on the tank. The rear section (bottom side of the tank) was decided to leave it in place so the rest of the shell maintains some kind of structure. The back section there will add about 0.3gal of gas. A few holes added. Almost could function as a baffle...
070718 c WP_20180707_12_07_48_Pro.jpg 070718 c1 WP_20180707_15_03_17_Pro.jpg
Tony is shaping and fitting the pieces together that will form the bottom portion of the tank. The heat outside yesterday at 5:15pm was only 112F (44C). Not sure how hot it got today. Definitely too hot to be doing this kind of work inside a garage! Very painful, slow process.
070718 d WP_20180707_12_07_42_Pro.jpg 070718 d2 WP_20180707_15_56_20_Pro.jpg
070718 e WP_20180707_14_09_32_Pro.jpg 070718 z1 552706412.jpg 070718 z2 552706417.jpg
Bottom section is now together and will be removed again, as a single piece. Then the vent, fuel feed tube, etc - will be added...
The tank is really starting to come together. A few details yet to work out though...
 
Back
Top