Wherein I either make a seat or a fool of myself, and also other things with the bike

NashGTI

XS650 Addict
Top Contributor
Messages
166
Reaction score
2,638
Points
243
Location
Nashville,TN
I've started to work on the seat that I've wanted to make for a couple years and figured I'd try some documentation of the affair on here for anyone interested. I'd keep it in the "What have you done" thread but it'll probably be too picture heavy for that. Plus here everyone can just ignore it if they don't care.

IMG_20181027_152941.jpg


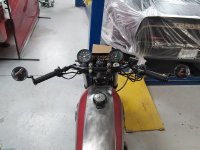
Starting with the bike the seat off as it seemed the best place to start. From the day I bought the bike I've loved the cross section of the fuel tank and thought it should be carried through a seat cowl or cafe type seat. I could easily have just not come across the pictures but it doesn't seem anyone has done anything like this yet. Got the measurements down and got to work.

IMG_20181027_152925.jpg


The plan so far is to take box tubing and make a frame base to attach the actual seat pan and the cowl skin to the bike. I don't have dies to bend square tubing but using it over round tubing makes every thing else easier. This ends up being the way I have to bend square tubing and it works pretty well for the purposes I have used it. Bunch of cuts through to one side and then TIG everything back up.

IMG_20181027_162657.jpg


The two long rails bent and welded back up. It'd be nice to have the proper tubing bender, but you can get pretty darn precise doing it the cut and weld way

IMG_20181027_164430.jpg


Now I've got the first cross beam in, it goes across right at the rear fender and is 8 1/4 inches wide to put the seat rails running right above the frame rails. The bends in the front pinch down along the same angle as the bends in the top of the frame where it pinches down by the fuel tank.

IMG_20181027_172352.jpg

Made the first hoop and tacked it to the base of the seat frame. This will be the dividing line between the seat and the body work. Got that cross section look I want here where you can see it if you aren't familiar with this type of fuel tank. Also a photo bomb that I didn't realize at the time.

IMG_20181027_181348.jpg

Bent up the piece for the front of the frame where it goes over the fuel tank attaching point and where the wire harness passes (for now).

IMG_20181027_191340.jpg

Here is the basic frame for the seat sitting on the bike to get an idea where the divider is going to be as well as the approximate height of the top of the seat and body. From this angle you can also see why the fork brace I made irritates me as the tuning fork emblem is upside down unless viewed from straight in front of the front tire.

IMG_20181027_191353.jpg

Going to keep the side swing of the seat frame for access to all the bits beneath. My plan is that once I get the seat done the rear fender will be modified or replaced and all the electrical stuff between the air filters and rear fender will get relocated up into the cowl area behind the seat and above the top of the main bike frame. The tail light will be moved up onto the cowl behind the seat.

That's all I've got for now. I'm not sure which way I'll got next. I can either start working on a seat pan or make the cowl area. I'm going to have to get a different tail light too I suppose as the way I'm planning on mounting it there won't be room for the factory light.
 
Decent approach (particularly using the hinges) but that rear cowl looks awfully tall.

Tall as it relates to what? Most of the cafe seats I see only go up to about the level of the frame kick up, but that's not what I'm going for. That being said, one of the times I had the thing sitting on there last night I thought the exact same thing of it being too tall so I cut the hoop off, shortened it an inch and a quarter and stuck it back on. I can't remember if that was before or after that profile shot was taken though. I won't call the seat nor the bike a cafe bike as they aren't really true to the cafe racer aesthetic.

My vision is something more along the lines of the tail of an early 70s race bike, like the Formula 750 bikes. I've got a kindergarden level (I'm pretty decent at a lot of things, computer imaging isn't one of them) image of what I'm going for. The peak of the cowl should come to just under the peak of the fuel tank. I would say don't laugh but that wouldn't be very sporting, so chuckle all you want.
curved seat.jpg
 
The picture must've been after I shortened the hoop then. I had formed the hoop to fit over the tank just behind where the fill cap was, so pretty much right where your line is. That's awesome by the way, thanks for the image modification. What I had done originally was made the hoop to fit precisely over the fuel tank there and didn't account for the extra height of the side rails and the amount the rails sit above the actual bike frame.
 
Yup. I got it. It's got potential there, Nash. We're watching...:popcorn:
I'm toying with that concept for my next build (sometime this century!) with the '79 "almost-a-runner". Kind of a drag bike/LSR hardtail. In other words, not really sure where that one's going... :doh:
 
Last edited:
The picture must've been after I shortened the hoop then. I had formed the hoop to fit over the tank just behind where the fill cap was, so pretty much right where your line is. That's awesome by the way, thanks for the image modification. What I had done originally was made the hoop to fit precisely over the fuel tank there and didn't account for the extra height of the side rails and the amount the rails sit above the actual bike frame.

Yea that's an easy one.........Easier to cut to shorten than weld in extra.......

If the sellers didn;t think that run over tanks were worth gold,....... then the back end off a damaged tank makes a good cowl.
 
Well I decided to work on the actual seating area first as it seems like I would want to be able base the way the cowl looks on the seat size. To doing to seat I started by reinforcing the divider hoop, then I cut some straps and slip rolled them to serve as a base to bolt the seat pan to, whenever it gets made. It lets you get an idea of the curve of the seat bottom now though which is nice.
seat pan bracing started.jpg

That's clearly not done at this point but it was already 8pm and I remembered that I had a burnt out tail light on the XS2 and that I had a family which was probably wondering when I was coming home for the night. I'm kicking myself a bit now as it feels like the seat pan itself should be made of 16ga and like an idiot I didn't grab any from the pile that got thrown out at work a few months back. Now all I've got laying around is 12, 14, 18, and 20 so I'm going to have to figure something out there. Or I can just use 18 and just be a little over the top with the bracing to hold the pan.
 
I'm digging it! Nice work...I like where you're going with this. Wondering about your sitting position--it may be a bit cramped if you're using the stock footpegs... are you considering rearsets? Also, you're adding a lot of weight to the bike...but if you're not racing, then who cares, right? :)

Looking forward to the progress.
 
Well I decided to work on the actual seating area first as it seems like I would want to be able base the way the cowl looks on the seat size. To doing to seat I started by reinforcing the divider hoop, then I cut some straps and slip rolled them to serve as a base to bolt the seat pan to, whenever it gets made. It lets you get an idea of the curve of the seat bottom now though which is nice.
View attachment 128669
That's clearly not done at this point but it was already 8pm and I remembered that I had a burnt out tail light on the XS2 and that I had a family which was probably wondering when I was coming home for the night. I'm kicking myself a bit now as it feels like the seat pan itself should be made of 16ga and like an idiot I didn't grab any from the pile that got thrown out at work a few months back. Now all I've got laying around is 12, 14, 18, and 20 so I'm going to have to figure something out there. Or I can just use 18 and just be a little over the top with the bracing to hold the pan.

Hi Nash,
Gawd! How much do you weigh? That seat would support an elephant if it's arse was small enough to fit in it.
OTOH, as it's already built, 20ga sheet & pop rivets will work just fine when you consider that the stock seat pan is a 22ga pressing.
 
Haha, I'm 6 foot 180 pounds if y'all must know. The seat rails themselves are certainly heavier than is needed to support my weight, but even at that they may look bigger in pictures than in real life as it's 3/4" tubing which was chosen because it was laying around and still big enough that I was able to simply drill and tap to attach the hinges. I've not taken the factory seat apart but it feels like 18 or 20 gauge from what attention I've paid. The big thing with it though is being a stamping they are able to put a ton of reinforcement to it where the seat pan I'm making is largely flat across it's 9 1/2 inch width.

Also bear in mind this is the first time I've done anything like this so I make no claims as to the efficiency or "rightness" of anything I've made.;)

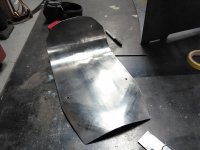
Anyway, worked on it for another couple hours tonight after work. Wife wasn't too impressed with my not leaving until after 8 last night, so I made sure I left at 7:55pm tonight. I decided to just use 18ga for the pan as it was there, and handily enough in a piece nearly already cut to the size I needed.
IMG_20181030_172106.jpg

See, sheet metal, I wasn't lying.
IMG_20181030_172651.jpg

Something substantive, slip rolling the back end. I was going to do a thing tonight showing the piece in the tools, but that ended right about here. Only took two trips to the slip roll which surprised me. I expected to have a more difficult time matching the curve and getting it in the right spot.
IMG_20181030_175623.jpg

Once the back was curved I went to the English Wheel to try and put a dish into the pan and to curve the front corners down. I really wish I was better with this thing as watching people who know what they're doing with one just seem like magicians to me. After a little while I was able to get something that I thought looked pretty decent and would work.
IMG_20181030_183041.jpg

Drilled some holes to attach the pan to the frame, eventually I'll weld the bolts to the pan so they will be studs sticking down from the pan and the pan will attach to the frame with nuts. Once I got the pan attached I popped the whole mess onto the bike to see how much I needed to trim from the front to fit up nicely with the tank.
IMG_20181030_185130.jpg

So there it is on the bike. You can kinda see more of the contour in the center of the seat from this angle. Also another photobomb with the name of where I work that I didn't notice until just now. If those ending up in the pictures is an issue for the people running the board here someone from the site let me know, I don't want to seem like I'm trying to do free advertising or anything. I stood and just looked at the thing for a few minutes at this point. I'm typically very critical of the stuff I try to make but this I think just looked cool.
IMG_20181030_185951.jpg

Cool enough I decided to tape on some padding and give it a try. I wouldn't say that it's cramped or even so much as uncomfortable as it just feels like it needs rear sets. They are in the plans for eventually but those cost money, hundreds of money in fact, and the metal work I can do for essentially free. I'm lucky enough that my boss has considered all the stuff I've done so far to be training so he hasn't charged me for the metal or TIG rod. I had never used a TIG before about nine months ago, I didn't even own a welding helmet until last Christmas so everything I do like this just makes me more useful to the business.
Sitting on it the front of the seat seemed too wide, I had tried to match it up to what visually seemed right with the back end of the tank but when it came to putting feet on the ground it required some bow legged cowboy action. I went back and measured the front of the factory seat and realized that it felt wide because it was , about an inch and a quarter wider than factory in fact. So I tore it back down and went back to the shear to hack off a half inch on either side. After doing that I went back to the English Wheel to run the front edges down again as well as work the dish some more. Putting the pan back on the frame I just had to stare again. In the same way the exhaust just seems right to me, looking at the seat even in the haggard shape it's in at the moment just looks right. I didn't take a picture of that time thinking the difference wouldn't be noticeable anyway.
It flexes a bit more than I'd like still, so I may add a lip to the outside edge. The front corners especially need something as they are just hanging free at the moment. I did some looking around at lunch for tail lights and can't find anything I really like so I may just end up moving the stock light up. I did find an ellipsoid LED light that would let me get the license plate up higher though so it's a possibility too at this point. As just as I'd like LEDs though it just doesn't seem to fit the look though. I just want the classic round light, about 4 inch diameter that looks like a can of cranberry sauce if anyone knows where to get one.
Before I left for the night I decided to take a picture of the gauge mount I made where you can actually see the script relief. I'll attach it here too if anyone is curious enough to want to see it.
IMG_20181030_194129.jpg
 

Attachments

  • IMG_20181030_184756.jpg
    IMG_20181030_184756.jpg
    162.9 KB · Views: 293
Haha, I'm 6 foot 180 pounds if y'all must know - - -

Hi Nash,
only 3/4" square tube? You are right, it looks bigger. Perhaps it would only support a hippopotamus?
Anyhow, with the bike's seat and 'bars the way they are and your 6 foot height, man, you really do need rearsets.
Hundreds of dollars to buy them for sure. But surely your shop has a bandsaw?
Carve the rearset sidepieces out of 1/2" or 5/8" aluminum plate and bolt your passenger footpegs on them.
Make dummies out of plywood first though, aluminum plate is expensive enough that it's best you only make one set.
 
Making the brackets and moving the pegs would be super simple, though oddly enough with everything else we don't have a working band saw. I've looked at trying to make something we couple times but just haven't had any ideas about how to effectively move the linkages with junk we've got lying around. I could be over thinking it but seems the pedals would need to be bearing mounted to the pedals to keep them from binding. Linking them to the shifter and brake rod would just be heim joint ends.

For right now though, the bike needs so much that the rear sets are back burnered since there are other things that bother me more. For instance the wiring is a mess, and the pot metal switchgear on the bars are both broken. Someone at some point jammed screw drivers into the carb throats to I guess unstick the slides so the carbs need replaced. The clutch slips on high RPM shifts and the clutch cover leaks. That's just a few of the problems.

Actually, going through and looking at some of the kits it seems they don't use bearings and just have bronze bushings riding on the aluminum pegs. I'm not sure I like that anyway at some point I will revisit it and really put some thought to seeing what I can come up with.
 
Last edited:
Making the brackets and moving the pegs would be super simple, though oddly enough with everything else we don't have a working band saw. I've looked at trying to make something we couple times but just haven't had any ideas about how to effectively move the linkages with junk we've got lying around. I could be over thinking it but seems the pedals would need to be bearing mounted to the pedals to keep them from binding. Linking them to the shifter and brake rod would just be heim joint ends.
For right now though, the bike needs so much that the rear sets are back burnered since there are other things that bother me more. For instance the wiring is a mess, and the pot metal switchgear on the bars are both broken. Someone at some point jammed screw drivers into the carb throats to I guess unstick the slides so the carbs need replaced. The clutch slips on high RPM shifts and the clutch cover leaks. That's just a few of the problems.
Actually, going through and looking at some of the kits it seems they don't use bearings and just have bronze bushings riding on the aluminum pegs. I'm not sure I like that anyway at some point I will revisit it and really put some thought to seeing what I can come up with.

hi Nash,
um, if your workplace has a non-working bandsaw, perhaps your employer could be persuaded that your training could include fixing it?
Or you could switch materials and burn the rearset pieces from steel plate?
& FWIW, plain bushings work better than rolling element bearings for low speeds and partial rotation.
I'd say bite the bullet and buy new switches and a wiring harness because attempting to fix that stuff is a PITA.
OTOH, it's amazing how well even totally effed up carbs can be refurbished and at far less cost than buying new ones.
The rest ain't exactly problems, more like routine maintenance.
 
I'll make the harness when the time gets here, and that's something I have loads of experience with. I'm supporting a wife and two kids on the lower end of a mechanics pay. So even though the other bits and maintenance aren't super expensive, they are out of the budget right now considering I've spent way more than I should have on motorcycle stuff already this year. Especially on stuff that isn't needed and is just for fun.

I haven't done any specific research on anything, but just seat of the pants I would think that rear sets would be an application for needle bearings. That could just be bias from having to fix too many brake pedal brackets on old Mustangs though.

Also if you know someone that can fix aluminum carb bodies that look like someone has taken a chisel to the venturis, point me in that direction.
 
Back
Top