Project Canuck- 84 XS650 Project Build

Robins, (rip), mistake was to leave the vinegar in the tank for several months...........a few days is all it needs, 3 or 4 at the most depending on the severity of the rust.

A softer approach but more time consuming is to use molasses in a water mix. This mixture about 10 parts water to one part Molasses needs to be kept at a warm temperature for the fermentation to work its wonders. Could take several weeks, again depends on enviroment temperature and severity of rust, and it stinks as the fermentation process advances, so a well ventilated area is required. ..........Leaves a black surface on the metal, rinse with warm to hot water then a good WD40 rinse to get rid f the water. No flash rust from the water........ and its ready to go.

What ever way you go to get rid of the rust the best way to stop rust from forming in the tank is to keep the tank full of petrol when not riding. Especially in a cold climate where condensation is a problem, the bike should be stored in such a way as to stop the condensation.

I used to leave my bike in Taranaki, NZ, (cold and wet climate in the winter and can get warm in the summer), in a wooden shed with a wooden floor at my fathers place. It would be there for a year sometimes 2 before i went back. This got very cold in the winter and to stop the rust from condensation i used to keep the Tank full and made sure the bike was well wrapped up with sheets and blankets and then water proof tarps, (in-case of a roof leak). Also sprayed liberal amounts of CRC, wet start or WD40 all over the bike before wrapping up. This was from about 1992 - 2010. This was taken last year and the bike has had no make overs since i bought her in 1989............ Oh yea its an 83SK Canadian, Dealer Import to NZ new in 83 with 000 k's on the clock.........Fact is it has spent more time in storage than out out it. looks a bit like yours before the polishing

If you ever get the urge to just polish and polish some more your welcome to come and visit:)
Text IMG_7852.jpg Text IMG_7854.jpg Text IMG_7864.jpg
 
Slept on it and took a slightly different direction than anticipated.

For the rust, no issue there. Picked up a gallon of Evaporust and the rust...well....evaporated. Little bit of flash rust after drying but all the pits and rust deposits on the bottom are gone. Will retreat again just before the fuel goes in and leave coated with Evaporust to protect from the flash rust. Good as new. New best friend.

As for the exterior, I took a ride to visit my powdercoater to show him the ripples in the metal. He said he will try his best with a primer coat to build up but may still show the dent/ripples a little. Lets see what he can do with it. Willing to experiment as I really do prefer powdercoat. Not looking for a showroom piece and worse case, some well placed decals will cover it up. Stay tuned. He did wonders with the frame, battery box and other components so I am sure he will figure something out.

Rust Before


IMG_1165.jpg


After

IMG_1173.jpg
 
Last edited:
Looks very nice but that is unlikely to be the original. That's a Morse brand chain and Yamaha came with Daido or DID from the factory, I think.
 
So now this has me thinking. Is this even a motorcycle chain. I can’t find any reference to a motorcycle chain made by Morse. Plenty of roller chains for industrial use, cam chains, timing chains, but I don’t see anything specifically made for motorcycles drive chains. It fits and looks like a bike chain.

Any thoughts?
 
Yeah. I had seen that already. Would be more concerned if there was no brand on it at all but Morse is a good brand in industrial but no idea in Motorcycle drives. Hard to say but for the price I may just play it safe and pick up a DID. The sprockets are still in good shape and barely look warm. Normally I change them with the chain which is why I wanted to use up this chain first.

Oh well. Just more money but I will sleep better at night.
 
Glad I double checked the sprocket before ordering. Looks like someone increased the rear sprocket to a 36 tooth. Not sure how much grunt to the low end that would even add so not sure the reason vs gearing down the front by a tooth. Guessing the rear was worn, hence the new chain. Always a mystery with an old bike. Unless the Specials were different, pretty sure stock is a 34. Front is still 17. Explains why there are 53 links (106 rollers) instead of 52 (104) on the chain.

DID does make a 104 chain but will now opt for the 110 and cut to fit.
 
Do a forum search on "17/36", posted by member "Fredintoon".
Must be a Canadian thing...

I have to find the article I was reading a while back. I seem to recall it being stock 36 on the 84 also in Canada. Who the hell knows why. Guess we need the extra push for when we attach the snow plow to the front.
 
Hi canuck,
alas that I seldom check the Canadian sub-forum and only found your string today.
Some things I did to my '84 Heritage Special that I'd recommend to you.
Stock front brake caliper is sized to operate the dual front calipers that the rest of the world's XS650s came with.
Adding the second caliper (XS750/850/1100 Standards) OR installing a smaller piston m/c (11 or 12mm) fixes that.
Drill the brake disk(s) & upgrade to Stainless brake hoses too.
Note that an XS650 Standard tank drops right on and is a gallon larger.
Note that the stock horn's pathetic bleat can't be heard by others. I use a Stebel-Nautilus mini air horn that puts out 139dB.
The Canadian '84 XS650s 36T rear sprocket gets you away from stop signs real quick but limits the bike's top speed.
Perfect for sidecar work though.
The 17/33 sprockets my bike had for solo use seemed to give a better highway ride than the stock 17/34.
Fit a ScottOiler or other automatic chain lubrication device to extend your final drive's life fivefold.
 
As for the exterior, I took a ride to visit my powdercoater to show him the ripples in the metal. He said he will try his best with a primer coat to build up but may still show the dent/ripples a little. Lets see what he can do with it. Willing to experiment as I really do prefer powdercoat. Not looking for a showroom piece and worse case, some well placed decals will cover it up. Stay tuned. He did wonders with the frame, battery box and other components so I am sure he will figure something out.

Well got the tank back from the powder coater and he was not successful. Said he tried to build it up a couple of times but could still see the ripples. It being gloss black every little bump is noticeable. He didn't charge me anything which to me is a sign of a good business.

Took the tank to a local paint shop that I have dealt with before for automotive work. $200 CDN (about $150 US) cash and he will smooth out the dents and color/clear. Not a bad deal. Not sure I could have done it for much less with all the supplies I would have had to buy, not to mention the time. He said the base powdercoat that is on it now is better than primer so headed in the right direction. Should have gone there first but lesson learned. Had to try..........:shrug:
 
Last edited:
Had some time today in between getting the other bikes winter ready so thought I would take a look at the carb sync. It was slightly off but nothing to alarming. And that was at the most sensitive setting on my Carbmate so only took a slight adjustment to bring it back in line.

I had set the idle mixture screw pretty much were it was when I got it which was three turns out. I didn’t even bother fine tuning it. It revs up smoothly and comes back to idle at a nice rate without a pause. Is that where most bikes end up??? I just remember with my KLR it was a never ending story for proper adjustment since there were so many factors out of ones control like air temp and pressure. I took the stance of set it and forget it. People would argue that it made a difference at higher RPM but it is so minute that it was not worth it. To those guys I told to buy a VStrom. Funny that I eventually ended up buying a VStrom.

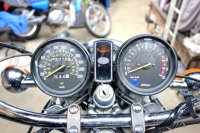
Couple of electrical gremlins to deal with. The clutch switch’s seems to do nothing. With the bike in gear it will not start. Has to be in neutral only. Not an issue as I always start my bikes in neutral but would be a pain if it ever stalled while riding and could not start it on the go. I will have to pull the headlight off and take a look at the wiring. The instrument light don’t work either along with the HB indicator. I suspect it is all related and may have a wire backwards. The chances of both instrument bulbs being burnt and the HB indicator bulb is remote but I guess it could happen.

Still don’t have the tank back from paint but managed to at least ride it up and down the driveway with my fuel bottle in tow. Can’t deduce much from the ride but at least it rolled, shifted and stopped without anything falling off. Unfortunately and early snow here pretty much ruled out the road. Would hate to get it dirty.

Stay tuned. Almost there.
 
Back
Top