Twisted off pilot screw(ed?)

Took a look and yes aluminum expands about 15-20% more than brass so heat is a bonus.
https://www.engineeringtoolbox.com/thermal-expansion-metals-d_859.html
If you have the carbs fully stripped a 300 degree oven might be a good thing.
Otherwise a heat gun with some caution.
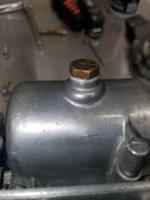
Here's the mark 1a idea.
View attachment 160923
stiff paper to prevent marring the carb bore
pin about 3/8" proud of the top of the bar so you can see to get it lined up on the screw tip.
hint: to make the pin just the right size, chuck it in a drill then spin while grinding a reduced section at the end.
get the carb body in a vice or such so you have a stable platform. load up the bar with hand pressure then light taps near the end with a small hammer to shock the screw tip loose.
Look up some jetmechmarty posts on XS1100 carbs, there are some gotchas, about carb year vs. jets used.
now that is really over engineering. just knock it out with one of these, available in sterling silver in fact.
hammer.jpg
 
Third times a charm. I ordered two sets of carb parts from two different vendors, each to send me the wrong (for later model) parts even though they advertised the exact part I was looking for (pilot screws for one). Meanwhile, I ordered from a third and hopefully more reliable vendor. I didn't want to wait any longer to see if this bike would run, so I "machined" the broken off pilot screws down to a needle point, installed new butterfly seals, re-assembled everything and low and behold it runs good! Wasn't without incident. I've never seen a float bowl cracked like this before. Must have had water in the carb at some point. Thing leaked like a sieve...but a little JB Weld fixed it up. Now to decide whether to restore this XS1100 or just sell it as-is (once I have the "correct" carb parts installed).
 

Attachments

  • thumbnail_20200309_144939.jpg
    thumbnail_20200309_144939.jpg
    108.9 KB · Views: 136
I've been plugging away at restoring this $200 xs1100. Originally bought it thinking I would part it out but motor checked out good so I dove in. Finally got it all back together after repainting the tins and polishing typical parts along with a ton of other stuff. Took it for a first quick ride today. I am amazed at how smooth and quick these bikes are. Now need to see if I can fix the electronic tach as it sticks at 3200 RPM and then on to restoring the vetters and possibly make it back into a full bagger again...
 

Attachments

  • 20200421_214348.jpg
    20200421_214348.jpg
    205.2 KB · Views: 109
I've been plugging away at restoring this $200 xs1100. Originally bought it thinking I would part it out but motor checked out good so I dove in. Finally got it all back together after repainting the tins and polishing typical parts along with a ton of other stuff. Took it for a first quick ride today. I am amazed at how smooth and quick these bikes are. Now need to see if I can fix the electronic tach as it sticks at 3200 RPM and then on to restoring the vetters and possibly make it back into a full bagger again...
Had an XS1100 back in the 80's. That thing was a beast in a straight line.:D
 
Yeah, everything I've read says not to push these too hard into corners but I'm beyond that stage in my life. Will see if I keep it but it's been fun to learn yet another vintage Yamaha and restoring it to solid running condition. A lot of posts from previous owners dictate that its not unusual to see close to 200k miles on these engines before rebuild. Shaft drive with smooth running 4 cyl makes for a great combo. Fastest production bike when it first came out before Kawasaki's lighter KZ1000 came out.
 
Back
Top