Mikey's new to him 1980 650

There were actually several because there were a couple different versions of the bolt. The early 256-14991-00-00 version had a screwdriver slot across the head. These came on carbs up to about '77 .....

Ro1G2az.png


The plain head bolt used from '78 through '80 has a couple different numbers, don't know why. They would be 1A0- or 1A8-14991-00-00 .....

mv4p1Rc.jpg
 
Thanks for the advice and the parts #s !!!
Found 2 of the plugs 1A8-14991-00-00 on Ebay for $9.19 each and only $5.00 shipping
And got 2 of the copper gaskets from Partzilla (Of course there shipping is outrageous )
Thanks again
 
Last edited:
Shift shaft seals and bushings came in today
This process went quite well using brass washers and a socket extension
I thought I read here somewhere to use petroleum free grease as the lube when putting them in but then I thought there in place to stop oil from leaking out (so regular grease it was)
I also saw in other posts where the seal had a spring in the seal
These didn't ? Neither new or replacement And I also thought that the seal would be a really tight seal on the shaft too as in really need to push it in ?
IMG_20210913_152452682.jpg
IMG_20210913_154037176.jpg
IMG_20210913_154113583.jpg
IMG_20210913_154544561.jpg
IMG_20210913_162810964.jpg

Anyway score one for the parts replacer :cheers:
 
Shift shaft seals and bushings came in today
This process went quite well using brass washers and a socket extension
I thought I read here somewhere to use petroleum free grease as the lube when putting them in but then I thought there in place to stop oil from leaking out (so regular grease it was)
I also saw in other posts where the seal had a spring in the seal
These didn't ? Neither new or replacement And I also thought that the seal would be a really tight seal on the shaft too as in really need to push it in ? View attachment 198125 View attachment 198126 View attachment 198127 View attachment 198128 View attachment 198129
Anyway score one for the parts replacer :cheers:

All right! Another shade tree mechanic success story! We’re a dying breed Mike. ;)
D5696C92-B614-4A68-AA86-4FEE626A3270.jpeg
 
Actually, many of us apply Yamabond to the O.D. of our seals. This lubes it for install as grease would but has the added benefit of helping to seal it into the case .....

Vsw1pYE.jpg


a6YXNOr.jpg


Then, before inserting the pushrod, you can fill the seal lips with grease .....

3iddQQH.jpg
 
After a 4 hr lunch with friends ( you'd think we'd run out of BS after 2)
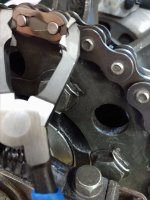
Back at the bike minor progress /shift shaft seal done /chains back on and safety wired ( That little chain link clip pliers is great!)
Front sprocket nut is back on ( I just hammered it on with a electric HF impact gun ) I think it will be tight enough
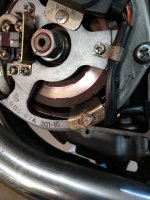
Next parts replacer question As long as I have the side cover off I thought I might as well clean the rotor a bit
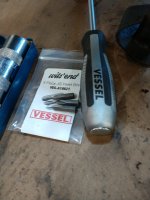
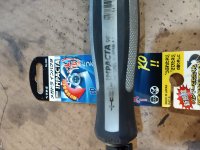
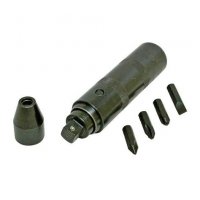
THE 2 Screws are on tighter than shit but I have the Impacta JES screw driver that should take them out by just putting the screw driver in the screw and whackin it with a hammer ( It supposedly turns it just a fraction loose at each hit ) Each screw was wacked dozen times
Any other suggestions maybe a little heat from a hair dryer on the screws ? Better impact tool ( I have a bigger toolbox so I got room for more tools)
Anyway a few small /minor victories for the parts replacer :smoke:
 

Attachments

  • IMG_20210917_171856120.jpg
    IMG_20210917_171856120.jpg
    143.3 KB · Views: 66
  • IMG_20210917_175715562.jpg
    IMG_20210917_175715562.jpg
    176.3 KB · Views: 71
  • IMG_20210917_175505736_BURST000_COVER.jpg
    IMG_20210917_175505736_BURST000_COVER.jpg
    136.7 KB · Views: 69
  • IMG_20210917_182553801.jpg
    IMG_20210917_182553801.jpg
    163.9 KB · Views: 65
#3 bit!!!! A #2 will f'k the screw heads. Not sure what you have there? a hand impact wrench usually looks like this.
impact.jpg
On #3 good ole USA Phillips bits are "just fine" work perfectly. Other than that hammer away. Note when reinstalling; there is a pin in the crankcase at about 7 o:clock the stator has a slot that must sit over the pin. I use the impact hammer to lightly seat the screws "home". No need to go crazy on cleaning up the rotor face. 2M did some research and brush dust (graphite) on the rings actually improves the electrical connection 'tween rotor and brushes. If you just gotta clean; blue magic or some other metal polish is best, sand paper is too coarse.
 
Last edited:
#3 bit!!!! A #2 will f'k the screw heads. Not sure what you have there? a hand impact wrench usually looks like this.
View attachment 198327
On #3 good ole USA Phillips bits are "just fine" work perfectly. Other than that hammer away. Note when reinstalling; there is a pin in the crankcase at about 7 o:clock the stator has a slot that must sit over the pin. I use the impact hammer to lightly seat the screws "home". No need to go crazy on cleaning up the rotor face. 2M did some research and brush dust (graphite) on the rings actually improves the electrical connection 'tween rotor and brushes. If you just gotta clean; blue magic or some other metal polish is best, sand paper is too coarse.
My impact is an old one with HUGE bits way to crude for this job
I may just quit being anal about the rotor and move on it's not that bad or get another impact wrench that will handle the JIS bits that I have
 
Last edited:
Last edited:
The Impacta really doesn't seem to be moving the screws at all
 
A ramp type impact like pictured above sells for about $10.........
Most impacts are 3/8" drive a 3/8" x whatever size your bits are 6 point socket would have you in business. (I do that fairly often, haven't broken a socket, yet)
 
Yes, the drive size. I have several and while most are the 3/8" drive, I do have a 1/2" drive one as well. It works the best, better than the 3/8" drive ones. Most of mine are Vessels, picked up used and dirt cheap off eBay. These are the "Cadillac" of hand held impacts in my opinion and, in fact, I think they're the ones who invented the tool.
 
Doesn't hurt to lube your impacts when you get them and every couple years or so. There's a ramp inside that works better when it's slippery
 
And don't forget to twist it counterclockwise to "load it up against the ramp." If it's not, all your energy from the hammer will be wasted taking up all the internal slack, with nothing left to actually loosen the screw.
 
My old impact is 5/16 so time to order a few impact bits
 
Back
Top