Hey guys. So this week I set out to tackle the seemingly daunting task of building the box and organizing the electronics for my current build. I decided on a box located under the seat with a shape that followed the frame...seen on many custom cafe racer builds.
So I set out to measure the bike and cut the material.
After cutting the material I began the process of welding the pan together....poorly ha...winter away from the welder has stolen my former skills with the TIG.
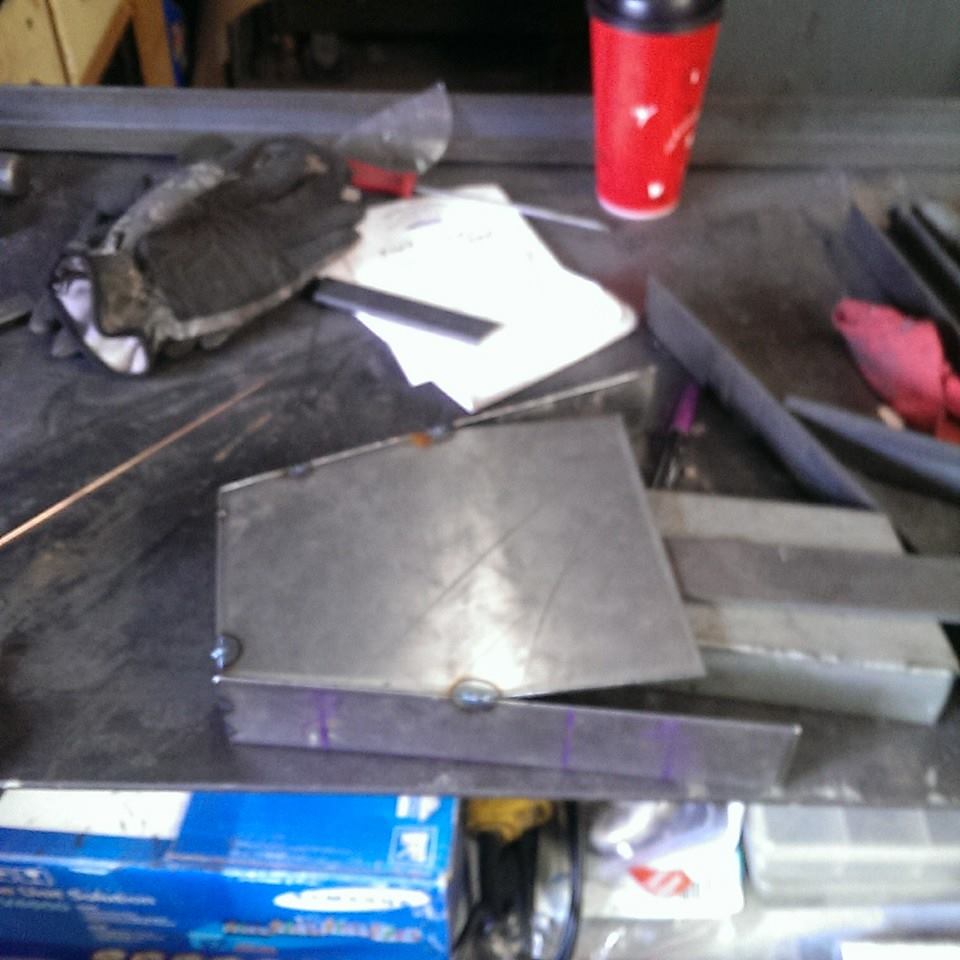
The edges have a curve so I used the welds to allow the metal to bend only where I wanted it to.

When it was all welded up I gave it a whack with the grinder and called it good.

After completing the box, I headed over to make sure it fit the bike like intended. To my surprise it did! ....almost suspiciously well... ha
Anyway here's shot of how it fits in the frame.
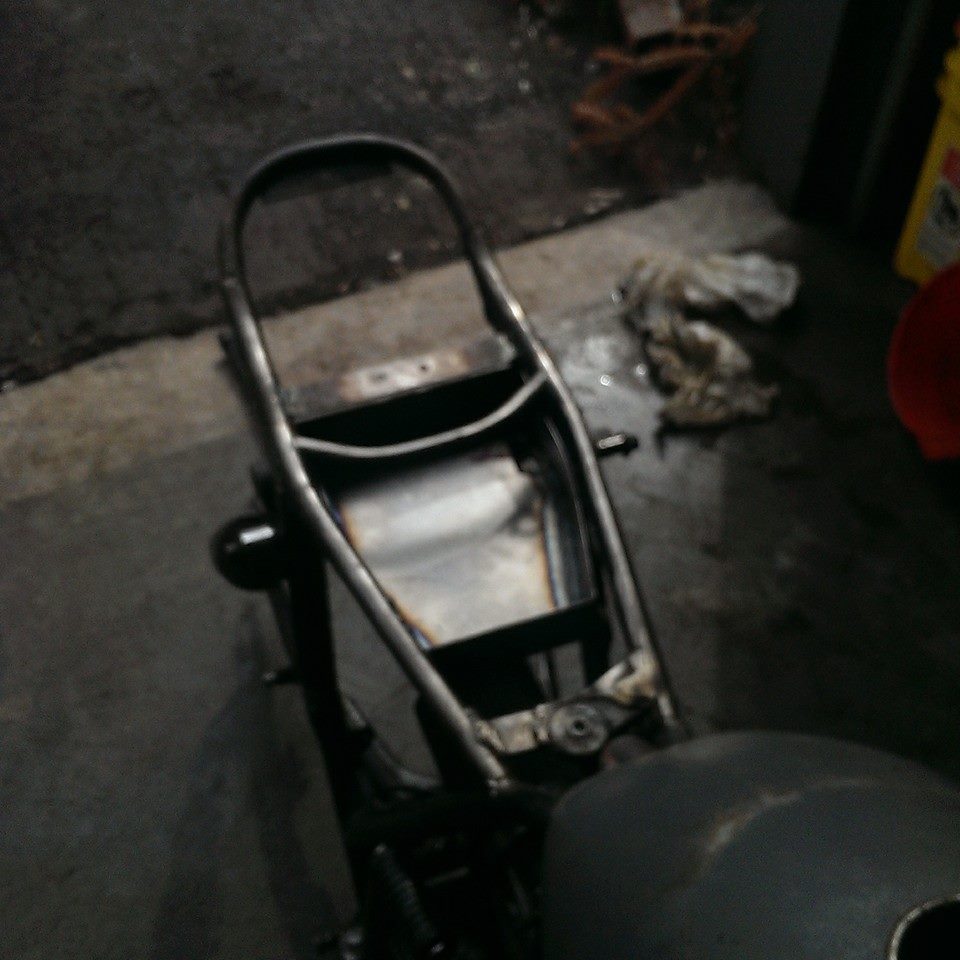
Now some of you may notice how close it sits to the air filter...but have no fear, I have a shorter pod that I will be running instead...also, this is my bike...a custom race engined XT500: adventure,scrambler,flat tracking cafe racing, street fighter
After verifying the fit it was time to drill the holes. I do not have a picture, however I simply mocked up the location of the electronics, laid out their locations and clamped up in the drill press with a step drill.
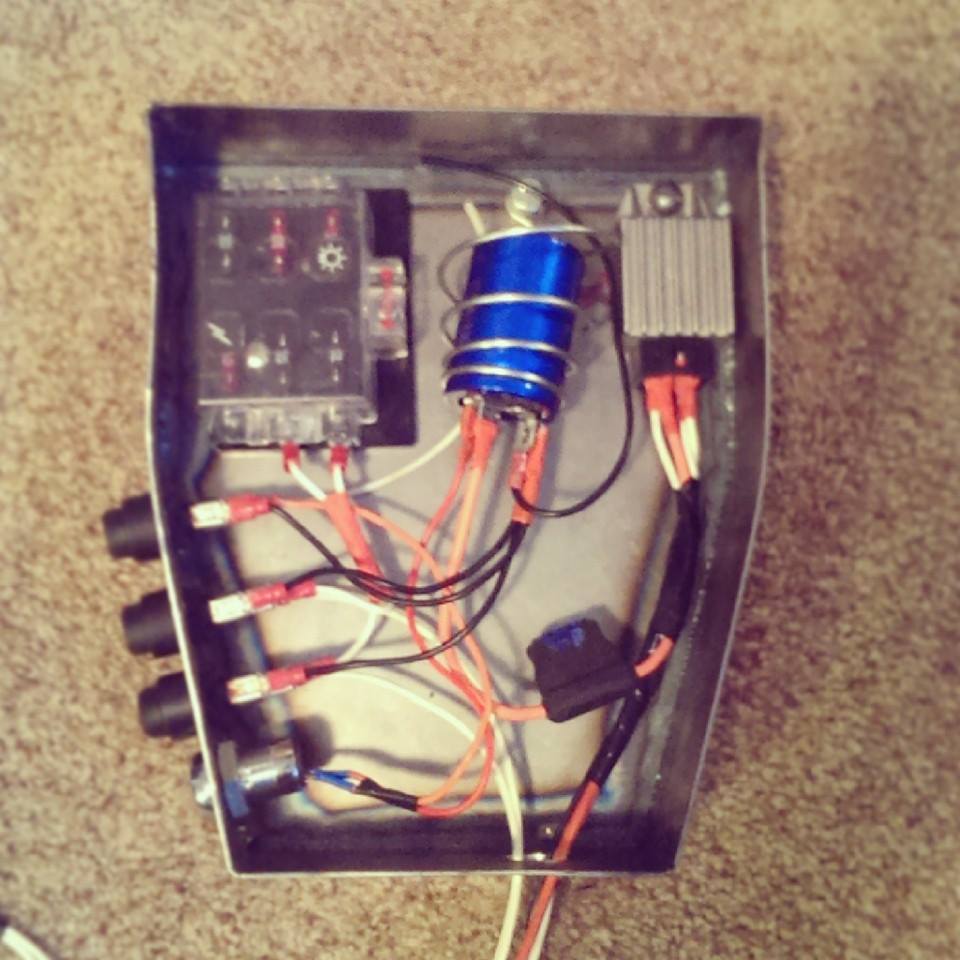
Now the tricky part...wiring it all together. I'll spare you the details, but this bike is 6V stock and half AC, half DC. With this setup it will remain half and half, however it will now be regulated to 12V instead of 6V. This is the entirety of my electronics that will be present in the box, with the exception of a few more wires, and a flasher relay.
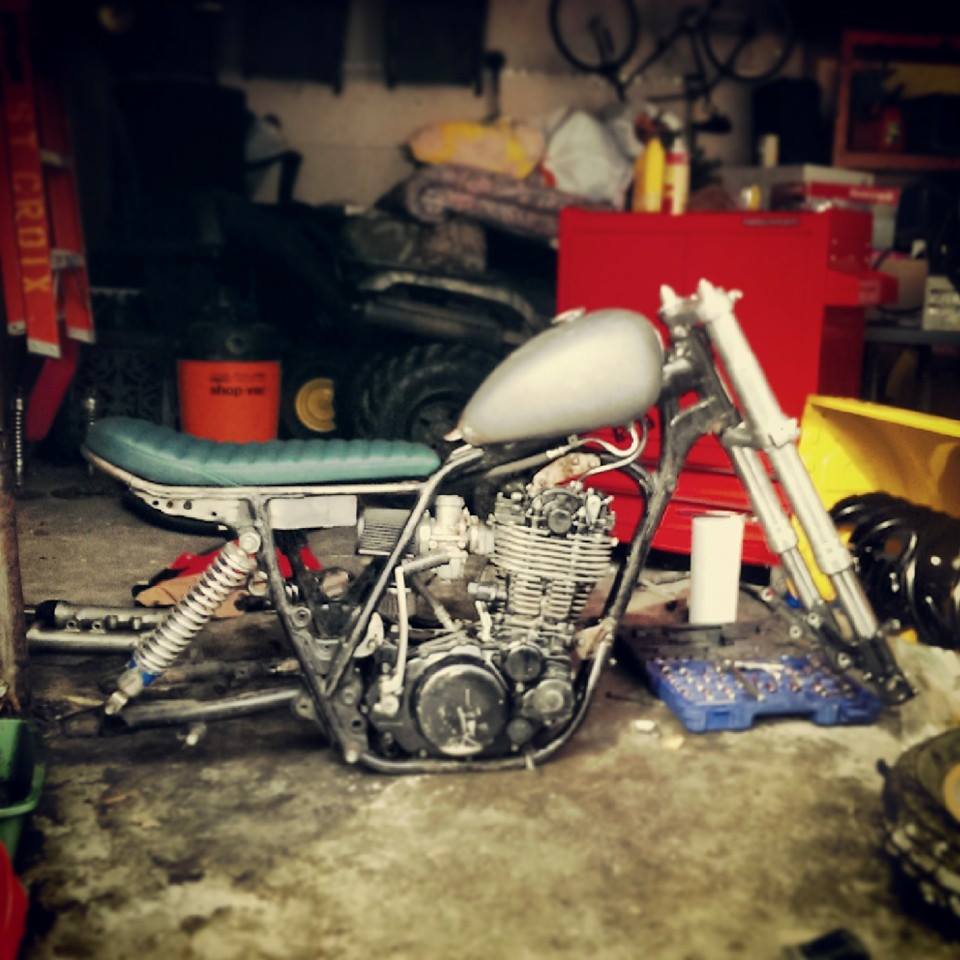
I know...it's not an XS, but Ol'Betsy is hiding behind all that mess in the background...waiting...preparing...and gathering herself for what's soon to come.......ridable Minnesota roads!
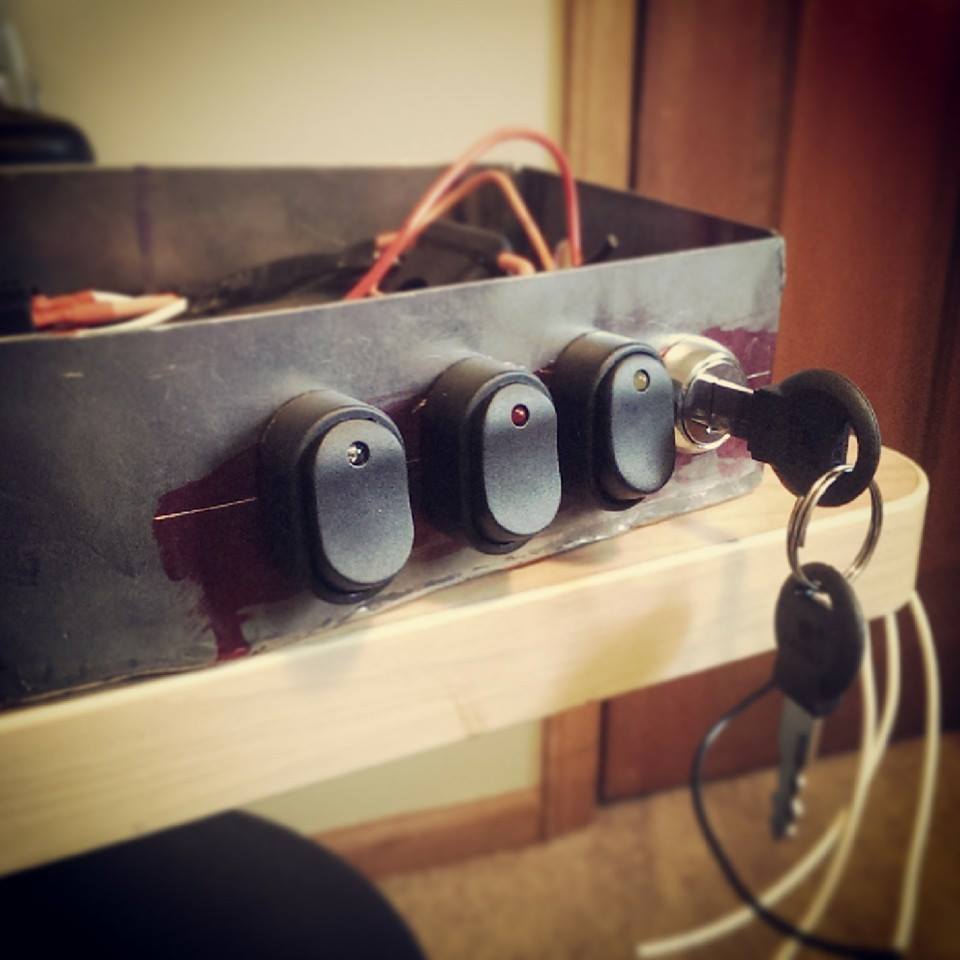
For my purposes I decided to go with an ignition switch, and three LED toggle switches from NAPA. One for the headlight, one for the tail lights (long story...they're LED's, and the two lights are running, brake, and turnsignals...it'll be fun to figure out...but the plan is to toggle the running lights for night and have the brake and turns on switched ignition for the day). The last switch is a "dummy switch" wired directly to the key...hopefully to prevent any dummy's from figuring out how to start my bike...that and I enjoy pretending to be a race car driver sometimes
After fitting the switches and ignition I went about bolting all the components into place.
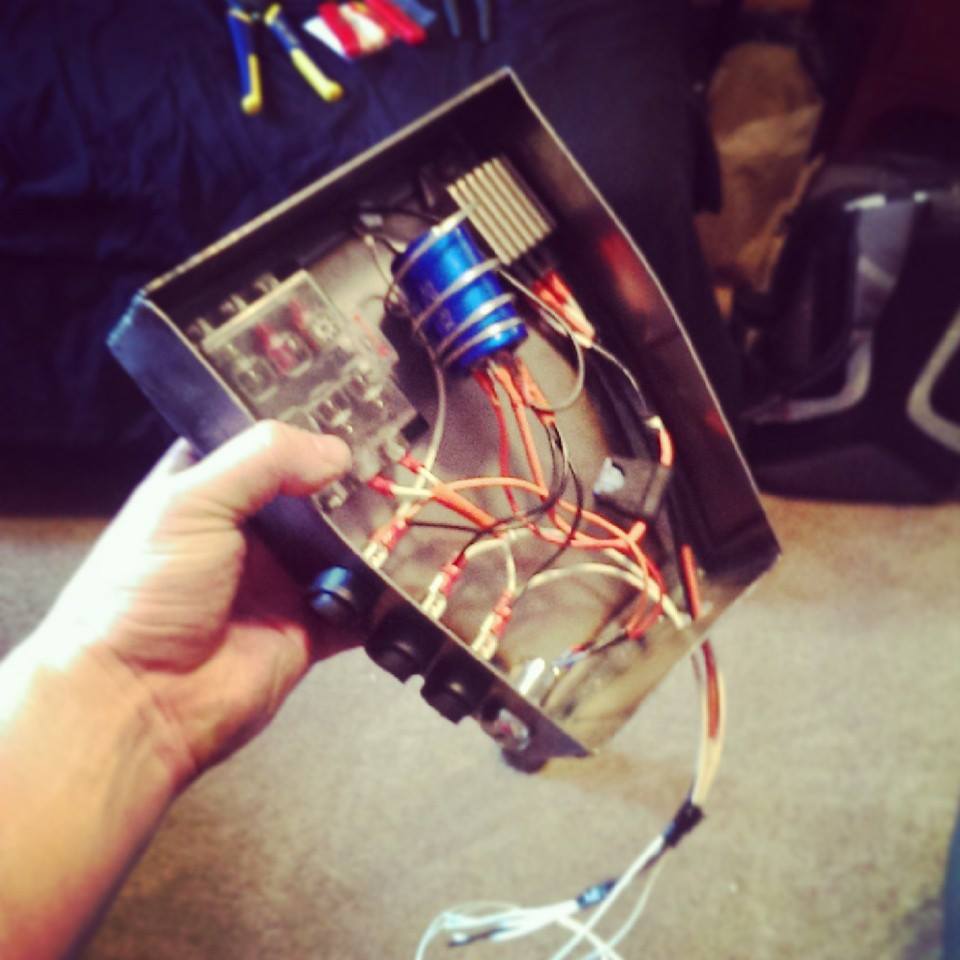
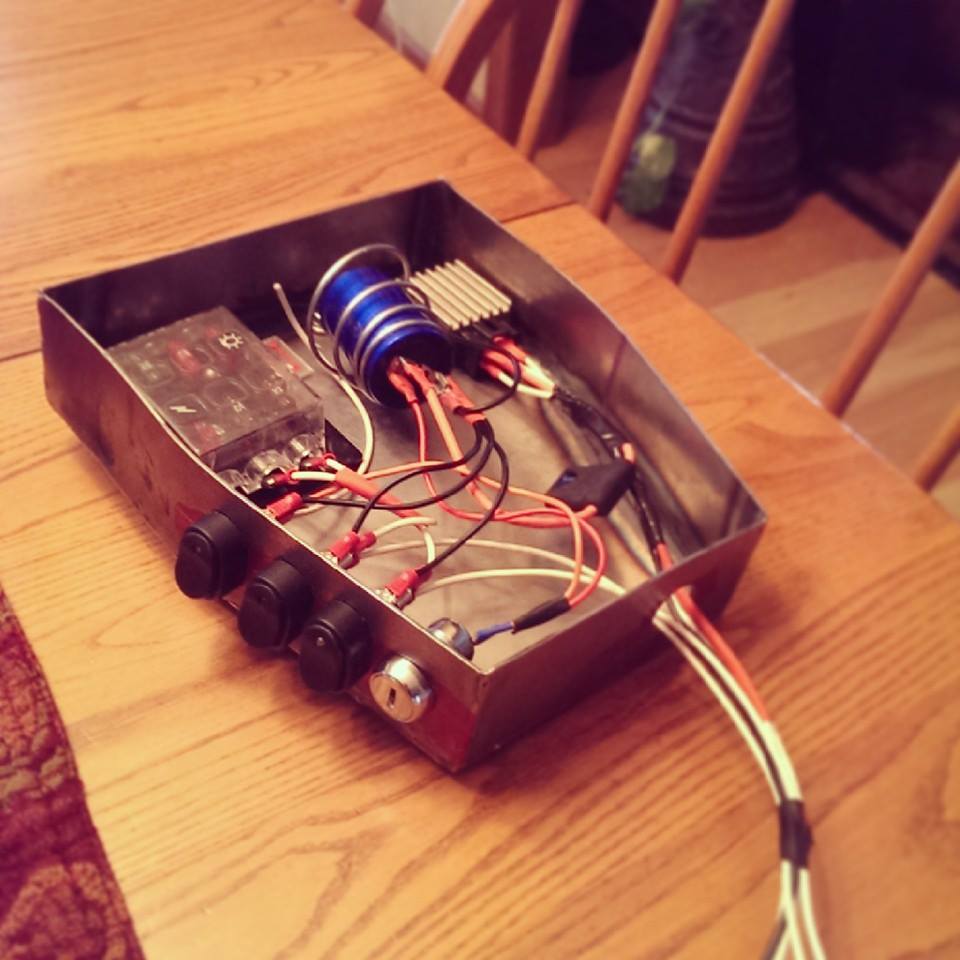
And from then on mocked up all the wiring as it will exist in the final product.
After a couple hours I had completed the process and if hooked up to the bike, grounded and 1 more wire connected the bike should run...(I hope). Gave er' a test shake to see what kind of movement exists and am pleasantly surprised by the stability.
Now its just a matter of finalizing the wiring with heat shrink and insulation, finding a rubber grommet for that passage, welding the box into the frame, and figuring out a way to cover the switches, since I do not believe they are waterproof. My plan is to create a simple hinged cover that I can lock closed, but that has a hole in it to slip the key through. This way I can go through as much dirt and water as I want... and even if someone were able to jack the ignition through the hole they'd still need to be able to get to the dummy switch...which I think will be nearly impossible thanks to the fact that it's the farthest switch from the ignition and they'd have to sneak past the other two to get to it.
Anyway, here she is!
Let me know what you think or if you've got a question about making your own")
So I set out to measure the bike and cut the material.
After cutting the material I began the process of welding the pan together....poorly ha...winter away from the welder has stolen my former skills with the TIG.
The edges have a curve so I used the welds to allow the metal to bend only where I wanted it to.
When it was all welded up I gave it a whack with the grinder and called it good.
After completing the box, I headed over to make sure it fit the bike like intended. To my surprise it did!
....almost suspiciously well... haAnyway here's shot of how it fits in the frame.
Now some of you may notice how close it sits to the air filter...but have no fear, I have a shorter pod that I will be running instead...also, this is my bike...a custom race engined XT500: adventure,scrambler,flat tracking cafe racing, street fighter
After verifying the fit it was time to drill the holes. I do not have a picture, however I simply mocked up the location of the electronics, laid out their locations and clamped up in the drill press with a step drill.
Now the tricky part...wiring it all together. I'll spare you the details, but this bike is 6V stock and half AC, half DC. With this setup it will remain half and half, however it will now be regulated to 12V instead of 6V. This is the entirety of my electronics that will be present in the box, with the exception of a few more wires, and a flasher relay.
I know...it's not an XS, but Ol'Betsy is hiding behind all that mess in the background...waiting...preparing...and gathering herself for what's soon to come.......ridable Minnesota roads!
For my purposes I decided to go with an ignition switch, and three LED toggle switches from NAPA. One for the headlight, one for the tail lights (long story...they're LED's, and the two lights are running, brake, and turnsignals...it'll be fun to figure out...but the plan is to toggle the running lights for night and have the brake and turns on switched ignition for the day). The last switch is a "dummy switch" wired directly to the key...hopefully to prevent any dummy's from figuring out how to start my bike...that and I enjoy pretending to be a race car driver sometimes
After fitting the switches and ignition I went about bolting all the components into place.
And from then on mocked up all the wiring as it will exist in the final product.
After a couple hours I had completed the process and if hooked up to the bike, grounded and 1 more wire connected the bike should run...(I hope). Gave er' a test shake to see what kind of movement exists and am pleasantly surprised by the stability.
Now its just a matter of finalizing the wiring with heat shrink and insulation, finding a rubber grommet for that passage, welding the box into the frame, and figuring out a way to cover the switches, since I do not believe they are waterproof. My plan is to create a simple hinged cover that I can lock closed, but that has a hole in it to slip the key through. This way I can go through as much dirt and water as I want... and even if someone were able to jack the ignition through the hole they'd still need to be able to get to the dummy switch...which I think will be nearly impossible thanks to the fact that it's the farthest switch from the ignition and they'd have to sneak past the other two to get to it.
Anyway, here she is!
Let me know what you think or if you've got a question about making your own