-
Enjoy XS650.com? Consider making a donation to help support the site.
XS650.com receives a small share of sales from some links on this page, but direct donations have a much greater impact on keeping this site going.
You are using an out of date browser. It may not display this or other websites correctly.
You should upgrade or use an alternative browser.
You should upgrade or use an alternative browser.
1972 Resto/Retro Project
- Thread starter jones5944
- Start date
-
- Tags
- restoration
Paulrxs650
XS650 Enthusiast
Welcome along. I'll watch with interest  Pop some more pics up as you get along.
mm 72! Watch the front axle, brake assembly some tricky one year only stuff, parts there.
yellowdog
yellowdog
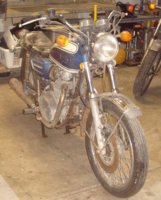
Nice,never seen a blue one before.
Nice,never seen a blue one before.
Ditto !!!
vr3506
vr3506
Nice project!
Was this blue an original Yamaha colour on this bike?
I also heard about a blue XS1
Was this blue an original Yamaha colour on this bike?
I also heard about a blue XS1
jones5944
XS650 Enthusiast
Thank you for your comments. I look forward to sharing this experience and I hope that everybody has a safe and prosperous New Year.
The blue paint was over the original red paint.
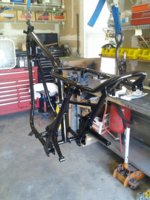
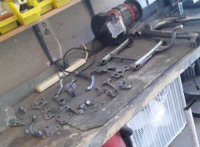
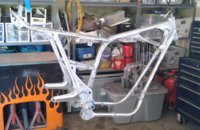
I disassembled the bike and all the parts were cataloged and bagged to match the Yamaha parts catalog. For me it makes easier parts location during re-assembly.
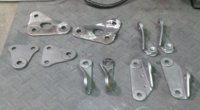
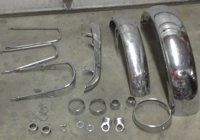
All chrome work to be re-plated was inspected and pictures sent to several plating companies for quotes. I determined that the rims were to far gone to be re-plated and will purchase new
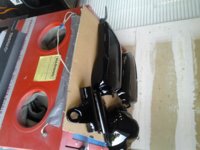
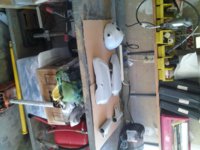
The parts to be painted were chemically stripped, inspected and prepped for paint.
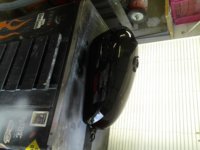
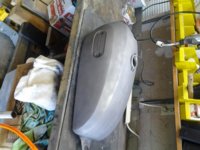
Luckily the gas tank only had minor rust and was easily cleaned with a chemical rust dissolver and some light media blasting.


Definitely following this. A serious restoration project.
Also curious about current chrome pricing. Local chrome shop?
May want to closely examine the rear fender loop. Notorious for developing cracks...
Also curious about current chrome pricing. Local chrome shop?
May want to closely examine the rear fender loop. Notorious for developing cracks...
scabber
XS650 Guru
Good to see your restoring the bike. Going to be a fun project. Progress is going great you have a lot done,
jones5944
XS650 Enthusiast
With regards to the chrome: I have decided to make this bike my daily rider so I probably will elect to go with standard plating instead of a higher quality show plating. Locally we have one shop that you either love their work or hate their work. They have a group they cater to with high quality finishes but if you are not on their A list it might take you along time to get back poor quality re-plates. I sent my request for a quote to shops in Minnesota, Georgia and Kentucky. I will be glad to share their pricing when I get it back. I am also looking at NOS parts. Sometimes I have been surprised to find that a new part can be purchased cheaper.
I etch primed and then primed all the parts in prep for base and clear coat. I am using PPG products. Luckily very minor fill work was required on the body parts.

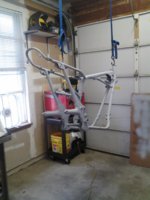
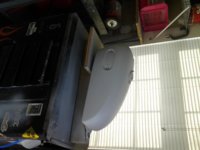
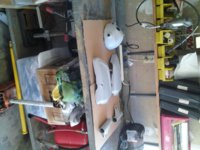
I etch primed and then primed all the parts in prep for base and clear coat. I am using PPG products. Luckily very minor fill work was required on the body parts.


Wow nice work going on here. The OP hasn't answered but I'm guessing the blue was a repaint. In the first pic there might be a bit of red peeking out under one headlight ear. The bottom edge stripe on the tank looks a bit thick compared to the stock pin stripe.
jones5944
XS650 Enthusiast
gggGary
In yesterdays post I noted that the blue was an overpaint. Sorry you missed it.
In yesterdays post I noted that the blue was an overpaint. Sorry you missed it.
I did miss that, sorry!
Is the rear hoop fender hole enlarged torn?
Check the rear hoop especially the RH front for cracking, might want to proactively reinforce weld there. What about the rubber block between hoop and fender? I need to do something about those on several bikes yet. Yes the chrome work is a head scratcher. Yamaha chrome is not as smooth shiny as the good shop$ make it.
jones5944
XS650 Enthusiast
gggGary:
The rear fender loop hole is enlarged a little and I plan on brazing it closed and reinforcing it at the same time prior to plating. The fender loop is in great condition. I have found the rubber block on fleabay and other sites. You might check out Clauss Studios & Manufacturing in CA. They do a lot of reproduction rubber products plus if they don't have it they might be interested in making one for you.
The rear fender loop hole is enlarged a little and I plan on brazing it closed and reinforcing it at the same time prior to plating. The fender loop is in great condition. I have found the rubber block on fleabay and other sites. You might check out Clauss Studios & Manufacturing in CA. They do a lot of reproduction rubber products plus if they don't have it they might be interested in making one for you.
vr3506
vr3506
Thanks for the adress ;-)
jones5944
XS650 Enthusiast
jones5944
XS650 Enthusiast
Rear Wheel:
Disassembled, cleaned and inspected.
Polished rear brake parts.
New bearings and seals.
New polished stainless steel spokes.
New polished aluminum rims.
New brake pads.
New sprocket (32T) and lock tabs.
True and balance.
Dunlop K70.
Front Wheel will undergo the same treatment.
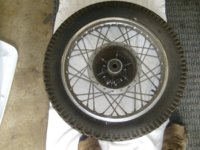
Original rear wheel
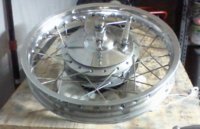
Restored rear wheel
Disassembled, cleaned and inspected.
Polished rear brake parts.
New bearings and seals.
New polished stainless steel spokes.
New polished aluminum rims.
New brake pads.
New sprocket (32T) and lock tabs.
True and balance.
Dunlop K70.
Front Wheel will undergo the same treatment.

Original rear wheel

Restored rear wheel
jones5944
XS650 Enthusiast
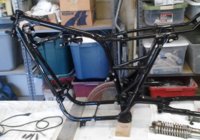
Began chassis re-assembly:
Cleaned all overspray from mounting points and threads.
Cleaned and inspected all nuts and bolts.
New tapered bearings in steering head.
New bronze bushings in swing arm.
New grease zerks in swing arm bolt. Opened up holes for better grease flow.
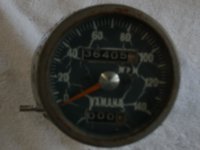

While waiting for front end parts I am dismantling the speedo and tach and will clean and install new face graphics.
vr3506
vr3506
Where did you get those speedo and tacho graphics from?

