TimeMachine
SeventyEighte
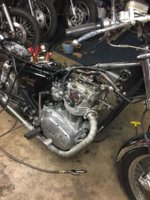
Get chrome dome nuts that have the correct thread pitch ? M10 = 10mm × 1.25mm pitch ? Check the pitch you need I can't remember.. 1.25 , 1.5 ??
A2 is the thread class for English threads (but that's external so ?), metric thread class is like 6H/6g. M10 x 1.5, or M10 x 1.25, or M10 x .75 are your standards. You probably just got the wrong pitch. Sometimes MikesXS will provide the thread information. Sorry I don't have the answer for your exact need/applicationBought a 10 pack of domed M10 nuts to replace the rusty 4 on my exhaust header clamps. They don't fit - rats. They screw on a few turns but that's it. Pack says M10 - A2 if the A2 means anything. Can anyone tell me what I should get please?
1.25 pitch is hard to find - that's why they cost $$$ from the moto guys one at a time. 1.5 thread pitch is what you get from mcmaster etc in 10 packs.
Bought a 10 pack of domed M10 nuts to replace the rusty 4 on my exhaust header clamps.
harbor freight sand blaster is only as good as the cfm s on your compressor. That's why they are always on craigslist - we all thought we were saving money by spending $100 on a blast cabinet only to find out we need to spend another $2000 on a new compressor.
 . Now the liner was poured in and spread around in the tank. Drained excess liner. I'll do that a time or two more and the instructions says to let it dry for 4 days in a well ventalated area
 . So Friday I can go rideing again?!

let it dry for 4 days in a well ventalated area
 Your probably right....