View attachment 132419
http://www.xs650.com/threads/frozen-17mm-rotor-nut-removal.53676/page-3#post-576194
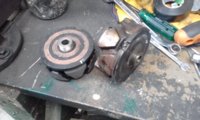
I’m moving my thread over to the Tech section - note: heed Gggary’s advice and check all components. My rotor was shot so I ordered an new one. I didn’t check my reg/rec because I replaced that a few years ago (at the time my rotor was registering 5.0 ohms). I should have. I may have gone PMA if I found what I did today earlier.
Question: can I test to see if my reg/reg is shot when it is disconnected? Or maybe I should fix the TC Bros connector and then redo Step #3?
What would you do?
Current situation is new rotor in, tested green wire to ground and the volts did not jump. BUT when I opened my e-box I found a few fried wires Where the stator connects to the REG/REC. The melted/loose wires are on the TC Bros. Connector that I used to bridge between the stator connector and REG/REC connector.
I’m guessing that this wire shorted out, and then my rotor overheated this Summer/Fall and then failed.
")