Master Cylinder Questions

YamadudeXS650C

Central New York XS650
Top Contributor
Messages
2,721
Reaction score
11,078
Points
513
Location
Syracuse NY
I'm rebuilding the MC of my '75 RD350 and it is identical or very similar to my '75 and '76 XS, and the rebuild kits apply to both models. Its been quite awhile since I rebuilt one of these, so my memory fails me. Can't find answers to my Q's in any of my manuals, and the tech section thread is missing many of the photos, etc, etc, so I would very much appreciate some replies to my questions.

As you can see, the old parts configuration is different than the rebuild kit.

masCyl 001.JPG


My Q's have to do with the internal parts:

I have already mounted the plunger #2 onto the spring.

> I seem to have the order correct, yes?

> This thin disc, #3: Altho it will be captured by the plunger, won't it scratch the bore? Or will its composition (copper?) make it safe? Whats with the black sooty stuff covering it? Should I clean it off?

> I have always used brake fluid to re-assemble these MC's, but this paste is included in the kit. Is it a better assembly lubricant?

masCyl 004.JPG


Thanks ahead of time.
.
.
 
Here's a pic of the Yamaha XS manual...

MVIMG_20171228_183120.jpg

Order looks right.
Your disk is called a shim in the Yamaha manual. No side loading on it, so it shouldn't bother the bore.
Those pistons are definitely different. Not sure if that's a problem or not.
I always use brake fluid too, so I don't know about the grease.
If you're using Firefox, you can install this Photobucket fixer add-on and you'll be able to see all the Photobucket pics in the tech section.
 
Here's a pic of the Yamaha XS manual...

View attachment 111307
Order looks right.
Your disk is called a shim in the Yamaha manual. No side loading on it, so it shouldn't bother the bore.
Those pistons are definitely different. Not sure if that's a problem or not.
I always use brake fluid too, so I don't know about the grease.
If you're using Firefox, you can install this Photobucket fixer add-on and you'll be able to see all the Photobucket pics in the tech section.
Thanks Jim,
I'm using Google chrome, and I'm studying the PB fix, just haven't done it yet. I'm wary of fixes.

My many manuals dont include that particular diagram, so your reply helps alot.
How about that black sooty stuff covering the disc? perhaps a corrosion preventive that should be cleaned off?
 
Last edited:
Cleaning it off definitely wouldn't hurt. If it were me, I'd also polish the edges just to make absolutely sure it doesn't scratch the bore.
 
Going from memory here, so take it with a grain or a hundred of salt but...

That looks like the rebuild kit I got from MikesXS.

Complete crap. Never got it to work in my master cylinder. Shitcanned it, cleaned up the original and put it back in.
 
Complete crap. Never got it to work in my master cylinder. Shitcanned it, cleaned up the original and put it back in.
Worst case scenario... use the new seals with the old parts (cleaned up of course). If you go that route, let me know. I'll share a trick I know for getting that cup seal off the new piston and on the old one without damaging it.
 
Last edited:
I finally found the answers to my questions online.
The shim is indeed made of copper, and its metalurgic softness relative to the bore means that it will have a negligible potential for damage to the bore.
The black coating is an anti-corrosive which must be removed .
Thanks for the replies.

.
 
Jim, in Entry 2 above your diagram shows Number 3 pointing to a black seal in the middle of the metal piston. Do you have a method for removing these and putting a new one back on without causing damage?

Thank you.
 
Here's a pic of the Yamaha XS manual...

View attachment 111307
Order looks right.
Your disk is called a shim in the Yamaha manual. No side loading on it, so it shouldn't bother the bore.
Those pistons are definitely different. Not sure if that's a problem or not.
I always use brake fluid too, so I don't know about the grease.
If you're using Firefox, you can install this Photobucket fixer add-on and you'll be able to see all the Photobucket pics in the tech section.
RE the Yamaha manual drawing. I would say that 2 is the piston. 3 is the piston cup. 5 is the cylinder cup.
 
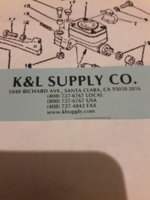
Here is a company which was great to work with on my MC rebuild View attachment 111313

K&L is often a lifesaver with old bikes. I'm often astonished at what they have.
K&S also has some hard to find items.
If your local shop has a reasonably decent parts counter, ask if they have catalogs for either of those companies if unavailable elsewhere.
 
On my SH the assembly is almost identical to that in Entry 2 accept for the shim. Instead the left end of the metal piston component has 3 small holes drilled in it at 0, 120 and 240 degrees and centrally riveted to it is a small daisy shaped reed valve. This all pushes directly against the piston cup so the reed valves are forced closed when braking and open when the lever is released.

I am guessing that the shim is a cheaper replacement for the riveted daisy shaped reed valve????
 
Jim, in Entry 2 above your diagram shows Number 3 pointing to a black seal in the middle of the metal piston. Do you have a method for removing these and putting a new one back on without causing damage?

Thank you.
Paul,
I do. On a lycoming engine, the crankshaft flange is about 5" in diameter. The journal the oil seal rides on is about 2.5" in diameter. You have to stretch the seal around the flange. Per Lycoming Service Instruction 1303, you boil the seal in water for 5 min. and then quickly stretch it around the flange. Boiling it allows the rubber to stretch out to twice it's length.... without breaking. I'm guessin' that will work for that cup seal also. I'd bet that's how it's done during manufacture.
 
Here is a company which was great to work with on my MC rebuild View attachment 111313

K&L is often a lifesaver with old bikes. I'm often astonished at what they have.
K&S also has some hard to find items.
If your local shop has a reasonably decent parts counter, ask if they have catalogs for either of those companies if unavailable elsewhere.

Well good to hear people have had good luck with there MC kits. I purchased one for my 1100 but after using the carb kits and having nothing but failure I didn't use them. Later found out that there carb kits were junk and everyone always has issues with them......ended up getting all new mikuni jets and bike purrs like a kitten now.
 
On my SH the assembly is almost identical to that in Entry 2 accept for the shim. Instead the left end of the metal piston component has 3 small holes drilled in it at 0, 120 and 240 degrees and centrally riveted to it is a small daisy shaped reed valve. This all pushes directly against the piston cup so the reed valves are forced closed when braking and open when the lever is released.

I am guessing that the shim is a cheaper replacement for the riveted daisy shaped reed valve????
Paul,
The piston that came with my rebuild kit does have the 3 small holes. The copper disc does seem to be a simpler replacement design. I've seen kits for the same application come with no disc, and some that come with a thin copper washer. I got mine from Niche-Cycle for $19.20, free shipping, and it seems to be almost identical to the Mike's kit. I dont see any quality issues, so far. I'll report back on the outcome in the spring when I get this RD out of the winter workshop; Its stuck indoors at the moment.
 
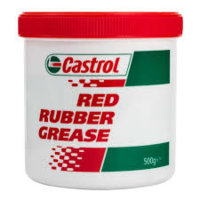
That red "paste" is probably red rubber grease. It's specially made for use on rubber. It's not petroleum based, it's made from vegetable oil. It works very well on rubber stuff. I particularly like it on the rubber bushings in the footpeg mounts. It makes them slide on and off really easy, and they'll still do so 6 months or a year from now when you go to remove them again.
 
Ah, red rubber grease. I believe you've got it, 5T.
This could have been an item in my "What the Heck is it?" thread.
upload_2017-12-30_8-11-58.jpeg
red-rubber-grease-spoonful.jpg

Last night I spent some time reading about various assembly lubes on racer/mechanic forums, but they tended to be controversial, with some mechanic always making a case against this or that product. Syl-glide, for example; lots of discussion about that at our website.

But this grease looks good; I'll read more about it.
Here is what is offered at redrubbergrease.com :

"Rubber without lubrication dries out, hardens, crackles and breaks. If affected by gasoline or if lubricated with petroleum-based grease, it swells, loses its shape and does not do the work as intended. When in contact with moving parts, it wears out from friction (an o-ring against a brake caliper or cylinder piston, a dust boot against a clutch plunger) and also may rupture. And, finally, during assembly, it is hard to push a piece of dry rubber into a casing and even more so to slide one rubber part onto another.

To help in all of the above situations red grease was designed, Castrol RRG being one of the best known brands. Being a vegetable oil based lubricant this grease does not harm rubber and can be used for its protection, lubrication and preservation. It can also be a great help during assembly of units containing parts made of natural or synthetic rubber and even plastic (installing bushings, for example).

Because of a unique combination of two of its qualities: natural rubber compatibility and brake fluid compatibility the main use of Red Rubber Grease is in hydraulic brake/clutch applications.

Red rubber grease uses.
Because of the qualities mentioned above Red Rubber Grease it is ideal for use in hydraulic systems, namely, hydraulic brakes and clutches or shock absorbers, pneumatic systems containing rubber parts (o-ring, seals). For this reason a sachet of the red grease comes as a standard part of quality brake/clutch and motorcycle fork oil seal and dust seal repair kits.

In contrast to regular automotive lubricants that are petroleum-based, red rubber grease is vegetable oil based (red dye is added for identification purposes) - this is the reason why it's "rubber friendly". Being that, RRG can be used where ever natural rubber is used in the car (see some applications mentioned on this site.)

Here is a comprehensive list of RRG properties:
  • Fully compatible with natural and synthetic rubbers
  • Compatible with brake fluids and some hydraulic oils.
  • Rust inhibitor (protects from oxidation and rust).
  • RRG is water resistant.
  • Hight temperarure. The grease can be used in applications with temperatures up to 210-230F. It will not melt and will not contaminate brake pads.
  • Petrol resistant. Although it will get contaminated in contact with gasoline, but still it will protect rubber parts from it.
  • High chemical and structural(mechanical) stability.
  • High resistance against water washing (will stay on after a rain, or car wash).
  • Has high wear protecting quality.
A few tips to keep in mind while rebuilding brake calipers.
To make the assembly of parts easier and ensure their long life, use red rubber grease for lubricating all rubber components of the calipers. Sometimes a sachet of red rubber grease is provided by the manufacturer together with the caliper rebuild kit. Most of the time the amount of grease provided is not enough. We recommend buying 1 ounce can of red rubber. This amount is enough for the job and you will not be tempted to use old grease and, probably dirty by then, if you buy a large can.

-brake-caliper-seal-smeared-with-red-rubber-grease.jpg
Lubricate piston seal with red rubber grease.

build-brake-caliper-smeared-with-red-rubber-grease.jpg
Smear inside of the caliper with grease.

rake-caliper-piston-smeared-with-red-rubber-grease.jpg
Smear some grease on caliper piston.

e-caliper-dust-boot-smeared-with-red-rubber-grease.jpg
Pack the dust boot with grease.

Now you are ready to start the assembly. Here, we are putting together a brake caliper from Triumph GT-6.

Insert the seal into the grove of the caliper bore.

Push the piston inside the caliper bore. We recommend to do this with your hands. Using a C-clamp or some other device to force the piston into the caliper may jam the piston and damage it or, alternatively, damage the walls of the caliper or piston seal or dust boot. Using rubber grease will make inserting the piston into the caliper very easy with your hands. Just push it down gently and make sure it is square in the bore. Once, the piston is half way in, place the dust boot around the piston and inset the dust boot lip into the grove in the piston. (By the way, be careful when puling the pistons out of the caliper during disassembly and don't damage the lip of the piston. A damaged lip may not seal well or, if it has sharp burrs it may rupture the dust boot.)

buld-brake-caliper-finished-with-red-rubber-grease.jpg
Push the piston in.
Wipe off the excess of grease from the caliper, dust boot and the piston. The job is done."
 

Attachments

  • upload_2017-12-30_8-11-58.jpeg
    upload_2017-12-30_8-11-58.jpeg
    9.5 KB · Views: 330
Last edited:
I have not used red rubber grease except the packet found in some kits, and tend to use a bit of brake fluid to assemble brake parts but whats up with those "slathering with the stuff pics" Looks like the butter scene from Last weekend in Paris.

ichiban moto cards.jpg
 
Last edited:
Back
Top