My Top Tip today is...

I recently replaced my alternator rotor with an exchange off-the-shelf rewound rotor. I was curious to see if the TDC marks would still line up correctly so made a simple tool to allow me to find TDC:

Step 1:
Took an old spark plug and cut off the earth strap. Then placed the plug in the lathe and trimmed off the shoulder that holds the porcelain in placed and knocked the porcelain out by gently tapping from the spark gap end.
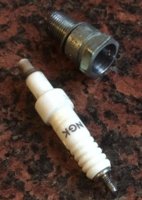
Plug.JPG

Step2: Bored the metal body out a little to accomodate my calipers and tapped and fitted a 4mm brass screw.
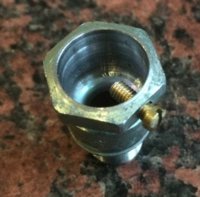
Socket.JPG

Step3: Securely screwed the plug body into the spark plug hole and inserted the calipers. Tightened the brass screw gently so the calipers would not shift easily. Rotated the crank close to TDC and inserted the caliper until is gently touched the top of the piston. I noted the depth, withdrew the calipers then rotated the crank slightly and took another reading. After several readings and minor rotations I found TDC and it lined up perfectly with the TDC timing mark for the old rotor. The following photo shows the assembly minus the engine.
Complete.JPG
 
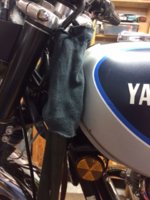
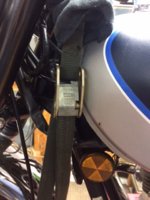
When I have my bikes on the table, especially those without a center stand, I use tie downs to keep the bike upright. I needed to be aware of the buckles getting too close to the paint so I cut up an old pair of my wife's socks and slid them over the buckle. The top is held by a small zip tie.
IMG_1796.JPG IMG_1797.JPG
 
OK guys - very impressive Top Tips indeed!!

Here is my assessment:
  • Paul Sutton - very cool - and a brilliant adaptation of a caliper and a spark plug!
  • KC120 - low-tech, but a superb use of sporting goods - and you really made me snort out loud with the "core sample" remark!
  • ThatXS650Guy - excellent adaptation of ladies clothing for use in the garage - well done indeed! (PS - my cafe bike will have the identical XS750 tank)
Super job guys - keep 'em comin'!

Pete
 
Totally concur. My other ride is a Honda ST1300 and it has brakes that are linked (front & rear) AND it has ABS.

That thing has more hydraulics than the Space Shuttle with pipes and hoses and valves and manifolds everywhere. The clutch is also hydraulic - in fact, it seems that about the only major system that isn’t hydraulic are the turn signals. All of this stuff is reliable and works like a charm - BUT - the bike is 11 years old and Honda recommends flushing the fluid every couple of years because brake fluid is hygroscopic (it takes up water from the atmosphere) and things will corrode eventually. I changed the clutch fluid last year and it came out looking like something you’d find in your hanky if you had a head cold.

Anyhow, with all those hydraulic lines and components, bleeding the clutch and brakes is.....a challenging multi-step process but with one of those little vacuum pumps, it’s a piece of cake. Highly recommended.
 
Last edited:
I occasionally use a vacuum pump but honestly I normally don't use it for final bleed. The thing about vacuum pumps is that they suck in air through the bleeder valve threads, you will endlessly chase your tail til you realize that's where the bubbles are coming from.
 
I occasionally use a vacuum pump but honestly I normally don't use it for final bleed. The thing about vacuum pumps is that they suck in air through the bleeder valve threads, you will endlessly chase your tail til you realize that's where the bubbles are coming from.

Agreed Gary. I frankly don't see a huge need for a vacuum pump on a bike with a system as straight forward as the XS650. Basically, its a straight drop from the front master cylinder to the caliper. Someone once suggested that if you just filled the system with fluid and left the top off the master - any air would bubble-up and it would pretty much bleed itself over several hours. There are of course two downsides to that:
  • you wouldn't want any moisture or other stuff getting into the al-fresco master cylinder and;
  • you really DO need to be certain that the system is bled and free of air.
Now, I'll bet that the rear disc brake on an XS650 Special is a bit harder to bleed because the system is essentially horizontal rather than vertical - even though it is a very short, simple system with relatively few components.

Nonetheless, for a complex bike or just about any car - those little vacuum pumps really help.
 
Any air getting sucked in past the bleeder valve is still headed for the pump's reservoir, not into the brake system.


I occasionally use a vacuum pump but honestly I normally don't use it for final bleed. The thing about vacuum pumps is that they suck in air through the bleeder valve threads, you will endlessly chase your tail til you realize that's where the bubbles are coming from.
 
Yes but no matter how much fluid you suck through the system you still SEE bubbles! :mad: Took me awhile to figure out where they were coming from.
Yes on a fairly simple system if you get all the parts arranged so the path is completely up hill to the reservoir it will self bleed in short order. It is sometimes necessary to remove and prop, wire up, parts to obtain an all uphill path. With normal handlebars and if you DON'T have the angled special type reservoir it can be done on the side stand handlebars turned full left. You don't have to leave the cover off. At the end squeeze and snap release the handle a time or two for that last little bubble in the MC bore. Hint; remove the caliper, and fully retract the piston into the caliper with a c-clamp, then pump it back out, for the best brake feel you've ever had. There's usually a small amount of air in the caliper that the bleeder doesn't catch.
And..... Occasionally during the season, leave the bike on the side stand, bars full left when you park it, squeeze snap the handle a time or two before you take it off the side stand.
 
Last edited:
The part I always found most difficult was to get the fluid to initially start flowing from the MC down the brake line. I would guess that a bit of suction would help this. Next time I will try a syringe and rubber tube.
 
Next time I will try a syringe and rubber tube.
If you have a big syringe, pressure fill it from the the bleeder valve. That's how I do it. Since gravity makes the air rise... go with the flow.... just give 'em a boost up the brake line.
 
I helped a buddy rebuild his 80SG M/C, caliper and install a stainless brake line a couple of weeks ago. Tried RG's trick of prefilling the brake line on the bench with a bent nose plastic syringe.
Ba da boom ba da bing, brake was bled in short order.
 
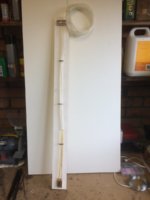
Yesterday I made a pressure gauge using 5mm ID PVC to balance my carburetors. Nothing special, just followed the ideas expressed by many on this forum. Tested and it was crap ...............
IMG_0040.JPG
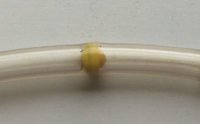
Clearly it needs some means of damping to remove the severe pressure fluctuations coming from the carburetors. So I took a couple of 6mm plastic bbs from a toy gun and drilled a 1mm hole through them. Threaded onto a fine screwdriver.......
Start.JPG
Wet the bb with a little WD40 and shoved it up the plastic........
Middle.JPG
repeated for both sides of the gauge and hey presto..........
End.JPG
success! The screwdriver kept the hole in the correct oriention and the gauge worked perfectly with a very stable fluid level reading.
 
Back
Top