Rotor Winding Tooling

A few days ago it got up to about 54°.... so I trudged my poor aching feet out to the garage for some work. Knife edge fixture base is 1-1/8" thick oak and uprights are African heartwood. Yeah.... stuff I just had layin' around. Knife edges are 3/8" 304-1/2H stainless... again, stuff just laying around. Epoxied two bubble levels for X and Y leveling and 3 bolts for a tripod leveling system. Put a rotor on it and it works a treat. :D

101.jpg


100.jpg


Also added the pointer to the timing mark checker...

102.jpg


It's always nice when ya can build stuff without spending money. :rolleyes:
 
Lookin' good, Jim. I love wood-based fixtures.
Thanks Steve. Yeah... I'm a metal guy at heart, but I love dabbling around with wood. Hence the African heartwood that was "just" laying around. :rolleyes:
Adding a magnet pointer.... might as well, just to be safe. I have about a half dozen for measuring and comparisons.
 
Ha! I love that! Fifty years from now some guy like Yamadude will have that displayed in his garage and be trying to get his friends to guess its purpose! It’s very nicely made!
Are you saying Jim won't be around winding rotors for us in fifty years?

Those tools look like some of the models built for submission to the US Patent Office I think I saw at the Smithsonian.
 
It's always nice when ya can build stuff without spending money.
Nice, Jim! Use what you've got, make what you need. My wife and kids accuse me of being a "hoarder". But when something needs to be fixed, I rummage through my "junk". If I don't have a replacement part, I have what I need to make one. :whistle:
 
Happiness is a fresh gas bottle... ;)
Last piece of tooling... I think. :umm:
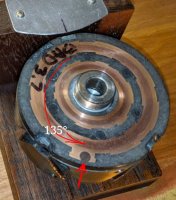
This is to index the rotors before I press 'em apart, and a guide as I press them back together. I didn't want to use a taper shaft for this because I'll use about 4-5 tons of force when I press them together. Might have to beat the rotors back off a taper... :rolleyes:

Scrounged a shaft that I turned down for a snug fit in the rotor. Drilled it for a pin to fit inside the woodruff key slot... cut the drill bit off for the pin and welded it in the shaft. The brass bushing is actually a Boeing landing gear scissor link bushing that I just happen to have laying around. After turning the edge off it, it's a perfect fit. Turned down an aluminum plug to an interference fit inside the bushing and pressed it in. Drilled the plug for the shaft and welded said shaft to the plate. Welded an index pointer to the plate and here we are....

7.jpg


Before I disassemble the rotor, I'll use a scribe to mark the top half of the rotor....

4.jpg


Then when I reassemble it, I just line up the scribe mark ...

5.jpg


Found another brass bush. to top off the stack in the press...

6.jpg


5 bucks for 100 new stainles screws and washers. I loves me a Bolt Depot. :heart:

8.jpg


Makin' brass springs on the Atlas. :rolleyes:

1.jpg
 
Last edited:
Back
Top