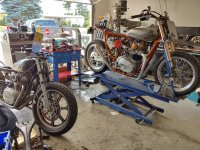
Also sorted front end components and drained my dual disk hydraulics to get some of those new brake lines like Jims and fresh brake fluid flush.

Looking good buddy! You could write a book on how to have an organized small work space!
Also sorted front end components and drained my dual disk hydraulics to get some of those new brake lines like Jims and fresh brake fluid flush.
Right under the footpeg; I lift the peg, then push down the sidestand. Honestly thought they were all that way. Just wish mine were longer, the bike leans way too far over on the sidestand.I may be wrong, but I sincerely don't think I have ever seen two XS650 sidestands that are exactly the same or that have the heel "peg" in precisely the same spot.
What I have seen is that the heel peg is carefully hidden directly underneath something else...and you have that too, so perhaps there are some identical stands around somewhere.
 could be lucky
Yep mines the same. Laid over way too much.Right under the footpeg; I lift the peg, then push down the sidestand. Honestly thought they were all that way. Just wish mine were longer, the bike leans way too far over on the sidestand.

Luck was with me as the bit grabbed the broken stud and simply wound it out the other end, leaving the threads untouched.
So pleased!
Great Lakeview!View attachment 148050.....
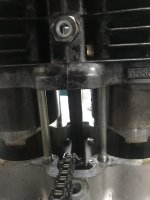
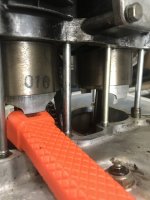
remove a sprocket bolt that had broken off in the hub......
Was figuring on having to do a helicoil but thought I would try to drill most of it out with a 3/8 bit to see if I could save it.
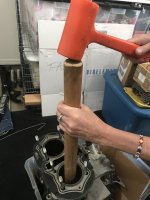
Penetrating fluid over night and today stacked a couple sprockets and my TX 500 cush hub spacer to help the drill go straight.
Luck was with me as the bit grabbed the broken stud and simply wound it out the other end, leaving the threads untouched.
...s.
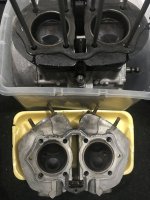
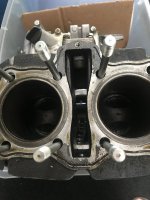
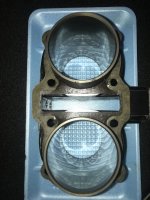
2X4 under the back of the motor so it points downhill. Cargo strap (or 2) around the jugs and hoist back up to level. Heat gun around the base of the jugs. when it's nice and hot, start smacking the studs with a mallet or large chunk of wood.Whats a good tip on lifting them off ?
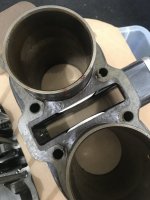
Yes, still wondering a minute why I can’t lift the cylinder off. It just seems perhaps the rings have bit into the cylinder bottom wear zone ?EDIT: never mind. I see you broke 'em loose.
If that's the case, shouldn't be enough wear to catch on. Sure you're not cocked to one side?bores look very good