-
Enjoy XS650.com? Consider making a donation to help support the site.
XS650.com receives a small share of sales from some links on this page, but direct donations have a much greater impact on keeping this site going.
You are using an out of date browser. It may not display this or other websites correctly.
You should upgrade or use an alternative browser.
You should upgrade or use an alternative browser.
What have you done to your XS today?
- Thread starter I am Carbon
- Start date
-
- Tags
- maintenance
I did something like that but I use the other connector that comes with the battery tender, the one with the clamps. Reverse the wires and you can plug that in for the USB charger and the voltmeter. I've got some pictures somewhere.Next up, I’ve been looking for a low tech solution for charging my phone when I’m on a longer ride. I didn’t want anything mounted to my handlebars. So here is what I got. A battery tender USB adapter and a 6’ long charging cable.
View attachment 151633 View attachment 151634 View attachment 151635 OK. So I thought I’d drop a update. My fuel lines suck. I bought period correct lines but way to thin. Almost like vacuum lines. So I have to re pipe it. My buddy gave me some genuine Honda line. I also broke off my shift lever bolt. When I popped it over for the first time Fred said “ your shift levers loose”. I locked the MikesXS lever down. Still loose. Took it off, put it in a vice, tapped it back on and began to tighten the bolt. It went right in and tightened up. Until I noticed there was more bolt to go until seated. Gave it some more and SNAP!. So I’ve had a minor setback. But I’m close.
Yeah I bought some of that crap line, off of EBay, the ads said the same thing , that it was genuine OEM fuel line. Wasn’t cheap either. Threw it right in the trash!
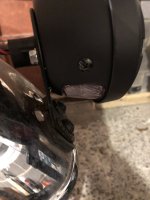
so my fuse kept popping every time I turned the key and traced it to an issue with the tail light.... removed it.. checked wires.. everything worked.. reinstalled and it popped... I figured out it was popping because it was bolted directly to the rear fender. so I used the rubber gasket off the oem taillight... is this normal? is there an issue with the taillight itself? LED if that matters.
Attachments
wrenchjohns
XS650 Addict
Your description tells me there must be a short to ground in the tail lite body. The body should not be hot.
john
john
Your description tells me there must be a short to ground in the tail lite body. The body should not be hot.
john
Thanks for the response. This is insane how all of these screws are hot lol. I guess don’t order your tail lights from amazon lol
Attachments
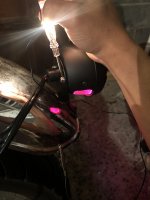
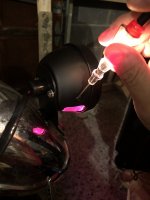
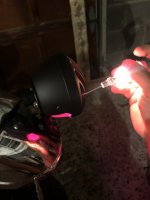
Wire color coding on Chinese electrics can be somewhat random, ground and tail light wires swapped?
I tried swapping the ground wire with the main power wire and it doesn't even light upWire color coding on Chinese electrics can be somewhat random, ground and tail light wires swapped?
pckopp
XS650 Addict
Replaced the S/R L/R unit on my 79 Special. Starts and lights.
About a month ago I left the key on. It killed the battery. I mean really killed it. Dead short. It was however, the cheapest no-name battery on Amazon so I won't do that again. I have had good luck with Yuasu. Did I kill the safety relay leaving the key on? Damage the coils?
Thanks.
About a month ago I left the key on. It killed the battery. I mean really killed it. Dead short. It was however, the cheapest no-name battery on Amazon so I won't do that again. I have had good luck with Yuasu. Did I kill the safety relay leaving the key on? Damage the coils?
Thanks.
Well, I did a couple of quick things today. Recently I had my XS2 out for a spin and later at home I noticed my rear brake switch just dangling by its wires. For some reason it doesn’t like to stay tight where it’s mounted. So I put it back and snugged it up finger tight and secured it with a skinny little zip tie. There! Nice and secure and nearly invisible.
View attachment 151615
Next up, I’ve been looking for a low tech solution for charging my phone when I’m on a longer ride. I didn’t want anything mounted to my handlebars. So here is what I got. A battery tender USB adapter and a 6’ long charging cable.
View attachment 151616
The cable has a nice protective loom over it.
View attachment 151617
I had to fiddle around a bit to find a nice roomy route to lay the cable.
View attachment 151618
Then I’ll just run the cord into my tail bag, where I’ll keep my phone while it’s charging.
View attachment 151619
This is all that shows from the outside.
View attachment 151620
When I’m not using it, it simply rolls up and stashes in a pocket, and since both of my bike already have the battery tender plug wires to my batteries. The whole charging system is portable so I can use it for both bikes, it’s just plug and play! Purchased the components separately on eBay , $15 all in.
View attachment 151621
I just wanted to post a little follow up on this phone charging set up. Today I went for a ride and I deliberately left the house with my phone down on battery power, it showed 66% charge when I left the house, I rode for about 40 minutes and got off to check my phone and it was now up to 94% , so I’m calling this one a success!
One observation, I had my low phone, plugged in and charging when I went to start my cold bike and I felt like my starter was lacking a little zip. It fired off just fine, but it felt just a little sluggish to me. In the future, I won’t plug my phone in until after the initial start. Also, once the bike had been started and was warm, no such drag occurred.
Photos?
My camera died so left with the choice of buying a new camera or buying motorcycle parts I chose motorcycle parts.
What I built was simple. I had to notch 2 pieces of aluminum angle, bend them at roughly 45 degrees and drill holes so that the same U-bolts that hold my crash bar in place hold the aluminum pieces. Then I cut a flat piece of aluminum that bolted on top of the 2 pieces of angle. Finally I made 2 flat braces which I probably could have avoided if I had the means to weld aluminum.
Had I made it of steel I could have welded it but then I'd have to paint it.

Chelatin' and Strippin'
Looking in the shed for a tank for the black Special, I chose this one that did not need bondo. Pretty clean inside, but I put two big jugs of metal rescue into it (the hole spacings on a 3 inch angle bracket are almost perfect to fit the petcock holes) and inspected the existing paint.
It was flaking off in several places and figured that would not be a good base for a fresh rattle can job, so found an old tin of my wife's furniture stripper and went at it.
Follow all safety tips, in addition cover your work surface with cardboard so the old paint can be cleared away without caking on your workpiece as you turn it around. Also sweep underfoot regularly so you are not tracking that stuff into the house.

An afternoon well spent since the tank has had metal rescue thoroughly sloshed around inside while I was stripping paint on the outside. A toilet tank flapper valve was ideal for keeping the good stuff inside while I used noxious stuff outside.
It's ready for a bit of sanding and then primer so long as the temp gets up to 10 or 15 degrees C.
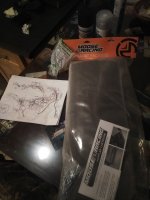
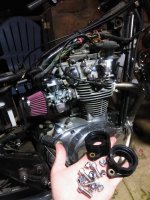
Grabbed some new hardware and carb intake boots.
Also repacked the muffler. It had nothing,it still sounds good , just a little softer but mean as fuck.
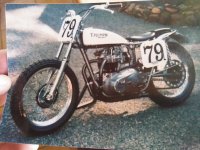
Also a picture of one of my uncle's bikes he lost in the fires in paradise CA. His Triumph RIP
Also repacked the muffler. It had nothing,it still sounds good , just a little softer but mean as fuck.
Also a picture of one of my uncle's bikes he lost in the fires in paradise CA. His Triumph RIP
Attachments
Last edited:
I had to fiddle around a bit to find a nice roomy route to lay the cable.
View attachment 151618
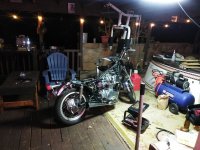
damn thats so clean... im afraid of tetanus when I reach for my battery
Front forks require very little for parts during servicing.
Are your fork seals leaking ? Are the dust boots which cover the fork seals sun cooked and or cracked ? Are your springs still strong enough or sagging ?
Likely you will need just fork oil, fork seals, maybe springs ?
Are your fork seals leaking ? Are the dust boots which cover the fork seals sun cooked and or cracked ? Are your springs still strong enough or sagging ?
Likely you will need just fork oil, fork seals, maybe springs ?
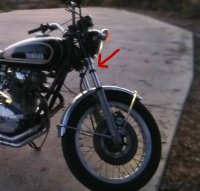
Springs feel good, they bottom out super easy. Like a blown shock on a car bouncy.
Do i need special tools to do this at home or should I take them off and have the shop in town do it.
The top boot that sits on the top of the forks are cracked and need replacing also. I'll take pics when i get home
You can see how far it food when I hit the front break by where the broken boot part is at in this pic.
Attachments
Last edited:
Similar threads
- Replies
- 32
- Views
- 1K