Ywain

Couple bees buzzed close to the bud.
The guzzi is long gone.
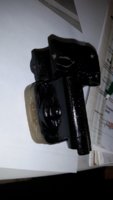
Recently did an all nighter to Cleveland and back to get this 2000 S3 Buell but a bud saw it and........
The trip to get the 79 special yesterday darn near ended with the van full to overflowing with XS parts; engines, frames, wheels, carbs etc etc. prolly only cold weather and oldguyitis saved me (so far) from loading up a collection.
View attachment 156253

View attachment 156254
It was on a "local" CL for stupid cheap crying to be rescued.
giphy.gif

Hmmmm....I just don't know which one I like the best...
  • the beautiful and rare bluey-green Buell sport-tourer;
  • the very pretty and fetchingly lived-in looking XS650 Special;
  • that poor forlorn kitty-cat that looks like it is snuggling in Cheryl Tieg's bathrobe.
Decisions, decisions.....
 
And the iggy install needed me to jump back to engine maintenance 101, the usual slog.
LH side; cover and the dreaded chain area de-glopped, clutch push rod seal, worm redone with good parts, new sprockets, chain. Starter gear cover removed, gears checked, missing starter remedied with a "rebuilt" unit installed. worn out "under the sprocket"chain guide replaced with serviceable part. Check clean straighten cover gasket surfaces. All bolt hole threads cleaned threads chased. Cover buffed
"some".
Cam chain tension, valves set. Tensioner wasn't quite the "right set" of parts. Still a bit WTF on that, should remove, check the inside stuff. Need to review the 5T tensioner schematics.
RH clutch cover removed, oil pump R&R'd, filters replaced. The usual stand on my head crankcase sump gasket scraping and all the other gasket surfaces carefully cleaned, file checked, ready for reassembly. "Normal" amount of flotsam jetsam in the side filter, cuz the sump filter was torn, who'd a thunk:rolleyes:? Sump filter replaced with a gggGary SS screen repaired unit. I had done SEVEN filter repairs "for the bins" a couple winters ago, this was the last one. Have I really been in 7 engines in the last two years? Good grief! Oil pump was decent, spent a bit of time with fine paper and stones, cleaning up the rotors and mating housing surfaces. Then clean clean clean. Someone had been in here before, bottom washer for tach drive MIA. Clutch screws had only minor "bodge marks". Some clutch rub marks inside the cover account for light aluminum swarf in filter housing. No "big" rubber chunks in sump or filter housings. This motor had been sitting a long time with no oil in it but no evidence of rust anywhere inside, so that bullet dodged. Still need to scope cylinders then do a compression check. I'm expecting (hoping for) acceptable numbers. Been oiling, hitting with rust buster, smearing grease on whatever I can reach, cam faces, valve stems, bores etc. before the close up, spin up.
This has been a normal how I find 'em bike: BIG project well underway, but ZERO basic maintenance done, then abandoned. Coincidence? I think not.
Will try to get enough done to set the Vape system, and see if she fires, then on to all the chassis work/mods to be done.
 
Last edited:
Wandering around in my usual desultory way, made it in as far as the starter clutch, squeezed the wishbone and started putting things back together Um did you know it's possible to install the bendix gear backwards? So.... while installing the clutch it seemed like it was getting pretty full. Came up with 8 plates and 7 steels. 3.0mm and 1.4mm hmmm. Had I mentioned there were marks where the pressure plate had been rubbing on the inside of the RH cover? So putting it back together with 7 plates and 6 steels. 79 2FO motor someone HAD been in before, some camming marks on the phillips head spring retainer bolts.
The partzilla 77 diagram has the "plain hub with 7 friction plates and 6 steels.
78-79 diagrams show the newer clutch assemblies used with the half plate and the ring, but don't think that's right.

77

77 clutch per partzilla.png


This diagram (incorrectly?) shown for 78-79
81 clutch.png
 
Yes, it's difficult to pin down exactly when that newer 6 plate clutch came along, at least from parts diagrams anyway. I think it was in 1980 but maybe some late '79's got it. Gary, with all the 650s that pass through your hands, you'd be the guy to tell us.

The cam chain tensioner assembly type can also be confusing. This is right around the time Yamaha changed from the no lock nut type D to the lock nut type E. I know the '80 models got the type E and I have seen it on many '79's too.
Well I don't always open the clutches but I tend to agree the fiches are wrong, 80 is the year they changed to the new type.

Funny you mention that, this bike's tensioner had the lock nut but I don't think it was sposed to the plunger was buried, I removed the nut and now it all seems right. Should really pull the assembly and look in inside. I need to find your most excellent tensioner guides through the years pics.
 
Took a look in the cylinders with the borescope, cross hatching all around. hmm maybe the top's been done. Plugs out, kicked and e-startered till oil reached the top end. Compression tests 140 both sides with the kicker in a kind of awkward position. Should be good. Got everything in on the LH side New chain, new clutch cable lubed with a mix of oil and WS2, LH cover back on. So that led to:
20200115_143443.jpg
lever drilled bronze/steel bushed and added a bit of JB weld to back up the bushing, this was REALLY wallered out. All back together on the bars, clutch action feels great. Was a clean the shop, deal with delayed maintenance, and little, nice to have done, projects kind of day. Hauled some parts back and forth from the shed.:whistle:.
 
Doing seals on the yzf600r forks. Remove calipers axle front wheel. Pretty straight forward had to sacrifice a 10mm hex key to make a deep 3/8 inch drive hex socket.
Loosened top clamp bolt, loosened cap a bit, 27mm hex. Then pulled drain bolt. Remove circlip from seal. Couple taps by sliding down lower tube popped the seal out. Remove lower bushing and fork comes apart. New seals on with DS2 and lithium grease, install, reassemble. No need to remove top tube from lower triple.
I recently upgraded my battery tools to Milwaukee M18 and the 1/4 hex impact wrench is a very nice tool for motorcycle work, with 1/4 3/8 and 1/2 socket drive adapters it (so far) is doing most bolts I find up to 12mm, 19mm head with no problems. nice control and fast to run out long threads. Adjustable torque allows bolt size appropriate initial tightening. (tool recommended).


yzf600R fork parts.png
20200128_163053.jpg
20200128_163112.jpg
20200128_163257.jpg
 
Last edited:
Been ponderin' a battery rattle gun. All my stuff is Ryobi and they're right proud of their impacts. What's a Milwaukee cost a fella?
 
Been ponderin' a battery rattle gun. All my stuff is Ryobi and they're right proud of their impacts. What's a Milwaukee cost a fella?
Still looking at a "real" M18 1/2" drive impact for lugnuts, rear sprocket nuts, tractor work, etc. This one came in a kit with a 1/2" drill that also has an impact setting. With 3 batteries, 12 18 volt charger and a carry bag $200ish Both are brushless motors. I'm a bit concerned about the 1/4" hex shanks under hard use but so far no problemo.
https://www.cpomilwaukee.com/milwau...7XBfIA5x_xmDCaekadwmMpDxK8vT6faRoCz_IQAvD_BwE
 
Last edited:
M18, If you see a real good deal make sure you get the latest generation BRUSHLESS motors not last years brush type motors.
 
A few different guys are running the M18 Milwaukee stuff at work. Everyone seems to be happy with them and they seem to be holding up good, heating guys can sometimes be a bit hard on tools. Prolly gonna make the switch when my Ridgid stuff starts crapping out.
Have used 'em a time or two and know the drill will spin a 3-5/8" hole saw through a 2x10 joist with no problem.
 
Ok been crapp'n on Jims lh switch thread working on ywain. Long as I'm up at the handlebars.
158084851840541696466.jpg
Might as well get all of it ready.
This has been on the shelf since the original littlebill MC overhaul thread.
1580848693592-304432164.jpg
The vape install needs a bunch of stuff done to go fire. But making some progress.
 

Attachments

  • 1580848573795-608518719.jpg
    1580848573795-608518719.jpg
    78.6 KB · Views: 206
Back
Top