Burger's Build

Yes 5T, when I saw the sprocket on the cam chain tensioner, I got worried for him. Haven't heard from him for 2 weeks. I hope he isn't too discouraged.

No issue on that, apparently the P.O's P.O. did the swap. I put a new style in which I had planned to do since the 750 kit from Heiden uses it (Got an entirely new tensioner assembly). I do have a 447 engine, no clue why he did that!
I am soon going to type up a big follow up post, but to be short the engine is in the frame and running! I am fighting a valve cover stud that fell out but once it's in I will run the engine to break it in correctly (only has 10 miles on it now) and give an update.
 
I'm long overdue for an update post... recently got fired so life has been hectic. Sorry for the wait!

Following Jim's post, I reassembled the head. I took the time to vapor blast it and I have to say I'm much happier with how it looks, here's a before and after.
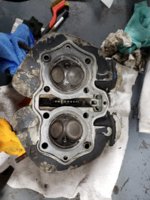
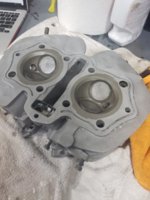
20200126_215633.jpg 20200216_115156.jpg

Here's a picture of it on with the sealer ready to be assembled
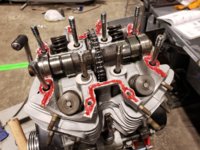
20200216_180346.jpg

Blasted the points cover as well to make them seal better
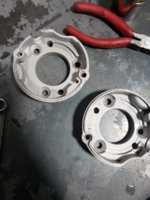
20200216_223846.jpg

After this I pressed in new seals with a block of wood in a vice just like Jim's guide.

Engine Reassembled and ready to go in:
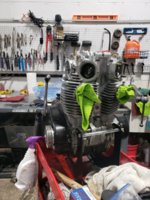
20200216_235837.jpg

And here it is in the bike

20200217_193025.jpg

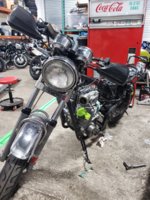
Time for the beauty shot:

20200222_161948.jpg

For the first start, I filled it with oil and kicked it until I saw oil on the rockers thru a valve cover.
Then I changed that oil, came out very good with some of the sealer I used (Since Permatex is anaerobic, I was pretty confident the sealer would dissolve into the oil even though I clearly put too much on the base gasket).
Added oil, started the bike and let it Idle for about 10/15 minutes. Dumped the oil, let the bike sit a day and torqued the head.
Dumped that oil, came out clear.
Added oil again, ran the bike for about 40 miles and dumped this oil. It was pretty metallic, but that's to be expected on a new engine (I hope):
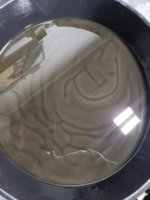
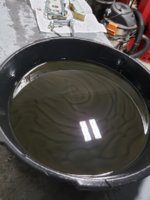
20200305_184419.jpg 20200305_184429.jpg

Now the bike is waiting on new tires. Tried mounting the rear today, and I pinched the bloody tube... wasted a day, I'm bringing the wheels to a shop in a couple of days. Went with Shinko 712s in 100/90 19 for the front and 130/90 16 for the back. This is what was already on the bike but they were terribly old so decided to change them.

I have to give a big thanks to Jim for his guide without which I doubt I would have undertaken this, and all the other members being so kind and patient with the comments. This is truly a great community. I'm not out of the woods yet, as I will explain in the next post...
 
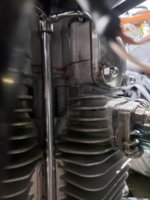
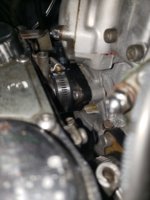
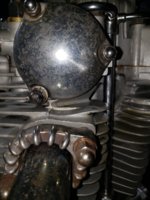
The problem now is one of leaky valve covers. I had an issue with one that dropped a pin which I posted about in another thread. Once repaired, I vapor blasted the mating surfaces of the valve covers and put a gasket on instead of the rubber seals. This helped a bit, but there are still a couple of leaks from the covers.

20200309_234032.jpg 20200309_234100.jpg 20200309_234301.jpg

Would love suggestions. The covers had sealer on them when I got them meaning this may be a longer running issue.

I torqued down the acorn nuts very lightly as I've read that they need only be slightly more than finger tight.
 
Added oil again, ran the bike for about 40 miles and dumped this oil. It was pretty metallic, but that's to be expected on a new engine (I hope):
As I recall, RobinC had the same metallic oil problem when he rebuilt his engine. I though it was a concern at the time... as I've never had that problem when I built an engine. But... Robins cleared up after 2 to 4 oil changes. So as long as it's not making odd noises, I wouldn't be too concerned yet. Just do frequent changes. As long as it improves at each change, you should be good.
 
I torqued down the acorn nuts very lightly as I've read that they need only be slightly more than finger tight.

3 Things:
1. Like valve covers on a car, yes, not too tight. Just evenly torqued/tightened all around. Then, if seepage appears, just tighten a little more and usually it stops. I use my shorty ratched and palm it like a T-handle.

2. Have you checked that the breather tubes are free? Was this bike sitting for a while? Mud dawbers love to built nests in small tubes. If your engine can't breathe through the tubes, it will breathe somewhere else and usually through the path of least resistance.

3. This is just me, but the gap between your exhaust flange and the head seems a little wide. I noticed that on mine once and closer inspection found that I put a new crush gasket on top of the old one. I find that at my age, (and I know I'm not near the oldest), it only gets worse. So I double check and triple check. When I can remember.:umm:

I'm experimenting with different positions and tightness. I cleaned the breather when I vapor blasted the engine, and it was if pretty good shape and breathed fine.
I did make sure to remove the old washers but I will try to torque it a bit more next time I'm working on it.
Thanks for the clues!
 
Back
Top