2F0 Tear Down - Junkyard motor

stanleyipkis

XS650 Enthusiast
XS650.com Supporter
Messages
88
Reaction score
85
Points
18
Location
Fort Worth TX
2F011.jpg 2F06.jpg 2F08.jpg 2F09.jpg 2F010.jpg 2F012.jpg 2F0.jpg 2F03.jpg 2F01.jpg 2F04.jpg 2F05.jpg 2F02.jpg

Hi Everyone,

Long time lurker, first time poster. I like puzzles and complicated things...

I have this 2F0-2059xx motor that I was told it was a junk yard motor. This past weekend I had this buttoned up to one of my frames and was able to get it to fire up but never satisfactory. It felt like the timing was off, I would get a back fire and felt like the left cylinder was not holding as well as the other. It would take 20 kicks to get a good start but it never idled and spat fire. I also determined that the Previous Owner had burnt their PMA before, they pilfered the ATU so that was never on there before. Also, the Cam Chain was extremely loose.

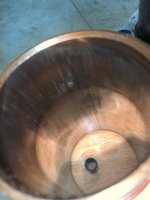
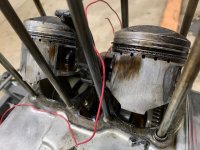
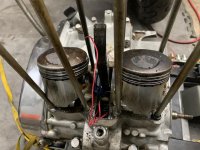
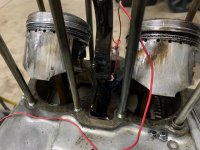
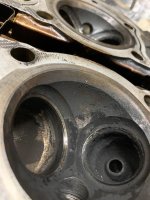
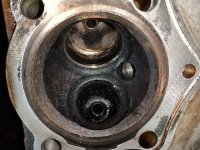
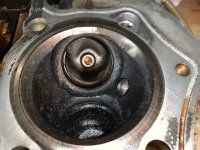
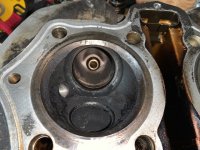
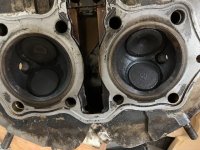
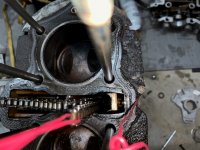
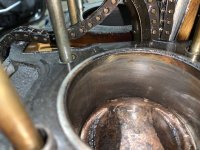
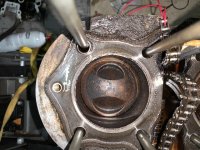
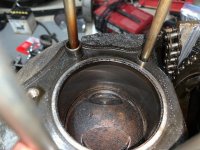
Now after tearing down I noticed there was a flat spot circled in one of the pictures, on both cylinders? How did this happen right outside where the Intake valve is supposed to chamber and detonate? I also noticed bad wear on the chain guard and the plastic pieces are gone, you can see the chain wear. Some wear on the cylinders but I can't tell if anything serious down there yet.

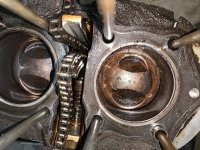
I turned the motor over with the kick pedal and was able to snag the last photos, now i can't get the pistons to come back up but then realized I have the chain off. I will need to reread the manual and research the forums again.

Please give me your feedback and let me know if you see something that I may not. I took the valves off and spun them on a drill but think I am thinking about opting to get new valves anyway. One of the valve retainer springs came undone after i pulled the valves, everything else looked normal. Will take more pics of the valves later.

I anticipate having to bore out the cylinders and likely have to get some larger pistons, rings too. Should look further and do anything with the crank?
 
Welcome. As a lurker, you already know about the wealth of information here.

The spots in the first picture look like a blown or leaking head gasket to me. Could be the head needed to be retorqued after sitting before attempting to start it. Doesn't look like any serious damage done at first glance.

Complete rebuild with all new gaskets and seals is a good idea. I wouldn't spend money on new valves if the old ones can be lapped in. Bore/piston/rings decision depends on the results of some careful measuring.
 
Thank you for your input DownEaster. I was thinking the head must have lifted to get like that.

I am a visual learner. I started with one xs in college, the timing was off and I then hung up my blue collar for a change in career and shelved that project. I put that xs aside for 10 years. In the last two years I started hoarding. I finally have my own place, I told myself I would get to wrenching again. I ended up with a second xs that just needed to be buttoned up and tuned. And then another motor which I intend to put into a hard tail frame.
 

Attachments

  • 8EC0DB39-3160-4D91-BFDE-414CDAFEBE38.jpeg
    8EC0DB39-3160-4D91-BFDE-414CDAFEBE38.jpeg
    229.9 KB · Views: 141
Just got back from the Head Shop, they said they wouldn't touch the valve head. The damage is outside of where they would normally cut, this would require welding and then recutting. They suggested to get a better valve head, it wouldn't be worth the labor/cost.
 
Just got back from the Head Shop, they said they wouldn't touch the valve head. The damage is outside of where they would normally cut, this would require welding and then recutting. They suggested to get a better valve head, it wouldn't be worth the labor/cost.
There's no damage there that I can see. What you're looking at is perfectly normal, from the factory head work. You can most likely just lap the valve back in and call it good... providing you get solid grey ring around the seat and valve face.
Here's one of my 2FO heads I haven't touched yet. Looks just like yours.
Give us some closeups of the seats.

zaa.jpg
 
That flat spot as you call it was put there for a reason. it gives you clearance to install the intake valve. Without that cut the edge of the valve would hit the edge of the lip.
On the cam chain, the front chain guide is an alloy base with a plastic insert that the chain runs against. The plastic is "glued" in place After enough years this glue loosens and the plastic fails. leaving the chain the run on the alloy. The fact the chain was very loose causes the valve timing to be retarded. this was probably the cause of the poor running.
If you cut the chain and let it drop down it will bunch up below the crank and bind it up so it won't turn. You will have to lift of the jugs and try to get ahold of both ends of the chain. Lift on the chain wihile rocking the crank with a wrench on the alternastor nut. This should let you lift the chain enough so it can br removed. Once out the crank will spin.
Ir you have repair manual it will have all the specs you need to determine just what parts are worn and need replacement.
Manuals can be found as downlloads or you can get them in book form.
Leo
 
I'd bet dollars to doughnuts that head is very usable/servicable. As Downeaster said, check tolerances carefully including valve guides which can be replaced. Also check head for warpage. I've found that the exhaust valve guides are typically out of spec on higher mileage motors (at least they were on my two recent rebuilds).
 
Thanks everyone. Here is where she sits now. I pulled the jugs off.
Going to use some easy off oven cleaner and pressure wash this one down while I gather myself and put together a an order list.
I am thinking I will just clean off the head and lap the valves. The pistons looks like i might have had some failed rings?
1.jpg 5.jpg 8.jpg 7.jpg 6.jpg 4.jpg 3.jpg 2.jpg
 
With it apart would be a good time to think of mods to improve things a bit. I found that Mike's 750 kit not only gives a performance improment but reduces engine vibes by a very noticable amount. You can do it in several ways. His complete kit with the new jugs thathave larger cooling fins. Or a set of sleeves to bore your jugs out for.
Perhaps his stronger rods. Welding the crank and such. A bit of polishing on the intake and exhaust ports to smooth the casting marks out.
Leo
 
If you want to go a less expensive route you could get a set of Crusin Image 2nd OS pistons. Rebuild you head. Maybe a 1st stage porting. XS 1 cam. Gonzo ignition.
 
I went with CruizinImage 4th over, 1.0MM instead of the second. The cylinder walls looked like it took a little bit of damage after pressure washed everything down.

I am now considering what cams and whether I want to consider the path of sending in for porting and polishing.
 
Back
Top