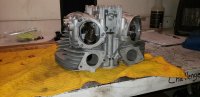
Did they come with the seal kit? Are they the same thickness?I'd imagine the red O-rings are stockers... Yamaha sells them. Damn shame I gotta wait to build it for justa couple of o-rings. I can't help but wonder what these four black o-rings are for if not for this...
-
Enjoy XS650.com? Consider making a donation to help support the site.
XS650.com receives a small share of sales from some links on this page, but direct donations have a much greater impact on keeping this site going.
You are using an out of date browser. It may not display this or other websites correctly.
You should upgrade or use an alternative browser.
You should upgrade or use an alternative browser.
Yam_Tech314's official build thread
- Thread starter G_YamTech_314
- Start date
They did come with the seal kit. They're slightly thinner. But the red ones feel awfully soft... That's why I'm not sure. Instinct says different color means different material.
Well if they came with the kit they should be compatible. Can't say about the size difference though. 
I just don't know what else on this motor would use 4 o-rings of that size... I can't think of anything.
Yes, the ones in the Athena kit are black. I never did a side by side size comparison, just figured they had to be the ones because there were 4 and they were the closest in size to the originals. I think the red originals might be silicone. You probably found red ones behind the points/advance housings too. The Athena kit gives you black ones for there too. They work but when I pulled those housings on mine after a couple years, the profile on those black replacements was deformed, now square instead of round, lol. They didn't seal back up properly and I ended up putting some good used original red ones in.
Thanks for the advice!!
I think I'm gonna use them since I don't wanna wait for $11 worth of 4 original o rings to ship to my house, and I definitely don't want to use the old ones. They're worn... As far as the points housing o rings... Well, I'll cross that bridge soon. Athena is what kit I have... I'm glad I can move forward thanks to your comment!
I think I'm gonna use them since I don't wanna wait for $11 worth of 4 original o rings to ship to my house, and I definitely don't want to use the old ones. They're worn... As far as the points housing o rings... Well, I'll cross that bridge soon. Athena is what kit I have... I'm glad I can move forward thanks to your comment!
Woah. I actually made LEGIT progress. Meaning... I did more than clean parts, and polish aluminum... I actually spent money and took a step forward!
I've been making detailed lists and writing reminders to check specific sections of the manual so I can ensure proper assembly. The rocker shafts required some coaxing with a light tap of a nylon hammer to fully seat them in their homes, but all of it went together snug and comfy. Assembly lube is in place, and I used a bit of coleman fuel on a rag to wipe up the excess.
Next step is gapping rings properly, buying replacement piston wrist pin clips, making a detailed list of step three, and getting that cam put back in. Things are moving along now.
Which brings me to my next question... Aside from cranking the engine by hand or turning the starter, how do you guys prime a freshly built engine??? There's gotta be a way to prime the oiling system before initial start up. I was debating letting it hang upside down for awhile so oil finds it's way to the top end, but with rings not being seated I worry about leaking out or blowing by new rings. The only other thing I could think of would be to pour oil directly into valve adjustment holes and hope for the best?
Attachments
Last edited:
I remove the plugs and either back the valve adjusters all the way off or remove them entirely. This unloads the starter so you can spin it for long periods. With it topped off with oil, spin the motor for 15-20 seconds or until you see fresh oil running down the rockers. If no oil, wait 2-3 min and spin it again for 15-20sec. Usually you'll start to see oil at the end of the first try or into the second. If you have to go more than 3-4 tries, there might be a problem.how do you guys prime a freshly built engine???
Does that risk any damage to the cylinders or rings? Or is the rpm low enough to be negligible?
It's a good idea!
Also, this makes it so you have to do a fresh valve clearance adjustment just before initial start up, as well as giving you a good opportunity to measure cam chain tension before initial start up. Come to think of it though, isn't the cam chain gonna be super tight at first until the engine is heat cycled?
They gotta start moving sometime... gooda' time as any.Does that risk any damage to the cylinders or rings?

Yes. Heat will melt the assembly grease out of the pins.isn't the cam chain gonna be super tight at first until the engine is heat cycled?
Please don't take this the wrong way, but at times you perhaps overthink possible problems. If you have oiled everything as you assemble the engine then that will do for starting it up. But as a further precaution, I took the plugs out, poured a teaspoonful of oil in both sides and kicked the engine over till I was sick of it, maybe fifty times, to prime the oilways before putting the plugs back and starting her up. Then you have a few minutes of oily smoke, of course. Then helmet on and start running-in. Now that can be a controversial subject.
No hard feelings! I take all sorts of critisicm. Perhaps I AM too picky, but for my first build I just really want it all to go well. I did good enough on some stuff, and exceeded my own expectations with other things. I'm still learning, always. I'll figure out how I wanna do it when the time comes!Please don't take this the wrong way, but at times you perhaps overthink possible problems. If you have oiled everything as you assemble the engine then that will do for starting it up. But as a further precaution, I took the plugs out, poured a teaspoonful of oil in both sides and kicked the engine over till I was sick of it, maybe fifty times, to prime the oilways before putting the plugs back and starting her up. Then you have a few minutes of oily smoke, of course. Then helmet on and start running-in. Now that can be a controversial subject.
Ain't that the truth!!!Then helmet on and start running-in. Now that can be a controversial subject.
I'm going to be trying to make some more progress tonight. I want to gap the rings to see where I'm starting... Maybe they'll be right from manufacturer?
I'm also going to create a step by step plan to follow the top end rebuild post in the tech section. I find that by writing things down I remember them better, and it allows me to double check everything by actuallyarking it off physically.
Is there any kind of weird tips and tricks/easily missed steps I need to look out for?
None that I can think of. Just follow my guide in TECH.I'm going to be trying to make some more progress tonight. I want to gap the rings to see where I'm starting... Maybe they'll be right from manufacturer?
I'm also going to create a step by step plan to follow the top end rebuild post in the tech section. I find that by writing things down I remember them better, and it allows me to double check everything by actuallyarking it off physically.
Is there any kind of weird tips and tricks/easily missed steps I need to look out for?
Gapped the new rings tonight just out of curiosity.
I'm gonna say this is something I learned today because I've never done it for real before. In school we gapped rings, but they were never new.
I don't know why I assumed the rings would be smaller than factory specs to start off, both wiper and comp. Rings for both cylinders are already within specs. I gave up trying to gap the oil rail rings because they move so easily that I can't really get an accurate measurement.
Going back to what @Raymond said earlier, I realized I DO see problems where there aren't any. I'm doing my best to learn how to diagnose possible issues, and really grow to understand the true inner workings of a real piece of technology.
In school, everything I ever worked on was dragged from a bench, torn down, and rebuilt with the same parts. None of the stress of real world technical failure looked over me. Given that this is my first REAL TIME attempt, I'm not allowing my muscle memory to do any of the work, otherwise I feel I'm not really taking this opportunity to learn.
Of the 10+ motors I've built in my life, this is my first real build, so forgive me in my inexperience, and my nonsensical questions or comments, I really just wanna cover every base in this, and get 100% of the experience out of this.
Maybe rings being in spec from factory is a common thing. Now I know... Lol.
Ordered new piston circlips from yamaha directly tonight. I read that they fit tighter.
More waiting!
I think this may have been an oversight way back when... Time for new wrist pins too... Inadequate oiling causing excessive heat on pins?? That looks like bluing to me.


Show us some closeup pics of the conn rods.... small end.
One pic without flash, right side conrod small end.
2nd pic is same rod but with flash


Next rod... How did I never notice these???
Must be that thing I just talked about... Experience.
Left side in same order. No flash, then flash.


2nd pic is same rod but with flash
Next rod... How did I never notice these???
Must be that thing I just talked about... Experience.
Left side in same order. No flash, then flash.
I've seen better.
Is there any discernible play when you rock the wrist pins back and forth?

Is there any discernible play when you rock the wrist pins back and forth?
Similar threads
- Replies
- 214
- Views
- 25K
- Replies
- 98
- Views
- 8K