SherpaT
XS650 Enthusiast
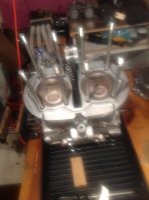
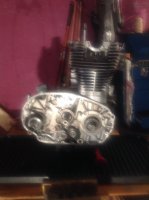
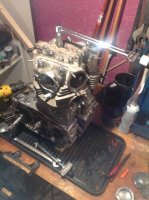
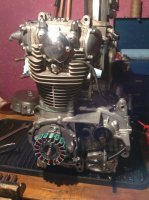
So the machine shop says the head is salvageable and is going to regrind it for 120 Canadian Kopeks. Not sure if its a good deal or not but not too many options and its a reputable shop. hopefully start putting this motor back together soon.
I cleaned the Carbs cleaned up and will be using some newer versions with one throttle cable and the plate joining the two. I'm waiting on the rebuild kits still though so thats on the back burner as well.
Today I started mocking up some side panels out of some aluminum oven liners. I want to build them out of aluminum plate of perhaps using an old road sign if I can find one to keep costs down. The local Home Despot has aluminum sheet but its only .25" and a bit thin for what I want and not cheap! I think the route I want to take for shape is very similar to the classic side plates on the 77' YZ250 using the original tabs as I really don't want to cut anything off. Call me a purist but I hate doing any irreparable damage to anything even though this thing won't be close to stock.
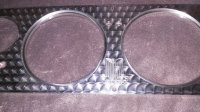
I also have an idea to incorporate this old dashboard piece I've been carrying around for years. I'm undecided whether to use it or not. I was thinking about using the ammeter and then rigging up a 12v cig. lighter/usb in the other hole just to charge my phone. If anyone knows what this panel is from it would be cool too. My plan is to make this thing mechanically sound this year with a rat bike feel and maybe make it pretty as I go. Honestly though I'll prob keep it ratty! Was thinking that I would try my hand at "Machine turning" the aluminum as well. Let me know what you guys think!


I cleaned the Carbs cleaned up and will be using some newer versions with one throttle cable and the plate joining the two. I'm waiting on the rebuild kits still though so thats on the back burner as well.
Today I started mocking up some side panels out of some aluminum oven liners. I want to build them out of aluminum plate of perhaps using an old road sign if I can find one to keep costs down. The local Home Despot has aluminum sheet but its only .25" and a bit thin for what I want and not cheap! I think the route I want to take for shape is very similar to the classic side plates on the 77' YZ250 using the original tabs as I really don't want to cut anything off. Call me a purist but I hate doing any irreparable damage to anything even though this thing won't be close to stock.
I also have an idea to incorporate this old dashboard piece I've been carrying around for years. I'm undecided whether to use it or not. I was thinking about using the ammeter and then rigging up a 12v cig. lighter/usb in the other hole just to charge my phone. If anyone knows what this panel is from it would be cool too. My plan is to make this thing mechanically sound this year with a rat bike feel and maybe make it pretty as I go. Honestly though I'll prob keep it ratty! Was thinking that I would try my hand at "Machine turning" the aluminum as well. Let me know what you guys think!