1976 XS650 restoration and rebuild, advice and help welcomed!

GeorgeOC

XS650 Junkie
Messages
513
Reaction score
118
Points
43
Location
California
Hello XS650 community, I already owe the forum a huge debt of thanks for all of your help so far. The time has come to try and contribute back to the boards.

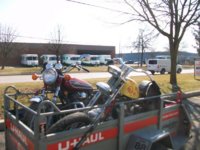
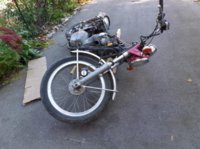
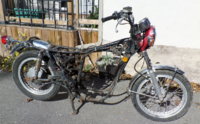
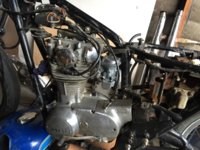
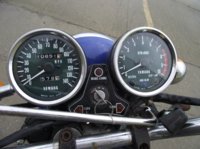
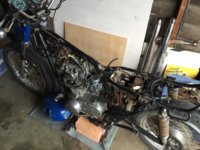
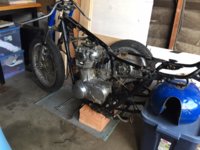
I am rebuilding and restoring a 1976 XS650, with roughly 11k original miles. The bike was purchased from a airport hanger in the midwest, and transported to Orange County. If I had to advise anyone out there, dont expect great things from motorcycle transport, unless you have a personal connection. That being said, I am excited to have the bike here with my hands dirty. I have it nrealy torn down. Clymer, Yamaha manuals acquired, and already in use.

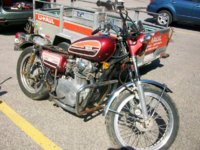
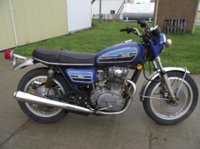
The goal will be to bring the bike back to tip top rebuilt running condition, with very mild dose of seat and handlebar tweaks, and retain the original 76' graphics.

Initially I had brought the bike to a local garage, with the goal of getting the engine running. After 10weeks, they said it had low compression. We knew that from day one! But sadly they then decided not to take on the work. 2.5 months lost.

I think, in the end they helped me dodge a bullet, and allow me to reach the goal I had in mind form the get go. To fully rebuild, clean, polish and learn the bike, tip to tail.

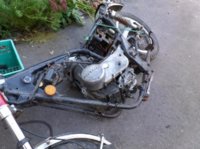
What I know now after tearing the bike down... Low compression, bad tank, needs new updated electrical/charging system, etc. Of course lots of elbow grease, sweat and tears.

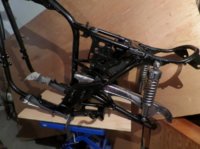
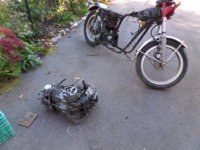
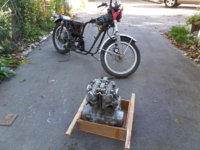
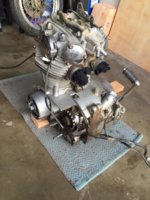
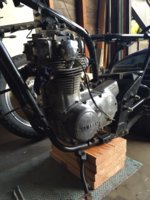
Within the next week I hope to have the engine pulled, and mounted on a newly created worktable. (thanks Troy Fabrications!)

Goals:
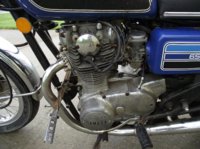
- 100% Top and Transmission rebuild.
- Relaced wheels
- Modern exhaust
- New electrical system

I know its a lofty list, and will definitely take time, and try my patience. But thats where all the reward and fun is. This is my first motorcycle, and definitely my first rebuild. So, any and all advice is well recieved. I am sure I will seek it!

Thank you in advance!
 

Attachments

  • IMG_5761.jpg
    IMG_5761.jpg
    299.3 KB · Views: 1,959
  • IMG_5764.jpg
    IMG_5764.jpg
    285.6 KB · Views: 968
  • IMG_6685.jpg
    IMG_6685.jpg
    256.9 KB · Views: 1,037
  • IMG_5768.jpg
    IMG_5768.jpg
    217.3 KB · Views: 913
  • IMG_6684.jpg
    IMG_6684.jpg
    248.7 KB · Views: 907
  • IMG_0010.jpg
    IMG_0010.jpg
    229.3 KB · Views: 858
  • IMG_0009.jpg
    IMG_0009.jpg
    219.9 KB · Views: 963
Last edited:
First, Welcome. Second, Why replace the wheels? Most prefer the spoke alloy wheels.
While the engine is out. Replace the worn swing arm bushings. With poor care they wear out quickly. The after market sells bronze replacement bushings.
Replace the steering neck bearings. The stock loose balls wear for the same reason the swing arms bushes wear. The aftermarket sells a tapered roller bearing replacement.
Replace the rear shocks. The stockers were not that great new. 40 years didn't help them.
read up on the Minton Mods for the front end. Easy to do and a good step up over stock.
The stock electrical system works very well with some proper maintenance. Go through every connection, cleaning and tightening. Switches can be taken apart and cleaned.
There are a few upgrades to the stock charging system that will greatly improve it's performance. The stock mechanical regulator used on your 76 isn't very reliable. Upgrading to solid state vastly improves charging. There are aftermarket combo reg/recs out there but going with a car reg and getting a new rectifier off Ebay can save a bunch of cash. $30-40 vs over $100.
There are many threads on engine rebuilding so I won't say much about that.
Upgrading from the stock points to an electronic ignition is a good idea. I use the Pamco, I started with the basic ignition then upgraded to the E-advancer unit.
Much easier to set up and keep running well than points. The e-advancer improves engine smoothness by eliminating the mechanical advance. All the necessary free play in that design leaves room for a lot of variation in timing.
Leo
 
Thank you Leo, big thanks. I definitely agree, the stock spoked wheels are a big part of what I would like to retain... I am hoping just to re-lace them, with new spokes, as the current ones are fairly corroded. Ideally, I will be polishing or powder coating the hubs and rims, with new spokes.

You mention a number of things that are 100% on the radar, thank you for confirming! Thanks for the Minton Mods lead, thank you!

- Rear shocks
- Swingarm bushings
- Neck bearings
- Pamco

I've kept all the original electrical components, harness etc, and will attempt to use as much of it as possible, but there are definitely some faulty spots in there, so will proceed accordingly...

Thanks for that frame up of the ignition, and electrics. That is probably my weakest DIY element. Thank you!
 
Good luck with the work. FYI, if you're looking for new parts, there's 650 Central here in California. He's an old school guy and is extremely knowledgeable. Whenever I need something, I usually just call him and do everything over the phone.

www.650central.com

209-533-4346

His name is Mike Morse
 
Thank you Uncle Meat, greatly appreciated. There will I am sure come a need for some new parts. The lead is most appreciated!
 
Hi George, I've got one of those too! Mine has 17k miles. After a ton of work it runs great. Swing arm bushings and rear shocks made it a different machine. I am running the stock points ignition. I just replaced the points and condensers, lubed the advance shaft and replaced the advance springs. I needed to clean out the tank and entire fuel system. The bike is very smooth and reliable. These are fun to ride and work on.
Would you be able to take a picture of the side stand bracket on the frame? Mine is broken off where the spring hooks on. I would like to weld back something so that I have a side stand but don't know what was there...

Gibson, thanks for the support! I'd be happy to take a photo for you. I can handle that within the next day or so. Ill send ASAP. Thanks!
 
Here is the starting point for the 76 I am resto modding. It was in pretty bad shape, so I dissembled it and brought it into basement. The frame is now rattle canned and it's going back together.
The anchor for the side stand return spring was chewed off on mine, (I think it used to be sort of a dowel with a big head to hold the spring from slipping off.) I ground the remnant flat so I could centre punch it, then drilled and tapped a hole so I could put in a bolt that was an equivalent. Works fine.
 

Attachments

  • 1-100_4873.JPG
    1-100_4873.JPG
    140.4 KB · Views: 642
  • 1-100_4878.JPG
    1-100_4878.JPG
    185.6 KB · Views: 661
Sorry for jumping in, but here is a picture of my last post's description to anchor the side stand spring. No welder needed.
 

Attachments

  • SAM_2364.JPG
    SAM_2364.JPG
    297.8 KB · Views: 596
  • SAM_2359.jpg
    SAM_2359.jpg
    55.1 KB · Views: 658
Thanks Lakeview! That's a nice red one. It will be good to have a side stand. I've been using the center stand since I got it running. I wonder what was there. Mine looks like a jagged broken point with a notch. Your fix may be the easiest...It is tough to fix though with the engine in the way...
 
Sorry for jumping in, but here is a picture of my last post's description to anchor the side stand spring. No welder needed.

All good guys! Keep it coming. Lakeview, what method did you use to remove the engine? Any special tricks? I am leaning on (pun intended) placing the bike on its side, and lifting the frame off...
 
Lay it down, take the last frame bolts off, lift frame away from engine. Works like magic!
 
Here are some pictures of engine removal. It has been written up before in this forum and searchable. We less experienced hobbyists with the generous help of the regular contributors on this site are standing on the shoulders of giants.
gggGary says using a 5 gallon pail for the bars is good, my paint was a bit rough so I used a milk crate, I have on ocassion laid down heavy cardboard to protect the floor from surprise oil releases; I put long handles on a recycled drawer to make it easier to carry the motor around, also you can strap it onto a two wheel mover's cart to take it down (basement) stairs.
 

Attachments

  • SAM_1839.jpg
    SAM_1839.jpg
    77.4 KB · Views: 680
  • SAM_1842.jpg
    SAM_1842.jpg
    92.3 KB · Views: 684
  • SAM_1843.jpg
    SAM_1843.jpg
    79.4 KB · Views: 718
  • SAM_1845.JPG
    SAM_1845.JPG
    288.6 KB · Views: 649
  • SAM_1846.JPG
    SAM_1846.JPG
    276.5 KB · Views: 707
  • SAM_1847.JPG
    SAM_1847.JPG
    238.4 KB · Views: 641
Here are some pictures of engine removal. It has been written up before in this forum and searchable. We less experienced hobbyists with the generous help of the regular contributors on this site are standing on the shoulders of giants.
gggGary says using a 5 gallon pail for the bars is good, my paint was a bit rough so I used a milk crate, I have on ocassion laid down heavy cardboard to protect the floor from surprise oil releases; I put long handles on a recycled drawer to make it easier to carry the motor around, also you can strap it onto a two wheel mover's cart to take it down (basement) stairs.

Lakeview, thank you. This is a huge help. I will be taking that chore on today or tomorrow. I will send an update ASAP. And yes, your comments regarding the true knowledge base here is spot on to put it mildly...
 
Hi George,
it'll be a nice rebuild when it's done.
FYI, it's rare to see a tach that still has a red zone not sun-faded into white.
Perhaps carry a little sun-bonnet to cover the gauges when the bike is parked outside?
 
...Perhaps carry a little sun-bonnet to cover the gauges when the bike is parked outside?

Now, THERE's a good idea.

I carry a shop rag that I drape over the instruments.
Works fine, unless it's windy.
Then try to find some shade to park under.

Whutcha got in mind there, Fred? Does such a thing exist?
 
Hi George,
it'll be a nice rebuild when it's done.
FYI, it's rare to see a tach that still has a red zone not sun-faded into white.
Perhaps carry a little sun-bonnet to cover the gauges when the bike is parked outside?

That's a great tip. It also gives me some confidence in the history of the bike... Hopefully it wasn't abused too badly. In the disassembly I noticed some token dirt and grime, but nothing too bad so far...
 
Made some headway this weekend. Managed to get the engine out, and placed into a stand. I built a small workbench to put the engine on, but the varnish is still curing up at the time of this post. The Troy Fab stand is top drawer.

I used the 'tip the bike over' method and threw down a 2 foam gardening pads under the engine while I removed the final motor mount hardware. I was pleasantly surprised how easy that was. Go figure.

Next steps...

1. Engine tear down
2. Frame refinish
3. Powder coat hubs, rims.

A huge thanks to everyone that has lent their feedback and comment so far!
 

Attachments

  • IMG_0011.jpg
    IMG_0011.jpg
    272.2 KB · Views: 586
Last edited:
Back
Top