hey whats up i figured id give this a try. ive been going on this thread for a while now but stay quiet. found tons of info on these bikes that helped me in the previous bobber build but i wanna try a cafe racer which i never attempted before. i started this project a month ago and wish i had more progress pics. but heres what i got so far...

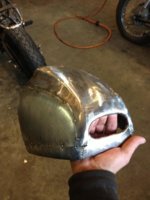
 a tail section made out of a gas tank. i put a rib in it to match the lines of the tank then i welded and soldered the seam so i have a nice joint. my welder ran out of gas and i used flux wire so the welds werent the nicest. and i dont have a tig welder right now. and everything will still have to be smoothed out on the wheel.
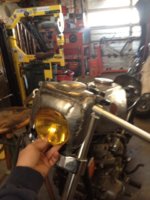
 front fairing i made out of sheet metal. still in the very first stages but its getting there

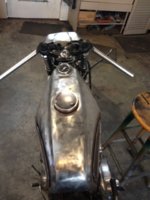
 top view of the gas tank. its a 1966 bridge stone gas tank. i think this is one of the coolest gas tanks ive ever seen
 i made a cover piece and welded and soldered it to the tank so the speedometer just slides in and is part of the tank
 i wanted to make this build different and made it a mono shock. i ended up bending up some tubing to finish off the frame. i might extend the seat supports a little out but im not sure yet. this angle works great with the shock. its all just mocked up and i have A LOT more work on this but ill keep posting progress pics. thanks for looking. will be getting back to the garage after the holidays because right now im off to mexico!

 a tail section made out of a gas tank. i put a rib in it to match the lines of the tank then i welded and soldered the seam so i have a nice joint. my welder ran out of gas and i used flux wire so the welds werent the nicest. and i dont have a tig welder right now. and everything will still have to be smoothed out on the wheel.
 front fairing i made out of sheet metal. still in the very first stages but its getting there
 top view of the gas tank. its a 1966 bridge stone gas tank. i think this is one of the coolest gas tanks ive ever seen
 i made a cover piece and welded and soldered it to the tank so the speedometer just slides in and is part of the tank
 i wanted to make this build different and made it a mono shock. i ended up bending up some tubing to finish off the frame. i might extend the seat supports a little out but im not sure yet. this angle works great with the shock. its all just mocked up and i have A LOT more work on this but ill keep posting progress pics. thanks for looking. will be getting back to the garage after the holidays because right now im off to mexico!


