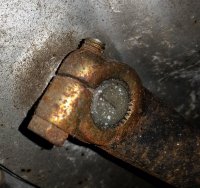
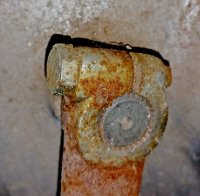
650 Rear Drum Brake Plates

'70-'83 XS650 Rear Brake Shoes

Drum diameter = 180mm
Shoe Diameter = 179mm
Shoe Width = 30mm

Yamaha OEM part #'s
148-25330-00
156-25330-00
168-25330-00
256-25330-00
447-25330-00
447-25330-01
4L0-25330-00
4L0-W2536-00
5R3-W253E-00
5R3-W2536-00.

Some aftermarket offerings:
Vesrah VB-225
EBC-514
MikesXS 29-3211
SOK-206 4L0-00 168
2FastMoto: # 2FM-09-2111GS

Replacing brake shoes.
No-brainer, right?
Perform the service routine on rear drum brake servicing, written by 5twins:

http://www.xs650.com/threads/how-difficult-is-it-to-replace-the-rear-drum-brakes.25632/

Then, just plop the new shoes right in there, and go riding.

Well, some of the aftermarket shoes could use a little closer inspection...
 
Last edited:
I have 6 sets of rear brake shoes for inspection and testing. One of those sets is a problematic pair of Vesrahs from member Machine, as noted in his thread:

Posts #110 to #201.

http://www.xs650.com/threads/79f-standard-rescue-in-progress.53829/page-6#post-578898

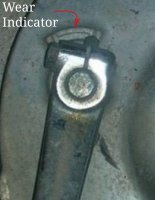
The latest XS650 models have a wear indicator on the brake cam, showing a useable range of lever travel of 45°.
XS650-BrakeShoeWearIndicator.jpg

The oldschool shop rule-of-thumb values for brake lever angles.

0°-10° = Clearance
10°-45° = Service range
45°-more = Replace

Some other bikes also have wear indicators like this, also showing a limit of 45°. After 45°, the shoes don't spread as much, but the lever moves much more, leading to the risk of overtravel jamming, and rear brake lock-up.

Some aftermarket shoes I've installed on other bikes in the past seemed a bit undersized, with a lot of free-travel in the brake lever, implying a reduced service life. Ideally, new shoes should make contact by no more than 10° of lever travel.

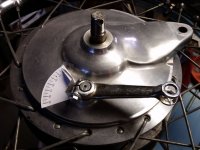
With that in mind, I made a protractor/pointer on my brake plate to test these 6 sets of shoes.

XS650-BrakeShoeTest01.jpg
 
Last edited:
The first problem I ran into was with the SOK brand #206 shoes. The shoes wouldn't fully seat on the anchor post. Viewing their anchor post seats, in comparison to a set of OEM shoes, shows rough casting, unmachined surfaces.
XS650-BrakeShoeTest02.jpg


Almost imperceptible, their unmachined seat arcs are just slightly smaller than the OEM shoes.
XS650-BrakeShoeTest03.jpg


Their positioning nubs are supposed to fit into a 12mm diameter notch in the anchor post. It appeared that they were bottoming out on the notch, holding them away from fully seating. Placing a 1/2" drill shank against the nubs confirms that they won't properly seat onto the anchor post.
XS650-BrakeShoeTest04.jpg
 
So, what to do.
I could easily open them up a little with a 1/2" cutter on the drill press.
XS650-BrakeShoeTest05.jpg


After cutting, they seated better, but still not completely.
Now they were being held away by the too-small radius of the larger opening.
Hard to see, but you can just make out the gap between shoe and post.
XS650-BrakeShoeTest06.jpg
 
I discovered that the shoes that I've been running on my XS1b for the last several years are an un-marked version of these SOK shoes, with the same anchor post fitment problem. Amazing, they work fine, no squeals. I had simply plopped them in there, like I've done for years, and never gave it a second thought. Well then, let's just take these 6 sets of shoes and measure the brake lever travels, as-is, without any further modifications.

Old shoes:
XS1B shoes -- Unbranded (SOK-206) - 14° - (bad anchor post fit)
TX650 shoes - Yamaha 148-25331-00 - 16°

New shoes:
MikesXS ----- 29-3211 (SOK-206) --- 12° - (bad anchor post fit)
CruzinImage - SOK-206 ------------- 10° - (bad anchor post fit)
Vesrah ------ VB-225 -------------- 10°
Vesrah ------ VB-225 (Machine's) --- 0°
 
Last edited:
Randy's (member Machine) Vesrah shoes were a tight fit. Could barely get them in the hub, and almost couldn't get them out. But, I got some good scuff markings showing where the interference is.
XS650-BrakeShoeTest07.jpg


Interference right at the cam end. If the shoe's cam-pad faces were ground down a little bit, they would probably fit fine.

So, cogitating on this now.

1- Grind down the cam-pad faces?
2- Build a shoe re-arcing rig?
3- Simply dress the high spots, a light skim, on the table sander?

The steel face inserts already look thin, so maybe no on 1.
To properly re-arc shoes needs more/thicker lining, maybe no on 2.
Laziness and simplicity pointing to 3...
 
Last edited:
So, cogitating on this now.

1- Grind down the cam-pad faces?
2- Build a shoe re-arcing rig?
3- Simply dress the high spots, a light skim, on the table sander?
Good news ! Maybe it will be nice to have that "slightly oversize" Vesrah shoe set just on the shelf waiting for a drum that benefits from turning ? (boring)
Hope so. Good follow up on this !
Thanks, Randy
 
XS650 Rear Drum Brake Cam and The Mysterious Dimple

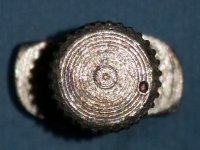
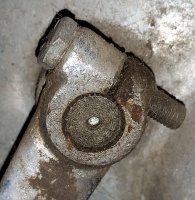
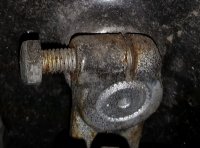
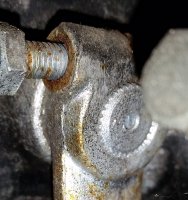
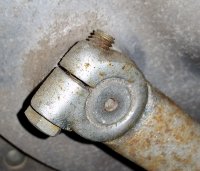
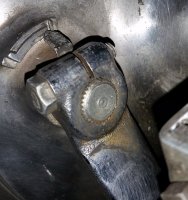
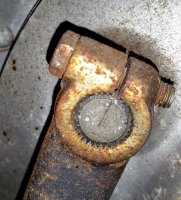
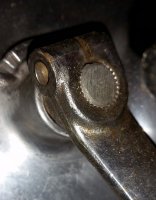
Many of you have probably seen the tiny dimple on the end of the brake cam shaft, and wondered if it has any meaning or significant importance.
XS650-BrakeCam01.jpg

Could it affect the brakes? Does it need to be oriented a certain way?

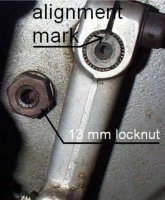
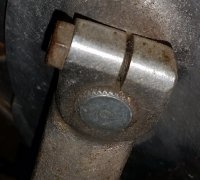
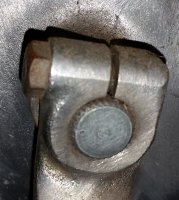
Back in the old shop daze, most motorcycle drum brake camshafts had some sort of indicator mark that was supposed to align with the gap in the brake arm, like in this picture of a BMW brake.
XS650-BrakeCam02.jpg

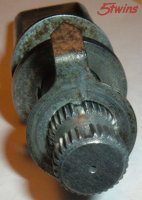
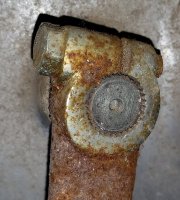
And, many had wear indicators and/or a missing spline, enforcing some sort of alignment scheme, like this later 81-83 XS650 brake cam.
XS650-BrakeCam03.jpg

But, our little Mysterious Dimple can end up either to the left or the right of center, no way to align with the gap in the brake arm. Strange. And no mention in the service manuals.
 
Last edited:
The challenge.
Determine if the brake cam is non-symetrical, and if the dimple aligns somehow with that dissymmetry.

I have 2 brake backing plates, 2 early 256 brake cams, and 3 sets of new shoes. All were used in various combinations for these tests, hoping for some degree of synchroneity in the findings.

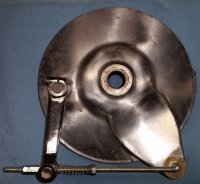
First, let's have a look at the XS650 rear drum brake layout.
XS650-BrakeCam04.jpg

During activation, the brake cam rotates Clockwise, and its rounded cam surfaces spread the pads of the brake shoes, expanding the shoes against the inner surface of the brake drum. The rear wheel brake drum is rotating Counterclockwise.
XS650-BrakeCam05.jpg


Friction on the upper brake shoe drives that shoe towards the anchor post, which reduces the force on the brake cam. This also has the added benefit of braking-boost, or servo-assist, as this shoe is being leveraged outward by that friction. This is called the "Leading shoe". Because of this "assist", Leading brake shoes usually account for about 60% of the total braking force.

Friction on the lower brake shoe drives that shoe towards the brake cam, which increases the force on the brake cam. This shoe will also be pulled inward by the friction, reducing its effectiveness. This is called the "Trailing shoe".

Now we look at the distances from the anchor post to the pressure application points of the brake cam. The distance length for the Leading shoe is about 5.4". The distance length for the Trailing shoe is about 6.0".
XS650-BrakeCam06.jpg


If we want the shoes to spread evenly and uniformly, the displacement travels of the brake cam lobes need to be different, by the same ratio as those distance lengths. In this case, the displacement travel rate of the Leading shoe's cam lobe needs to be 5.4/6.0, or 90%, of the Trailing shoe's cam lobe travel rate.

This 90% ratio is suitable up to about 20°-30° of brake cam rotation. Cam rotation beyond that will have the relative pressure distances becoming closer, reducing the need for brake cam dissymmetry.
 
Last edited:
I fashioned a way to measure the brake cam's lobes spread, or displacement values relative to cam rotation angle.
XS650-BrakeCam07.jpg


The lathe chuck has a degree wheel. A flat strip rides against the cam lobe, and a dial indicator shows the displacement.

Numerous measurements of the cam lobes of both brake cams, from 0° to 20° of cam rotation, revealed that one lobe produced about 90% of the displacement value of the opposite lobe, confirming that the factory did indeed produce non-symetrical brake cams. And, the Mysterious Dimple aligned with this dissymmetry.

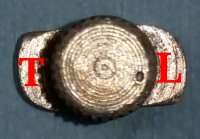
The Mystery Dimple indicates the slower spreading cam lobe, which would be the lobe for the Leading shoe.

Shown here, "L" for the Leading shoe, "T" for the trailing shoe.
XS650-BrakeCam08.jpg

The "L" lobe is inboard, toward the axle.
The "T" lobe is outboard, toward the rear of the bike.

Imperceptible by eye, we're talking tenths of a millimeter differences in the leading curves of the cam lobes.
 
Last edited:
To confirm this finding, I cooked-up a positioning rod from allthread.
XS650-BrakeCam10.jpg

Fitted to the brake backing plate and the brake arm.
XS650-BrakeCam11.jpg

With a degree wheel and pointer to establish various cam rotations.
XS650-BrakeCam12.jpg

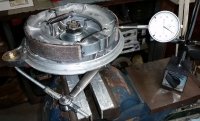
And rigged-up a way to measure brake shoe positions at those various brake cam rotations.
XS650-BrakeCam13.jpg

All 3 sets of new shoes, both backing plates, and both brake cams were tried, each cam tried in both orientations. A pic of one of the measurements.
XS650-BrakeCam14.jpg


Yes, this takes a while. I'm beat.
 
And the results?

In every test with the cam installed backwards, the shoes displayed eccentric arc circles (not centered about the axle), and dissimilar spread values, of about +/- 0.2mm.

With the cam installed correctly, those shoes stayed within 0.05mm of expected positions, concentric with the axle center, and symetrical expansion spreads.

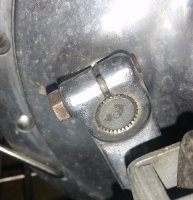
A properly installed brake cam should have the dimple inboard, toward the axle.
XS650-BrakeCam20.jpg
 
As a trivia factoid, 10° of brake cam rotation produces a 1mm increase in brake shoe diameter.

Now, for all those who scamper out there and find that their brake cams are installed backwards, a bit of discussion is in order.

If your brake shoes are new, or relatively new (as in not fully bedded or seated), it would be best to reinstall that cam as soon as possible. The way the shoes were unevenly positioning and expanding, the Trailing shoe is setting a bit further out, and expanding slower than the Leading shoe. This would put the majority, if not all, of the braking chores on that Trailing shoe only, for quite a long time, until it wears down enuff so the Leading shoe can start making contact. Long term reduced braking effectiveness, perhaps mushy feel.

If your brake shoes are worn-in and/or old, the brake lever arm demonstrating at least 20° of rotation, from the relaxed position to shoe contact, then both shoes are probably making full contact, and the expansion rates more similar allowing the Leading shoe to add braking effectiveness. At reshoe time, expect the lower/Trailing shoe to show more wear. This is when you really want to mark the shoes "top" and "bottom" if you intend to remove them, but not replace them. And, leave the cam in the backwards position. If the cam were to be reoriented at this late stage of the game, it's likely that only 1 shoe will be doing the braking...
 
Last edited:
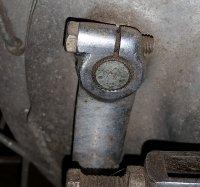
Very interesting and very nicely done, 2M. I took a look at the several brake plates I've used and most of their cams are installed backwards, lol. I guess that could help explain their poor or mediocre performance. But, my best working assembly, a '77 plate, is backwards too. I'm guessing that works good because the shoes are well bedded in. I was always puzzled by the inadequate performance I was getting from my TX750 brake. Technically, it should be a better, stronger stopper than the 650 because the drum diameter is 20mm larger and the shoes are 10mm wider, but it never was. Maybe this will fix it.
 
Thanx, 5twins. I'm also curious if reports of poor braking could be attributed to this.

I can't quite make it out in your pics of the 81-83 brake cams, but it looks like there may be dimples on those as well, possibly in alignment and agreement with having the dimple inboard, toward the axle?

Edit: I also wonder if other Yamahas of the period used the same dimpling, and are documented...
 
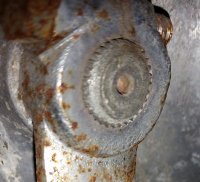
So, I checked out my '81-'83 "missing spline" brake cams, and also the couple early 2000's ones from XV650 V-twins I have. They all have very light dimples, much less pronounced than the earlier cams. If you look at the end of the cam from an angle, you can see the dimple .....

YRhMwgx.jpg


If you look straight on at the end, you can hardly see the dimple .....

rEoQHgG.jpg


And yes, it's position agrees with your findings. It is inboard, towards the axle.

By comparison, here's the dimple on my buddy's 1980 cam, much more pronounced and easy to see. And it also looks like he lucked out and installed it correctly, lol .....

eScif3j.jpg
 
So, I checked out my '81-'83 "missing spline" brake cams...

...And yes, it's position agrees with your findings. It is inboard, towards the axle...

Great, 5twins!
Looks like we got 'er licked.

Looks like I had one of those senior moments while grinding thru the data, and got the wonky shoe positions backwards in my head. With new shoes, and the brake cam installed backwards, it's the Trailing shoe that'll set further out, but travel slower. The Trailing shoe would be providing the only braking, and certainly give poor performance.

I revised post #34 to reflect this...
 
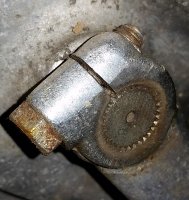
Pics from the herd, lots of early, some later, some I've gone through, all with unknown history. A few are duplicates as I was shooting while climbing through the jungle in the shed.
20190321_084500.jpg 20190321_084527.jpg 20190321_084314.jpg 20190321_084510.jpg 20190321_084551.jpg 20190321_084532.jpg 20190321_084337.jpg 20190320_141530.jpg 20190321_084604.jpg 20190321_084236.jpg 20190321_084113.jpg 20190321_084204.jpg 20190321_084138.jpg 20190321_084253.jpg 20190321_084247.jpg 20190321_084305.jpg
 
Back
Top