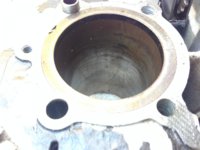
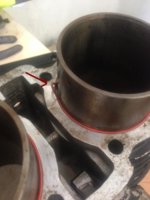
'71 xs1b conversion to cafe

Now we know why the camchain gave you such a hard time.

You didn't remove the camchain tensioner...

Funny, I went back to read up on this- the Yamaha combined service manual says nothing about this step, but the Clymer's does. Go figure. :confused:

Although the service manual does include breaking the chain as a step in the disassembly, so maybe that's why?
 
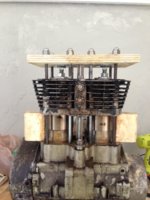
Might as well get the jugs loose and supported up on wood blocks. Lets you keep track of crank rotation and that the pistons are coming out together.

Would you mind going into this a little more please? What is the significance of keeping track of crank rotation?

I was assuming I would just whack each piston down a little. Go back and forth and work them both down?
 
this pic is for installing pistons but you get the idea. Just an old hand saying; usually just ONE piston is really stuck, it's easy to be torquing on the crank with one piston going down faster, Yeah I have been THAT GUY. :wink2: You will have to block them up with wood sooner or later,the crank will hit BDC long before the pistons come out of the bottom of the cylinders.
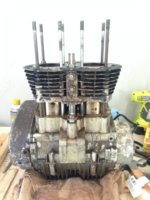
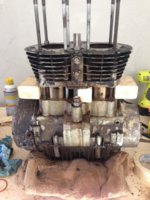
JugBlocks3.jpg
 
Got it, Gary. Thanks.

Well, I think I may have done something to complicate the process. I got a bunch of wood shims and got the jugs loose and thought to myself, I can just jiggle them a little more with my hands.

So I grabbed the jugs with my hands (see what I did there :D ) and wiggled them a little and suddenly they broke free and came up pretty quick and now they are stuck with the pistons at the top of their cycle. As I understand it, hammering on the pistons while they are at the top or bottom of their cycle is a big no no.

So I suppose I should just continue to wedge the jugs up and up, either with more shims and/or cradling the jugs off the table to the point where the weight of the motor now does the work...?

jugs.jpg
 
No problem support the jugs as mentioned use a wrench on the rotor nut so the crank isn't exactly on TDC and beat em out evenly. Note the piston domes are thin, a hollow in the wood piston beating block so the pressure goes to the edge of the pistons is a good thing.
 
Hi DQG,
it's time to jack it off.
make yourself two screwjacks out of a length of metal tubing, a length of threaded rod, a plain washer and a nut.
Put one each side between the crankcase and the barrel flange and ease the barrel upwards until the pistons emerge.
Optimum methodology is clamping a vise-grip on the top of the threaded rod to bear against a head stud to stop the rod from turning and using a ratcheting box-end wrench on each nut and clicking them in unison.
 
Thanks Fred and Gary for your input.

There may be a viable third method.

I kept staring at the jugs (pun not intended) and then I noticed the kick axle, then thought why not and put the kick crank back on and pushed it, and the whole thing went right back in.

I lifted it back out just enough to insert 2 x 4's all around and went back to incremental banging on the pistons.

So now here's where things stand:

jugsprop.jpg

I used my miter saw to create the concave shape of the 2 x 3 I am using to hammer on the pistons.

banger.jpg

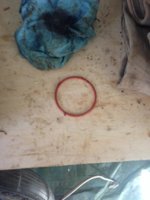
While giving the pistons a few good whack, this rubber washer mysteriously appeared on the workbench. :banghead: Where did it come from?

washer.jpg

I guess from this point on, it's a war of attrition. Gave both pistons a few good whacks, and liberal doses of PB blaster, going to let that sit overnight then repeat the whole thing again tomorrow.
 
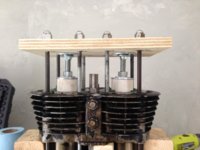
Well, after a few whacks that went nowhere, I decided to switch over to the screw jacks method as suggested.

jacks.jpg

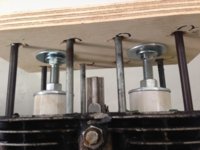
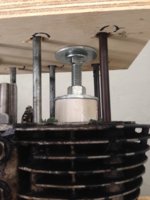
The following is a near-copy of the method used by slowmaintenance on his excellent thread with two minor modification, one is using 3/4" plywood with alternating grain layers (which makes it pretty hard to break along a grain line), and the other is using round head screws rather than hex heads, so I could position large washers on top to spread the stress. I coated the screws with penetrating oil.

jacksCU.jpg onejack.jpg

Alternating by 3/4 of a turn, I didn't experience much resistance, so I kept going. Next picture appears to show me going backwards, but I had actually switched over to longer PVC pipes.

progress.jpg

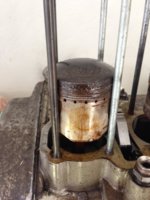
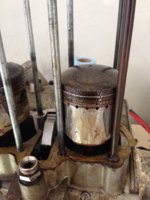
Slowly but surely, the jugs came off. Pics of the pistons:

piston1.jpgpiston2.jpg
 
Hi jussum,
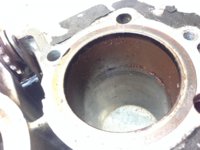
and if the bore cylindricity and piston to bore clearances were still within spec they'd be right.
 
Just an observation, the clearance notches in your clyinder sleeve flanges aren't aligned with the hollow dowels. It may have been resleeved at some time.

Or, the sleeves may be a bit loose, and rotated somehow. I'd check to see if they're tightly held in the aluminum cylinder block.

Although not critical, it's something that would bug me. I'd put them in the oven at 350°, and after half an hour, rotate them to get the notches aligned, place heavy plates on top (to keep them from creeping out), let it cool. Of course, remove the sleeve o-rings first...

Funny you should say that, sleeves feel secure by hand. But something funky is up with the o-rings. Did they get stretched by being overheated?

gasket2.jpg
 
Question, should I clean all components before checking out all specs? I'm going to get the components vapor-blasted.

I imagine I'd want to put a super-clean block in the oven unless I want a major grease/oil fire.
 
I've seen that o-ring squeeze-out syndrome on other cylinders. Not uncommon, usually occurs when the installer doesn't get it in there correctly. Another reason to keep your eyes open during the teardown.

Yes, cleanup dirty parts first before doing any work on them.

When evaluating cylinders for rebore, unless there's obvious damage, I'd always hone them first, then inspect and take measurements. That's the 'true' surface. If they pass muster, fine. Otherwise, bore them. And the boring bar doesn't have to deal with abrasive corrosion...
 
Thanks 2M.

I'm trying to get the piston pins out, and from everything I've read, they should push out with minor force after circlip removal, but these pins are not moving at all. I suspect rust again.

FWIW, I did see rust on the connecting rods.
 
Also, any particular trick to getting out the 2nd guide stopper at the bottom (in the crankcase) with the cylinder studs in the way?
 
Back
Top