'71 xs1b conversion to cafe

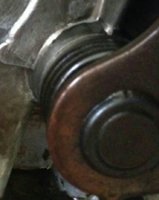
NOPE there is an insert inside the ball bearing inner race.

Part #20

RearWheelBearings.jpg
 
Got a lot done today, but first, a funny story.

I am in the habit of grabbing empty boxes wherever I see them to store spare parts in- and so one day I went to the food store, saw a bunch of boxes and grabbed them, closed by overlapping flaps, piled them in the shopping cart, and soon I was getting the kind of stares that make you check that your fly is indeed up.

I get to the truck and dump them all in the back, and find out why:

always.jpg

Spent today getting the plastic bushings and distance collar out of the swing arm so it's ready for sandblasting.

Proceeded with detabbing frame by using sawzall to cut off as much as I can before using the grinder.

Some areas of concern:

What if anything should be done about this particular spot showing aggressive rust damage? Would it be enough to just grind that rust off, or should I have this area reinforced?

rust.jpg

Been trying to figure out if this hook has any significance before I cut it off- I couldn't find anything in the manuals, wanted to be sure before I cut it off.

cutoff.jpg

Deliberating cutting off the steering neck lock and welding in the hole, or is this easy to find a replacement lock for?

steerlock.jpg

I want to replace the tail with a flared hoop for a clean look and thinking to cut here, halfway between the welded supports going to swingarm so that when I have the hoop welded in, the swingarm support adds extra strength by having both the hoop end and frame end being welded atop it. Good idea?

hoop.jpg
 
... soon I was getting the kind of stares that make you check that your fly is indeed up.

Yep, things labelled "Always extra long" will do that.

...so it's ready for sandblasting...

...What if anything should be done about this particular spot showing aggressive rust damage? Would it be enough to just grind that rust off, or should I have this area reinforced?

I'd examine that area closely after sandblasting, looking for thin/weakened spots and acid burn-throughs.

... Been trying to figure out if this hook has any significance before I cut it off- I couldn't find anything in the manuals, wanted to be sure before I cut it off.

As Wrenchjohns says, it's the return spring hook. More info:

http://www.xs650.com/forum/showthread.php?t=26692

... I want to replace the tail with a flared hoop for a clean look and thinking to cut here, halfway between the welded supports going to swingarm so that when I have the hoop welded in, the swingarm support adds extra strength by having both the hoop end and frame end being welded atop it. Good idea?

I think you've got a customer if you cut it off:

http://www.xs650.com/forum/showthread.php?t=45662
 
Thanks 2M for the heads up. I've left a post on that thread.

Got a good price for sandblasting, and vaporblasting of the hubs. Going to hopefully get both done next week. Still have to grind the tab stumps smooth with the tubes.
 
Beautiful day, and had it off so I got out the grinder and went to work:

grind1.jpg

grind2.jpg

Took off passenger pegs as I plan on this bike being a single rider.

What are some of the methods you guys use to smooth over the grain caused by the grinding?
 
Hi DQG,
chop it off a bit higher than flush then smooth it flush with a flapper disc on an angle grinder. Then prime, fill any remaining roughness with spot putty, prime again then top coat.
 
Thanks Fred. Stopped by Home Depot to look at the flapper discs they had and the lowest grit flapper they had was a 80 coarse. Don't think that's what I want, is it?
 
Hi DQG,
80 grit will be ok, just don't go apeshit with it, eh?
At least, not until you've seen what it will do.
For cleaning up the frame tubes in the photos, you could also try using a strip of 80 grit emery tape.
1" wide cloth tape, abrasive on one side, comes in a roll, tear off what you'll need.
I use a mebbe 30" long strip holding an end in each hand, cleans up not quite half way around a tube as you pull it back and forth.

Copy.

I actually was thinking of doing what you suggested with the tape- buying a roll of emery paper, wrap it around the tubes and just go back and forth with it. Evenly sanded, right to the diameter of the tubes. Seems like a no-brainer to me.
 
Got the rotor puller today, thanks to Tuba.

Went right to work with it, off came the stator nut and washer.

Rotor puller went on tight and I went to work, but the rotor is not budging. FWIW, the rotor itself is chock full of rust so I imagine it's rusted to the shaft.

What concerns me is how much brute force I should apply without damaging the thread of the rotor puller. Ideas?

puller.jpg
 
I actually was thinking of doing what you suggested with the tape- buying a roll of emery paper, wrap it around the tubes and just go back and forth with it. Evenly sanded, right to the diameter of the tubes. Seems like a no-brainer to me.

Hi DQG,
the emery tape should be the CLOTH tape because the paper tape ain't strong enough.
Put an arm-length around the frame tube in a long U-shape, pull it tight and move it back and forth.
that cleans up about half around the tube.
And jussumguy's hammer on the puller end trick has always worked for me.
 
Got the rotor off this morning with a few good whacks of the BFH. Thanks Jussum.

rotorshaft.jpg

Next up, the clutch basket assemblage. I've been looking up tips on how to remove it without a clutch holding tool.

When I was looking at the clutch basket, I happened to notice these cracks on the anchor plate for the kickstarter.. should I be concerned?

cracks.jpg
 
Last edited:
those ain't cracks they's aluminum casting shrinkage lines, you'll find em all over the cases if you start looking.
 
Thanks Gary.

Got the clutch basket nut off using the below set up- two of the old plates clamped together, and holding on to that. Fortunately not too much pressure was needed to make it come off.

clamp.jpg

But now the basket itself absolutely refuses to budge (I can see rust where the bearing and thrust plate is). I thought about using a flatbar to pry it off, but am hesitating because I don't want to chip any of the gear teeth on the back of the clutch basket.

Ideas?
 
Thread the hub nut back on, stop about 1/2 - 1 turn from seated.
Gently and squarely tap on the hub nut while gently levering the backside of the basket.

Something else to consider, welding your shifter shaft to the shift arm. Our older shifters are press swaged together, later are welded. Mine slipped loose, and I welded it. Look at pics of later shifters to see the welding. Your shifter:
 

Attachments

  • 71 Shifter.jpg
    71 Shifter.jpg
    152.3 KB · Views: 222
Back
Top