77 xs650 project

The-Buck

XS650 Member
Messages
20
Reaction score
0
Points
1
Location
Owatonna, MN
1977 xs650 project "23"

I just picked up my first ever xs650 yesterday, and I'm chomping at the bit to get going on it. It was a project bike that another guy started but wasn't able to continue. I can't take any credit for the current work that was done, and from the look/sound he did it right.

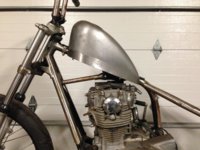
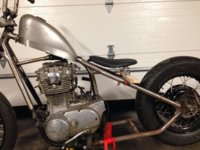
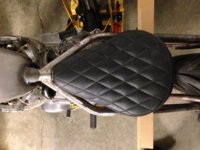
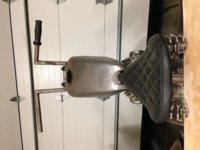
So far it has a TC bros hardtail, 23" ( yes twenty three inch) front wheel, biltwell throttle, custom bars, monster craft foot pegs, frisco sporty tank, sully diamond solo seat etc... Basically lots of goodies that mean that this bike is well on its way to being a great bike!

7E17D07D-208F-4831-83DF-87B7A3E34E37_zpsvqfokzhw.jpg


9447F970-70DA-439B-8437-527CC0F72156_zpscraqwirw.jpg


One thing I am wondering about is can I run a PAMCO ignition on the stock alternator and not need a battery? My understanding is that most people run the PMA for this type of setup, but is it necessary? I'm trying to finish this bike on a budget and this is one of the big things that this build needs.
 
Last edited:
Tonight the plan is to mock up the rear brake stablizer and brake rods, along with getting the tank in place to mark out spots for the tank bungs.

Tomorrow I will be ordering the PAMCO ignition, bungs and parts for the fuel sight guage.
 
Thanks for confirming ippytattoo, after reading A LOT more I now understand why using a stock alternator will not work without a battery.

That being said, the PMA is on the list of things to do, but not at this time due to funding inadequacies :(. I want the HHB PMA for this and am not going to compromise such a critical part.
 
Welcome to the site . Another chopper build someone else's broken dream. It should look good and ride like crap when finished. I have logged a few miles on a hardtail so I can say that. Still a fun bike none the less. Good idea the mockup. The rear tire needs to be aligned with the motor and frame. It look offset in the picture. The chopper builders on site can give you some pointers on that. I'm more of a motor head. More important to have a first class motor and build the bike around it. Good luck on the build and post some pictures of your progress. :thumbsup:
 
Thanks for the info scabber, good stuff to know! I will have to measure the the offset and see if it actually is off or if it is just the angle of the picture. The P.O of this bike had a very good plan, but just couldn't make it work. Hopefully I will do it some justice.

The plan for the motor right now is to confirm its condition and only repair if necessary. While having a completely fresh engine would be a dream, its not in the plan at the moment.

I will definitely be adding pictures as this build progresses, for both myself and for you all.
 
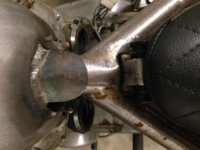
So I managed to get the tank positioned where I was happy with it, along with the seat position and the rear brake stablizer. I marked the spots on the frame and once all of the other mock ups are done the welding can begin.


23-1.jpg

23-2.jpg

I am going to mount the tank with some weld in bungs and I am also going to get some rubber washers/gromets to help with the vibration. The only concern I have right now with the tank position is the new petcock that needs to still be welded on to the tank. It looks like it will fit, but I will have that in the tank before drilling holes for the tank mounting bungs.

23-3.jpg

23-5.jpg

23-6.jpg

23-7.jpg

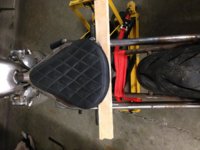
I like the placement of the seat, but would like to have the rear up just a little bit more. I mainly wanted to mock up the hinge to see where I was going to weld it on. The straps and wood helped me get an idea of how the seat felt in that position :D

23-8.jpg

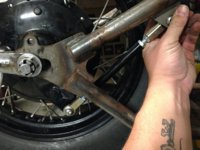
Once I got to actually looking at the brake likage it was a bit puzzling so with some quick searches I found out how it is suppose to be mounted. I don't have all of the parts I need, so today I will be searching for the rest of the rear brake parts I need (mainly just a fixture to mount the pedal to the frame and connecting parts to the actual brake arm on the rear hub).

23-9.jpg

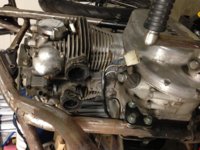
I also managed to pull off the alternator case cover, and while in there I just took a glance to see if there were any major concerns. I'm going to be putting in the PMA at some point, and seeing that there wasn't any major concerns inside the cover made me feel a little better about everything.

One other thing that I looked at was the offset of the rear wheel. Looks to me like it is pretty close to where it needs to be, but if someone can offer some advice on the best way to check it I would be grateful :wink2:
 

Attachments

  • 23-4.jpg
    23-4.jpg
    221.1 KB · Views: 365
Small update;

The previous owner was relocating the seat and cut out the section of the frame that the springs mount to. The position that I felt was good, both from a practical and estetic point of view, was close to the original position. Luckily I was able to find a piece of pipe that is very close in deminsions to the frame, and all for $0.38!

I cut the pipe a little long to account for the curved cutouts that I still need to do, felt it was better to be safe than sorry.

Hopefully some time this week I will begin to tack some of the parts that need to be welded up. I also ordered my seat mounts and the bungs I need for the tank.
 

Attachments

  • seat bar.jpg
    seat bar.jpg
    214.4 KB · Views: 295
Well just remember the deal we made. Lol. Once it's finished I just wanna Bob around the block a couple times on it.

As for the seat check it out when it's sitting level on the ground a couple quick bumps with the angle it sits at and you'll be burning rubber on your butt real quick. That's why I was going to lower the hinge and bring it back a bit to level it out as much as possible while still looking sexy as all get out.
 
Well, its been a long winter and not much progress has been made mostly due to low funds but that doesn't mean there has been no progress.

What I managed to get done before the snow hit was most of the mocked up welding that I had planned. The tank is now securely fastened to the backbone, the break stay has been welded on, the seat is in place with the hinge and spring perches welded. I still need to get the brake pivot welded on, as well as mock up a mount for the headlight.

That's enough of my rambling, on to the pics!

bike1_zpso6nlbxzj.jpg
bike2_zpssxk0xgmy.jpg
bike3_zpsbykp6aqf.jpg


One thing I gotta say is, I love the stance of this bike and how well it seems to fit when seated. I have a ways to go before its back on the road under its own power, but I can see the faint light at the end of the tunnel.

HHB_zpsut0cniwk.jpg


Oh, and I snagged a killer deal on a HHB PMA and Pamco setup!! Everything is there, just need to install and wire it!
 
Thanks Fox23, good to hear that I'm at least on the right track with this build. Hopefully in the next few weeks it will warm up here and I can get back out to the garage and make some more progress.
 
Back
Top