81 Cafe racer "rebuild"

Big_Al

XS650 Enthusiast
Messages
45
Reaction score
1
Points
6
Location
Bolingbrook
Hey, I bought my 81 650xs last summer. The PO had made some sad attempts at a cafe racer build, and that was what apparently got my attention. I had to go to school in August and the build had to wait till this summer in which I have 6 weeks free and now only have three left. This is my last vacation for the next few years, so if I don't finish, I will be bike less for the forseeble future. I feel like I'm in a reality show with the clock ticking away. "Will he make the deadline...stay tuned after the break to find out". Well let's get on with it.
 
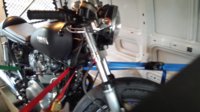
So this is the bike as purchased. All the owner did was pop in a cafe seat with cafe seat kit bolted to frame and spray everything flat black (apparently wo primer since paint was already chipping from fender). This pic is from when I picked up bike from mechanic over spring break. Since I was super busy w school, I couldn't work on it , so I desperately tried to find someone else to jet the carbs and tune the engine, so that in the summer I would just focus on build. That was an epic failure. I just found out that the half ass mechanic thought the carbs were 79, when they were actually 74 solex, so I sent him wrong mains and pilots for carbs. My fault I guess in the end. So I still have to reject carbs after everything else is done. Good grief
 
650xs from PO
 

Attachments

  • Cafe racer as is.jpg
    Cafe racer as is.jpg
    122.1 KB · Views: 210
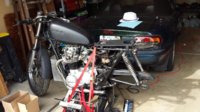
back wheel removed first, then forks and handlebars
 

Attachments

  • Copy of 20150508_085411.jpg
    Copy of 20150508_085411.jpg
    208.3 KB · Views: 186
  • 20150508_112544.jpg
    20150508_112544.jpg
    230.5 KB · Views: 194
from there I attempted wet sand all oxidized metal parts. Started on caps that go on hubs. The caps look like front hubs before i wet sanded. They turned out really well, but since it was my first time and since i have OCD/perfectionist complex, i spend almost a day on each, plus a beer or two in between.
 

Attachments

  • 20150708_112757[1].jpg
    20150708_112757[1].jpg
    119.3 KB · Views: 172
  • 20150701_214038[1].jpg
    20150701_214038[1].jpg
    100.7 KB · Views: 189
Then I went on to the chain tensioners. It was going well until I sanded through the anodized layer, and then it started to look funny. A whole days work gone to shit. Plus not to mention super sore wrists from sanding all day.
 

Attachments

  • 20150625_224436[1].jpg
    20150625_224436[1].jpg
    163.9 KB · Views: 186
later that day, I found out that I could have just ordered new chain tensioners from mikesxs for around 14 bucks. :doh: Well, I decided to just buy them and also buy new gear lever and brake rod thing.
 
Then on to one side of rear hub. Boy, it was a pain in the butt. I didn't want to go use a low grit because it was a pain and almost impossible to buff out deep scratches when using higher grits, as I found out when sanding smaller caps on hubs. But nothing was taking out the oxidation stains. I eventually ended up going all the way down to 220, the lowest grit I had, and still nothing. After a whole day of sanding and nothing, I finally gave up. I found a guy who does this for a living and has industrial buffing wheels. I gave him my hubs and threw in my forks as well. I was sick of sanding. Either I was too anal or just didnt have the right equipment to get it done right efficiently.
 
one side of hub before, then after. It may look better, but it is hard to see oxidation stains still on there, and I couldnt get them off. I wasn't cutting deep enough by hand
 

Attachments

  • 20150702_115020[1].jpg
    20150702_115020[1].jpg
    139.5 KB · Views: 202
  • 20150708_112635[1].jpg
    20150708_112635[1].jpg
    101.5 KB · Views: 168
at the same time, I started on other side of hub bc I guess I got bored or frustrated and wanted new scenery, but same problem with oxidation stains not coming out:banghead:
 

Attachments

  • 20150708_112720[1].jpg
    20150708_112720[1].jpg
    114.2 KB · Views: 159
off to the buff shop you go you horrible oxidized things!
 

Attachments

  • 20150708_112450[1].jpg
    20150708_112450[1].jpg
    120.1 KB · Views: 196
  • 20150708_113110[1].jpg
    20150708_113110[1].jpg
    203.8 KB · Views: 176
Oh yes, I applied stripper to those metal parts just in case I was working with clear coat, but it didn't seem to do much.

Next, I applied stripper to metal rims, then cleaned up. They have rust on insides. I will apply rust inhibitor before I apply new spokes I bought and will polish the inner rims as well.

It only cost me 30 bucks to have shop remove tires from wheels, and I thought it would be that cheap to put them back on... WRONG!:yikes: $240 to be exact. 80 for mounting and balancing, then 80 each for truing spokes. I'm not going to attempt to true the spokes myself. I don't have the time to do that if my first attempt fails. And the tab keeps growing...:(
 
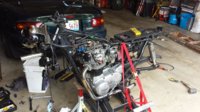
next was ripping off nasty factory wiring and cables. Geez, just looking at it makes me shudder
 

Attachments

  • 20150711_155847[1].jpg
    20150711_155847[1].jpg
    162.4 KB · Views: 176
the spinal cord of the bike ripped off. Reminds of me of how Robocop in robocop 2 ripped off spinal cord off of Cain. Did i give away my age?
 

Attachments

  • 20150712_170824[1].jpg
    20150712_170824[1].jpg
    179.1 KB · Views: 157
So, for some reason I tend to make things complicated. I wanted to get rid of old battery box and free up that area, but I also wanted to keep electronic start. I am going to rewire bike, but had to modify simplified wiring diagrams found on the forum to include electric start ignition safety relay. But then I was told just leave out the safety relay and just dont crank the electric starter when the engine is running. I'm not going to build battery box under seat like brat mod, so I had to look for new cafe seat w/ enough clearance in cowl to keep battery of at least 140 CCA, which is stock CCA apparently. And I was told NOT to use lithium batteries because they blew up with these older charging systems, so that left me with AGM batteries that were the same size stock batter almost.

To make a long story short, I just gave up on electric start and life became simpler. Bought a battery the size of cigarette pack and will be kick starting the bike. Plus, I can follow wiring diagram without making any mods. Simpler is better.
 
This is the shitty mods the PO did to the bike seat frame. And he dropped a heavy plate over it with stock turn signals and aftermarket license plate light plus brake light
 

Attachments

  • 20150721_102816[1].jpg
    20150721_102816[1].jpg
    162.6 KB · Views: 169
  • 20150721_102836[1].jpg
    20150721_102836[1].jpg
    127.2 KB · Views: 176
got loop bar from dimecitycycles.com to do it right. I never welded before. Bought a flux welder and am going to practice tonight on spare pipe, then tomorrow I need to take engine off of frame and give it a go.

I was looking for a smaller diameter pipe that I could use as slugs for loop bar. The closest thing I could find was at a local steel vendor and it was still too big. I had to shave it down using stone grinder. It was taking forever. Then I decided to use spare sockets that were much closer to ID of frame tube. I still need to shave them down, but not as much as that pipe I was working on. I should have pictures tomorrow.
 

Attachments

  • 20150721_102918[1].jpg
    20150721_102918[1].jpg
    136.9 KB · Views: 183
Back
Top