All Balls tapered bearing - removal?

GeorgeOC

XS650 Junkie
Messages
513
Reaction score
118
Points
43
Location
California
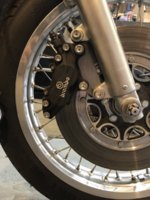
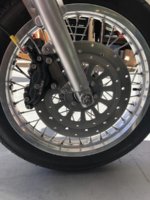
Hello, and thanks for any insights here from the community. I am knee deep in swapping a 35mm front end into the 76'. This morning I removed the old 34mm forks, and trees. When I rebuilt this front end I had installed the All Balls Racing tapered bearing kit.

Question of the day, might anyone have experience removing the lower bearing? I found an All Balls video showing replacement of the bearings... but they destroyed bearing to do so. There does not seem to be much purchase available for a puller, other than on the bearing itself.

Not a major crisis, but was hoping not to have to buy a new set of bearings. Has anyone ever swapped the tapered kit from one stem to another?

Thanks all!
 

Attachments

  • IMG_1113.JPG
    IMG_1113.JPG
    138.4 KB · Views: 303
Maybe tap in successively larger wedges (putty knives, knife blades, flat screwdrivers) until a puller will fit. Did you have to warm the bearing to get it on? (wondering how tight it is)
 
Thanks xjwmx. I did not have to warm the bearing to get it on initially. But that probably is never a bad idea. Thanks for the suggestion. I have a small chisel that is no longer suitable for wood working, that might get me started...
 
I think you may need one of these bearing separator-puller tools. I have one I'd like to remove too and this is what I plan to try .....

https://www.ebay.com/itm/14-Pcs-Bea...m=382277474019&_trksid=p2047675.c100005.m1851

The tool costs about the same as another set of bearings would, so you decide. Thing is, every time you use it, it gets cheaper, and it will pretty much pay for itself the first time if it saves you having to buy steering bearings again.

I have the MikesXS bearings in my '78. The set doesn't include grease seals, just the bearings. I have since used the All Balls kits in other bikes. They come with nice grease seals you can install if you like. I've found the top one really isn't needed but the bottom one does help out the factory rubber ring seal. I installed a grease fitting in my neck so it is pumped full of grease. The weight of all that grease, due to gravity and the normal side to side turning of the forks, makes it constantly ooze out of the bottom bearing. On the one hand, I have myself a very nice self-lubing bearing but on the other, it makes a real mess all the time, lol. I want to add one of those All Balls grease seals to it.
 
Kinda odd you don't have a grease seal in the pics yet I don't see the gap below your race that the stock grease seal fits into. that gap is usually enough for me ,to start the bearing moving. I'm not beyond grinding a punch to get the fit. angle to work the race up off the stem. An old 3/8 grade 8 bolt makes a fine start for a custom ground bearing drift. A bit of rust buster sprayed on now and then during your work doesn't hurt.
 
The stock seal is just a rubber ring. It's all rubber with no metal frame or spring in it like a normal seal. It doesn't get trapped between the bearing and the tree, it just sits in that step machined on the triple tree just below the bearing. That's probably why it doesn't work real well with the roller bearing. It doesn't reach up high enough to seal the bottom of it.

The All Balls seal is a metal washer with the rubber seal attached. It does get trapped under the bottom bearing. It snaps on the bottom of the bearing and the rubber goes up snug to the bearing cage. It seals much better and I think it will help with my grease mess problem. Even though the top and bottom bearings have different I.D.s, their O.D.s are the same and so are the 2 grease seals included in the kit. That means the one I don't use on the top can be fitted to the MikesXS bottom bearing on my '78 - if I can get it off without wrecking it, lol.

spE6X6h.jpg
 
I think you may need one of these bearing separator-puller tools.

Kinda odd you don't have a grease seal in the pics yet I don't see the gap below your race that the stock grease seal fits into.

5twins, gggGary, thank you gentlemen. Drifted the piece out... slowly but surely. About the seal, I had already moved it over to the new lower tree. Things have gone together from here. I am upgrading to a Brembo caliper while I am at it with the Pandemonium adapter. That adapter is a nice piece of steel I must say. The spacing is actually spot on for the original 76' rotor. I will be looking for a later model one piece rotor though to be resurfaced/drilled. Here's where I'm at...
 

Attachments

  • IMG_1114.JPG
    IMG_1114.JPG
    163.8 KB · Views: 247
That’ll be a nice addition! Post up some more photos of your installation, please.
 
That’ll be a nice addition! Post up some more photos of your installation, please.
I certainly will. At the moment looking for a SS line for the brake. Slingshot Cycles was my go to, but looks like they are not operating at the moment. Any suggestions for an outlet that allows custom length hose ordering, with the correct banjos and fittings?
 
That’ll be a nice addition! Post up some more photos of your installation, please.

Here we are @Mailman , finally some photos. The brake is good to go now. New custom line from Galfer. I must say, Dan from Pandemonium deserves a lot of credit for creating the adapter kit, and the great tutorial for the Brembo conversion. This front end is night and day over the original stock 34mm forks & 2 piston caliper. Dan also sold me this refinished, drilled rotor. That arrived today, and I am tickled pink.
 

Attachments

  • IMG_1126.JPG
    IMG_1126.JPG
    173.3 KB · Views: 277
Back
Top