-
Enjoy XS650.com? Consider making a donation to help support the site.
XS650.com receives a small share of sales from some links on this page, but direct donations have a much greater impact on keeping this site going.
You are using an out of date browser. It may not display this or other websites correctly.
You should upgrade or use an alternative browser.
You should upgrade or use an alternative browser.
Aww Jeeze....('77 Re-Hash)
- Thread starter Beags64
- Start date
Haha, mud dauber...
Leaks???.........what leaks
Hey I have a 1978 with a leaking petcock on left side would this be an approved repair form me I don't always smoke while riding and my plug wires only arc a little on damp morning!

Actually to be honest I don't now and never did except for the one time when I was around ten years old and mom cured me of that one right fast! Another thing is I too cheap to pay that kind of money that could be better used on motorcycle parts or micro brew barley soda!Hey I have a 1978 with a leaking petcock on left side would this be an approved repair form me I don't always smoke while riding and my plug wires only arc a little on damp morning!
Sometimes ya gotta get a bit creative....
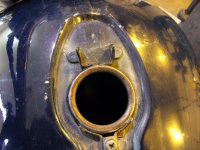
Since he had no key it seems the PO thought it was OK to brutalize the gas cap & get rid of the pin.
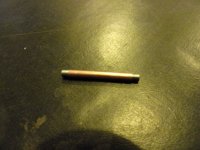
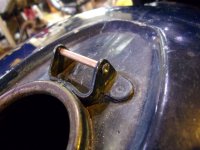
Took a short piece of TIG rod turned the ends down a smidge, center drilled the ends, peened 'em and waalaa...a cap that closes.
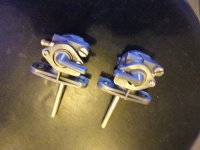
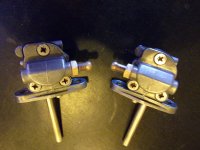
Just have to reinstall the cap (w/the new seal) and the rebuilt petcocks on the freshly cleaned tank. One more thing off the list.


Since he had no key it seems the PO thought it was OK to brutalize the gas cap & get rid of the pin.
Took a short piece of TIG rod turned the ends down a smidge, center drilled the ends, peened 'em and waalaa...a cap that closes.


Just have to reinstall the cap (w/the new seal) and the rebuilt petcocks on the freshly cleaned tank. One more thing off the list.
"Houston, we have a problem..."...

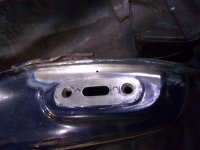
...by my count one too many holes here.
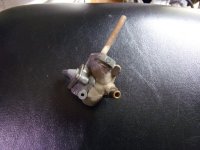
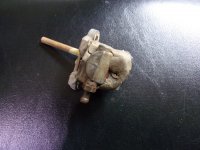
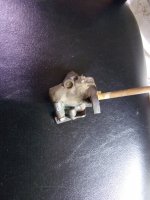
Been chasing a minor weep around right side petcock. After multiple tries changing this that and the other a bit of poking around with a pick discovered a pin hole hidden below the paint. Small bubble in paint led me to the discovery.
Trying to avoid a liner if at all possible so looks like a thorough tank flush and wash is in order. Surrounding metal seems sound so going to do my best to TIG this lil bugger closed. Nothing to loose at this point.
At least it's in a spot that's easy to hide a repair.
Best of british luck there Beags.... been my experience that pinholes run in herds."Houston, we have a problem..."...
View attachment 193802
...by my count one too many holes here.
Been chasing a minor weep around right side petcock. After multiple tries changing this that and the other a bit of poking around with a pick discovered a pin hole hidden below the paint. Small bubble in paint led me to the discovery.
Trying to avoid a liner if at all possible so looks like a thorough tank flush and wash is in order. Surrounding metal seems sound so going to do my best to TIG this lil bugger closed. Nothing to loose at this point.
At least it's in a spot that's easy to hide a repair.
Oh I know, fixin' one generally breeds two or three more...okay maybe five. Gonna strip the area around the petcock flange and give it the once over, see if I can spot any more.
Push comes to shove I'll line it
Push comes to shove I'll line it
Never did it on a bike tank... but I've fixed more than one lawn mower tank with 5-600° silver solder and a propane torch. At that low temp the rest of the "herd" stays hidden. If the tig makes more holes, might give it a shot?Oh I know, fixin' one generally breeds two or three more...okay maybe five. Gonna strip the area around the petcock flange and give it the once over, see if I can spot any more.
Push comes to shove I'll line it
Well there ya go then.Always a possibility too. Soldered a joint or two in the last 35 years of my plumbing/HVAC career
I have read articles on Tin soldering patches onto Motorcycle gas tanks
Knew one that worked with that at a shop forgot to went out the gas fumes properly could have ended with a balloon shaped tank.
Depends on where it is on the tank but the trick was grinding it clean and if I remember correctly use acid for cleaning
and thereafter is it called flux in English .
I believe it is a proven method from the days when auto body work also used tin.
Sheet metal work has used soldering long time back.
Although I have worked with sheet metal I have not patched tanks in this manner
But have used tin for parts
Once again the collective wisdom of this site wins out, always good to have multiple perspectives on a problem. Opted to go with Jim's better suggestion of soldering as opposed to my knee-jerk thought of welding.
Little bit of prep work...
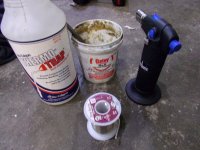
...gather the appropriate supplies...
...and we have a winner!
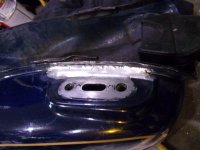
Again thanks to Jim for pointing me in the right direction. TIG could have turned into a never ending can of worms.
Now on to those side cover latches....
Little bit of prep work...

...gather the appropriate supplies...

...and we have a winner!

Again thanks to Jim for pointing me in the right direction. TIG could have turned into a never ending can of worms.
Now on to those side cover latches....
Nicely done Beags!!

I'd still bet there's a herd of pinholes in there. I'm also certain you got 'em corralled by spreading the solder across the whole area. Nice!!
I'd still bet there's a herd of pinholes in there. I'm also certain you got 'em corralled by spreading the solder across the whole area. Nice!!
Nice work Beags!
If you do decide to use the "belt and suspender" approach and install a liner - I would recommend the POR15 tank treatment and liner kit. I used one on my 1976 XS650C tank and it is still good after about 5+ years. The installation process is a bit laborious as you have to keep the tank moving while the stuff cures and in my case, it took nearly three hours. I thought my arms were going to fall off....
https://por15.com/products/motorcycle-fuel-tank-repair-kit
BTW - POR15 is made in the US and it is the same liner system that Jay Leno uses on all of his high-dollar car and bike restorations.
The other motorcycle liners (such as Kreme) seem to react badly with modern ethanol gasoline and flake-off inside the tank. This can create all sorts of havoc with carb jets etc. In contrast, POR15 seems to be just about impervious to anything - so it stays put. They advertise that it can even seal small pin-holes so if there are still some there, you might repair the tank permanently that way.
Cheers,
Pete

