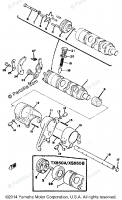
If you remove the cap bolt, Clean the area very well, and I mean very well, It can be JB Welded to a near perfect repair.
It needs to be very clean or the JB Weld won't stick to the case. You may even have to grind out a bit of the surface to get clean metal. Once good and clean make a card board gasket that has a tight fit on the cap bolt. Apply a thin coat of grease to the threads on the cap bolt and to the cardboard washer. Carefully thread the cap back in place without anything under it. Trying not to get the grease on the area where you want the JB Weld to hold.
With the cap threaded in but not quite all the way mix up enough regular JB Weld, NOT the quick set stuff, Apply to the clean area and press firmly into the threads of the cap. Then add enough more to fill the area around the cap to just a bit more than what the original area looked like. Tighten the cap slightly to compress the top flat.
Let it set for 24 hours. Check to see if the JB Weld has set up. If it looks even a bit questionable let it set another 24 hours. When it's set completely Carefully unscrew the cap. The grease should have keep the JB Weld From sticking to the cap threads and the washer. It should screw out leaving good threads behind.
You can then use files and sand paper to make it look like the original case. Possibly a Dremmel tool. Replace the internal parts, a new gasket and snug in place. It doesn't need a lot of torque, just snug.
While out try stretching the spring a bit. I use a set of diaginal cutters, dykes to some. Squeeze the cutting edge into the spring between the coils in several places to make the spring about 18 inch longer.
JB Weld has steel as part of the matrix. It can make a repair as strong as the case ever was if done properly. JB Weld fails primarily because of not getting thing clean enough.
I have fixed a lot of things with it. Sealed cracked engine block. Valve cover holes stripped out. Bedded rifles. Patching our sump filter screens. As well as too many little things to recall.
Leo


