Burger's Build

Hi 'Burger,
that head is more than good enough to go as it is.
If it's pretty enough to go, that's for you to decide. i

Thanks for the input. Honestly I'm pretty conflicted, since I like to get things right and nice. The paint on the outside of the engine is also keeping me up at night, I can't take it off but it does bother me greatly. So I will see what I do, I am exploring my options. Today I'm pulling the valves and checking the seals!
 
"Today I'm pulling the valves and checking replacing the seals!"
There, much better. Here's an axiom I pretty much live by.... If you have to pull the motor apart to replace it, replace it while the motor's apart. Never put old seals back in a motor. There's a good chance that's the original 40 yr old seals. After 40 yrs, they've seen a good life. Time to give 'em a rest. ;)

Will listen to your wisdom! The PO apparently changed the seals 2 years ago when he got the bike. However that doesn't discount the fact that peace of mind costs only about $20...
 
Look for an ARS seal kit. Ebay maybe. ARS was the original manufacturer for Yamaha seals... and you'll eventually use all of em.
 
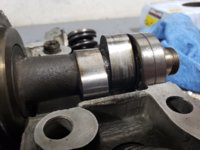
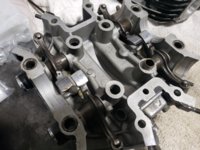
So getting to the seals was kind of a trip. Turns out my camshaft and rocker arms are in pretty ugly shape
20200128_181712.jpg 20200128_181655.jpg

Note the streaks and discoloration on the camshaft. Since I have a second engine lying around, I am going to swap the cam and rockers from that engine since they are in much better shape.
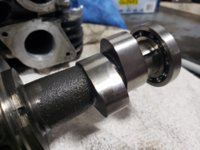
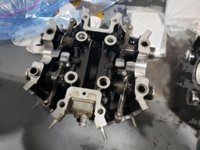
20200128_181715.jpg 20200128_181652.jpg

So I am off to pull the rockers from the other rocker cover. Note that the rockers need to be labeled and matched back to their original positions since they need to be paired back with the same position on the camshaft. So I made myself a key photo I will label bags by
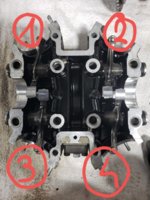
20200128_202525.jpg

To pull the rockers, the first thing to to is to remove the big screws on the side of the rocker cover.
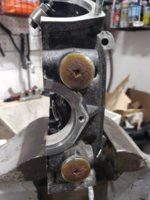
20200128_203906.jpg
This took some convincing. Also important: do not use a vice like here if you ever want to use your rocker cover again. I am never going to since the other side (valve cover) it is mated to is very damaged. Again, don't use a vice it will damage the mating surfaces and you'll ever seal.

Once the screws are off you need to drive this little part out (the name escapes me)
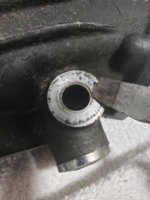
20191228_174810.jpg

To do so find a bit the same diameter and hammer it out
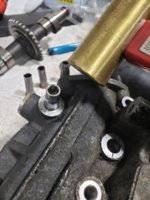
20200128_212052.jpg

If you are replacing them in the same rocker cover you need to also keep track of where they go.

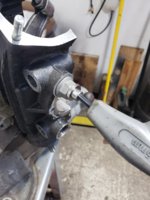
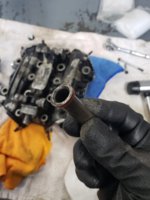
Now the fun part: the rocker arms pivot around a cylindrical piece that serves for oil delivery. This piece need to be removed by threading a 6mm screw in it then using the screw to pull it out. Thankfully, most of the cover screws for the engine are 6mm
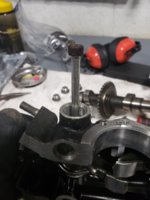
20200128_215546.jpg


Using some pliers like a slide hammer worked... for 3 out of 4. One of them just won't budge. I sprayed it with kroil and will be trying again today, I have read on this forum there is a way to use washers to screw the cylindrical piece out so I will try that today. If you have experience with getting this out please tell share!
 
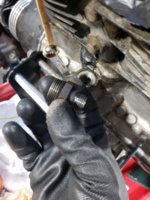
Yes, you'll need a screw or bolt that's threaded more. Add a nut and some fender washers to it. Thread the screw/bolt into the shaft, hold it from turning, then tighten the nut down against the washers (which are positioned against the cover). This will pull the shaft out little by little as you tighten the nut down. If it pulls out until it hits the washer and is still stuck in there, you'll need to add a perfectly sized socket (small enough to sit on the lip of the shaft hole but large enough so the shaft can be pulled into it) to your "puller" tool.
 
On to removing the last rocker... Followed 5twins advice and rigged something up.

20200129_122455.jpg

In theory, I know I need to put these back into the same place they came from... but has anyone swapped these out with success? The ones from my other engine are in significantly better shape. I am also noting I will need to put new seals back on reassembly

20200129_130456.jpg

Next post will be about removing the pistons and jugs
 
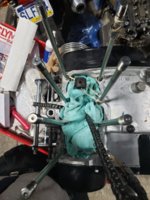
On to removing the pistons. Remove the last oil bolt here:

20200129_164223.jpg

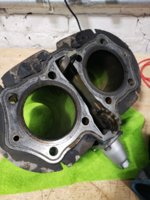
Then slighty tap the edges of the jugs with a rubber mallet. Jugs pop right off

20200129_170651.jpg

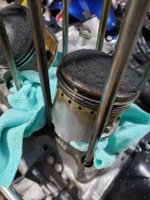
Did someone say piston ring gap?

20200129_165825.jpg

I am going to be replacing the entire pistons + jugs so at this point I removed the pistons. To do so, use a puller tool to pop out the piston circlips.

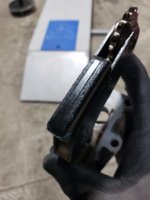
Let's take a look at the chain guide, main reason to tear down this engine...

20200129_170838.jpg

Note the amount of plastic that fell off of this and has been floating around in the oil... even the rear guide seems in terrible shape

20200129_172244.jpg

This will be getting replaced by a newer design one to match the new 750 kit.

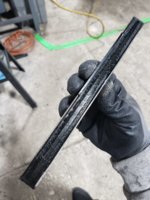
On to our favourite activity... gasket scraping. This is after about one hour of scraping with a plastic razon blade + permatex gasket remover & purple degreaser.

20200129_210613.jpg

Going to go back to it today to get the surface nicer... Any tips are welcome.
 
... but has anyone swapped these out with success?
Yes, if the ones in your spare motor are in better shape, use 'em.
Those pistons look to be in pretty good shape, don't throw 'em away.
Those o-ring will be in a new gasket set.
 
Yes, if the ones in your spare motor are in better shape, use 'em.
Those pistons look to be in pretty good shape, don't throw 'em away.
Those o-ring will be in a new gasket set.

Good to hear. I will swap these out, I don't know how they seem to have gotten warped and paint on the inside?

I will save the pistons, unsure what I will do with them for now.
 
If your sleeves are also in good shape, pop 'em out and sell the pistons and sleeves as a set. Someone might want 'em.
Have a look here.

Thanks for the link, very interesting.
I very likely will have a bunch of spare part to sell once done! Getting to the point I'm nervous everything will start up once bolted back together.
 
Does the serial number on the motor you pulled out of the bike match the frame number? I ask because that's definitely an early rear cam chain tensioner you have there. If the whole motor is an early one, the piston wrist pins may be bigger and not match the later ones. That means your planned "upgrade" pistons may not fit on the rods.
 
Welcome to the party, Burger! So far, so good. It looks like you're doing everything right (We're nosy, so including lots of pictures is a definite plus!), and, yes, Jim's fabulous Top End Build-up is a must read! You'll find lots more tips and tricks on this forum. These guys are the best! Can't wait to see the finished product! Cheers! And, again, welcome! :cheers:
Tebo
 
Have you read the top end buildup thread in the Tech Section?

I actually read it before agreeing to purchase the bike, it was the deciding factor knowing I had such a grest resource to fall back on when doing the top end.
For now I'm worrying mostly about the gasket surfaces being clean enough. I measured my rings and pistons a few days ago and those seem good. I'm sort of dreading the whole reattaching cam chain / putting cam and bearings back on.

It's so interesting though!
 
Does the serial number on the motor you pulled out of the bike match the frame number? I ask because that's definitely an early rear cam chain tensioner you have there. If the whole motor is an early one, the piston wrist pins may be bigger and not match the later ones. That means your planned "upgrade" pistons may not fit on the rods.

When purchasing the bike I was made aware the po's po had made that swap. I have already purchased a new rear guide from Heiden to swap in.
 
Welcome to the party, Burger! So far, so good. It looks like you're doing everything right (We're nosy, so including lots of pictures is a definite plus!), and, yes, Jim's fabulous Top End Build-up is a must read! You'll find lots more tips and tricks on this forum. These guys are the best! Can't wait to see the finished product! Cheers! And, again, welcome! :cheers:
Tebo

Thanks tebo! That thread is bookmarked on my browser. This community is awesome.
 
You really have to pin down whether you're working with an older or early engine because there's several big internal differences. The cam chain is a different pitch and length. The cam chain sprockets are different sizes and also made to fit the early different chain pitch. That little sprocket on the rear tensioner probably also wouldn't fit and mate up well with a later cam chain because it was matched to an early one.
 
The early cam chain and sprocket set was used up to 1973. The chain had 102 links, the cam sprocket had 34 teeth, crank sprocket 17. In 1974, a new chain and sprockets was introduced. The chain now was longer and had 106 links, cam sprocket had 36 teeth, crank sprocket 18.
 
Back
Top