I would guess the air from the vac is warm also  .
.
..
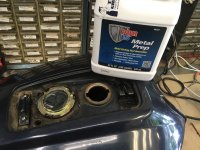
 POR15 also has a system for coating polished Aluminum, I think it is called Glisten?
Por15 still has the clear, but it isn't called Glisten PC anymore. I posted it on here someplace.