Clutch push rods - 2 short vs 1 long

79josh81

XS650 Addict
Messages
427
Reaction score
419
Points
63
Location
Kiel, Wisconsin
So assuming that this video...


...explains similarly how an xs650 clutch works, what was the purpose of Yamaha having 2 shorter push rods vs the earlier models having 1 long push rod?

Also, if I wanted to swap a long push rod into my 79’ xs650, how do I remove the shorter inner stock push rod? (I’m still learning so be gentle or I’ll have to retreat to my safe space)
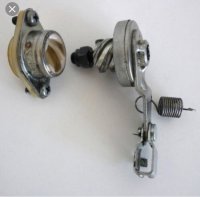
 
I don't know why Yamaha made the change. Many of their other models use just one long push rod, the 650 did too at first. However, the older 650 long rod was steel. The longer rod of the 2 piece replacement is bi-metal (aluminum with steel end caps). Theoretically, this should expand closer to the same amount as the alloy cases compared to the all steel rod. These different expansion rates between the rods and the cases can be an issue on the 650. Because of it, the hand lever develops lots more freeplay when the bike gets hot, sometimes enough not to disengage the clutch enough. It drags slightly causing hard shifting and the notorious hard-to-find-neutral syndrome that many of these bikes suffer from. But the differing rod construction isn't really an explanation for the switch. On most all of those other Yamaha models using one long rod, that rod is a bi-metal type. They could have made one long bi-metal rod for the 650 but didn't for some reason.

Many of us switch back to the long single push rod. It gives a bit better clutch action and seals much better into the case because it wobbles side to side less. Some have had luck with pulling the inner ball and rod through the seal with a magnet but I've never been able to. I always have to take the right side cover off, clutch pressure plate off, and push the parts out with another long rod of some sort.
 
Many of us switch back to the long single push rod. It gives a bit better clutch action and seals much better into the case because it wobbles side to side less. Some have had luck with pulling the inner ball and rod through the seal with a magnet but I've never been able to. I always have to take the right side cover off, clutch pressure plate off, and push the parts out with another long rod of some sort.

Where are the ball bearings positioned? There’s one where the clutch cable connects and then just one more between the outer and inner push rods?
 
I’m still trying to understand how the worm gear contraption (?) (by where the clutch cable connects) on the outside of the left cover works and functions.
 
There's a third ball on the right side, between the inner rod and the valve shaped pusher piece that moves the pressure plate out when you pull the clutch lever in. This drawing illustrates it quite well .....

wfEBron.jpg


When you switch to the old style one long push rod, it will replace both of the shorter rods and the ball between them. This third ball will stay. Anywhere along the path between the worm and the clutch where two rods meet, there should be a ball. There's one in the worm gear itself because it's adjusting screw can just be considered a very short push rod.

Thanks man. That visual helped a ton. I don’t suppose there’s a visual like that to help me visualize the way the worm gear works to push the push rod into the clutch is there? I know I could take the worm gear apart to understand the mechanism and how it works but I’d rather not if I don’t have to.
 
You really should pull it apart. It needs to be cleaned and greased on a regular basis, as much as maybe once a season if you put lots of miles on or many in the rain. It's a "swirl" type gear arrangement, kinda like the threads on a bolt. Turning the inner male piece "threads" it in or out of the outer female piece. Here's a pic of a clean outer piece. You can clearly see the "swirl" cut grooves inside it .....

LgsTDfp.jpg
 
Yeah maybe ill just pull it apart then. Is there anything I should be aware of so I don’t mess it up or lose something? Not that I pull it apart and something comes shooting out of it never to be seen again.
 
Yeah maybe ill just pull it apart then. Is there anything I should be aware of so I don’t mess it up or lose something? Not that I pull it apart and something comes shooting out of it never to be seen again.
Take a pic of the worm gear assembly before you pull it apart so you can get the lever back in correctly when you re-assemble it.
 
A note on Dave's pic - the lock nut on the adjuster screw is on backwards. It should be installed with the shouldered portion facing the worm.

The only thing you'll need to watch for is that the ball contained in the male worm part doesn't fall out. It was crimped in place by the factory but over time, the push rod wears those crimps away and the ball can fall out .....

jf4wS0Y.jpg


Wad some grease into the hole where the ball is and that will hold it in place for you. To check for the ball missing already, remove the adjuster screw. If the ball is gone, you'll be able to see right through the hole.
 
Do any of you guys know what kind of side to side movement the outer push rod should have? Should it have any? I’m not entirely convinced that my push rod seal is leaking oil (my sprocket nut was loose to where I could move it by hand so I think that’s where most of the oil in that area was coming from) so I’d rather not replace the push rod seal and bushing if I don’t have to.

And also, how do you guys suggest cleaning out all of the crud inside the left side cover? I noticed some of you guys have spotless everything under the cover so I’m curious what kind of solvents are safe around the seals and what everyone’s methods are.
 
Last edited:
Back
Top