'Cuz I'm not in enough trouble already

The used market is also rightfully hard on "Sport bikes" they tend to have been rode hard......Not to mention the old man riding a sport bike for more than 15 minutes thing.... The http://www.badweatherbikers.com/buell Forum ( a somewhat smaller clone of XS650 typical comment is; I expect to spend 50 to 75% of the purchase price on parts to make it right. Harley parts on Yamaha parts prices... "Labor is free" :wink2:
There are a few Harley dealers supporting Buells yet. The EBR's not so much. I have a back of my mind feeling that Harley went out their way to "discourage" dealers from having anything to do with EBR. Since most engine parts are either Harley or Rotax there's strong availability there.
ahhh Rotax, i used to have Can Am Sonic 500 with rotax motor, that was a fun bike memory moment...you up for another spanish inquisition question? How bout a list of all your current bikes, bet it pretty interesting...and i a little more pushy than mailman and ask for pics with your bike list too!!!
 
Last edited:
You're selling the 1125 with that fine Aprillia motor and keeping the bikes powered by Hardly Ableson?! What's wrong, Gary, doesn't the 1125 give you enough grief to scratch that masochistic itch? (Yes, I know the dirty secret: if a guy really knows motorcycles but owns HD products anyway, it's because he's turned on by pain.)
 
Last edited:
The 1190SX is plenty of (even more) modern tech motor but with an old man can ride more than 10 minutes handlebar.... Allison rode on the back of the 1190 to go to the memorial day service this morning. She sez never again, GRIN!
 
Back to the leaky tank issue. I posted a message to an eBayer selling ethanol resistant resin.
EPOXY RESIN GASOLINE/ETHANOL RESISTANT COATING 4 FUEL TANK SEALING & LINING 96oz


s-l200.jpg

Price: $54.18
Buy it now
Watchers: 50
Quantity Remaining: 278
72 sold
Buy it now

Get to know the seller polymerproducts


My post;
I have a fiberglass (Buell) motorcycle fuel tank from 1991, it was "sloshed" a long time ago when it began to leak, that coating failed. Tank has sat empty for about 10 years. The loose "peelings" were removed. Then tank was repeatedly shook with a light steel chain inside to break off as much loose coating as possible. It has a couple of seam leaks and some cracks in the poor design (mostly just resin, little or no fiber) sump. I prefer not to cut the tank bottom out to to get everything, so would like to do a "slosh" as compared to cutting it open to do a brush and then have to rebond the joint. Do you have a compound (thinned?) that can be "sloshed" as compared to brush coated or must I bite the bullet and cut it open?
The cap hole is large enough to allow "decent access" but the complex bottom shape has areas that would be very difficult to reach with a brush. Some before and after pics of coating, tank, sump and problem areas. I can,will acetone and or MEK (available at local box store) rinse tank to improve bond. Thanks for any help!


$_0.jpg
$_0.jpg
$_0.jpg

$_0.jpg
$_0.jpg
$_0.jpg

$_0.jpg


His VERY HELPFUL reply;

Hello Gary,
Thanks for the inquiry. Let me tell you; I wish the questions I receive is as concise as yours, which makes my replies more conducive to the application. The pictures are a great help too, thanks. Is that an after-market tank? From the pics, it looks like the resin used is a polyester resin and it would not have been the best choice for fabricating the fuel tank as you can see with your tank. Especially, with E85 gasoline that is mostly ethanol, a more aggressive fuel that will degrade resins, especially polyester. Be careful using the chain impact method as this may damage the tank further and create more fissures and microcracking. From the looks of it, the composite tank may be already weakened from the fuel exposure, and it will be less resistant to impact force.

Consider warming the tank by placing it in a black trash bag and expose it to direct sunlight with the bag open. Stand the tank with the bung opening down so any fuel additive oils that do not evaporate will run towards the opening and degreasing it will be more accessible without splitting the tank. By slightly warming the tank, fuel the has absorbed in the composite tank material will outgas and yield a stronger adhesion for the repair coating. Again, looking at the pictures you sent, this may be the case.

A technique that I recommend is to use a high-pressure washer and use a TSP degreasing solution as the detergent. TSP is an excellent fuel degreaser, especially when used with hot water; you can buy TSP at Lowes or HD. TSP is a dry powder, use hot water to make a detergent solution for power washer siphon detergent. It won't be as harsh as acetone or MEK rinse, and it will be as effective in degreasing.


continued...
Once the tank is cleaned and degreased, use the MAX GRE epoxy to create an in-tank barrier/liner coating application. The sloshing technique that you noted, I'm afraid is not an efficient method to create a uniform coating thickness throughout the tank. Sloshing will often leave thin our uncoated spots and will render the repair ineffective. Technically, a barrier coating should be a minimum thickness of 0.015-inch or 15 mils. The method used to apply the liner coating for tanks is by using a process called roto-coating. Here is a video demonstration of the process, it is not a tank coating process, but I think you will get the idea.
I've made roto coaters using a bar-b-que rotisserie and that works well too. Another method is to pour the MAX GRE an allow it to cure flat, rotate 45 degrees and repeat until all sides are coated with the proper thickness.

MAX GRE is an undiluted epoxy-based resin, and the mixed consistency is similar to cooking oil. Diluting the resin to make it thinner will lower the chemical resistance properties of the cured resin so, a thinner resin system is not conducive for gasoline/ethanol resistance. I have more information that may be of use to your project, but relating the info via this forum will be quite difficult and restricting.

I would like to work with you on this project, as this makes for a good reference project for the MAX GRE. Unfortunately, we are restricted to provide c]o[ntact-info, however, if you do a web[search, I'm sure you will find it and we can discuss further if you are interested. Check the label on the MAX GRE picture. Hope this helps.
Gerald L.
Chief Chemist
 

Attachments

  • $_0.jpg
    $_0.jpg
    1.3 KB · Views: 2
  • $_0.jpg
    $_0.jpg
    1.3 KB · Views: 2
  • $_0.jpg
    $_0.jpg
    1.3 KB · Views: 2
  • $_0.jpg
    $_0.jpg
    1.3 KB · Views: 2
Ooh....I’m happy to see you thinking about this project again. I want to watch ( from a distance ) you tackle this interesting problem!

Wow! You’ve gotta love a company that makes such an effort at giving you a very thorough reply. Did you see on their eBay listing the gas tank that had been layered on the outside with carbon fiber? That looked pretty cool!

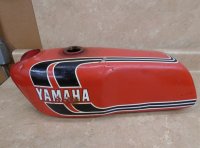
Hey by the way, I found a replacement if you can’t iron that one out. :smoke:
E536697A-28DA-4FB4-BF9A-15152AB2440C.jpeg
 
The sloshing technique that you noted, I'm afraid is not an efficient method to create a uniform coating thickness throughout the tank. Sloshing will often leave thin our uncoated spots and will render the repair ineffective. Technically, a barrier coating should be a minimum thickness of 0.015-inch or 15 mils. The method used to apply the liner coating for tanks is by using a process called roto-coating. Here is a video demonstration of the process, it is not a tank coating process, but I think you will get the idea.
Another method is to pour the MAX GRE an allow it to cure flat, rotate 45 degrees and repeat until all sides are coated with the proper thickness
His last statement there calls for a word of caution. Epoxy does not adhere well to fully cured epoxy without mechanically roughening up the previous coating. It will stick well to epoxy that has just set... and not fully cured yet.

I'll give you an alternative method... Slosh the tank as you were planning and set it upright. Take some epoxy from the same mix and pour it out flat on a piece of cardboard... (this is the test coupon in tech jargon:rolleyes:)
Check your coupon frequently. as soon as it starts to set... that is still soft but no longer sticking to you finger, mix another batch and slosh it again. This time lay it on it's side. Don't forget to make another coupon.
Repeat until all sides have been coated. You'll wind up with multiple coating throughout the tank... all bonded together.
 
I’m still in the cut it open and clean everything out camp. Not that Gary is soliciting advice, but that never stopped us before! :geek: I’m the best armchair quarterback!
 
Back
Top