Early model 70-71 instrument rebuild/rejuvenation

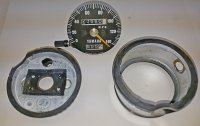
Very detailed overhaul, Didn't realise there was so much involved in calibrating the dials. I think for the average owner getting the dials to work in the first place would suffice. After all, riding these classic bikes one is not to concerned with watching speeds and revs. By the way how is the odometer spindle removed from the cup (housing) to enable the mechanical's to be removed?
 
Howdy, ramrod.
Member Tadd442 has threads on his XS2 speedometer adventures.

http://www.xs650.com/threads/have-you-ever-disassembled-an-early-speedo.31279/
http://www.xs650.com/threads/speedo-trip-meter-shaft-70-73.31323/
http://www.xs650.com/threads/xs2-speedometer-face.33287/

And there's some knob removal comments starting in post #44:

http://www.xs650.com/threads/early-...rebuild-rejuvenation.31305/page-3#post-348979

Edit: A more recent and detailed discussion on disassembly of Mailman's speedometer, showing the removal of the tripmeter knob and shaft in better detail.

(Posts #162 to #219)
http://www.xs650.com/threads/mailman’s-xs2-a-sympathetic-restoration.51520/page-9#post-542194
 
Last edited:
...chroming the cases

I have the Alsacorp chrome paint kit, and a plan.
Awaiting the appropriate roundtuit.
Google "Alsacorp easy chrome".

...and getting new faces???

I've found nothing for the thin aluminum 70-71 faceplates.
The decals that Mailman used on his XS2 look really good, and may work on ours...
 
The `70-`71 XS1 and XS1B instruments have a totally plastic enclosure, bezel and bezel ring. As such, they cannot be opened up like later models, which use crimp rings on metal shells. Instead, we must carefully cut through the plastic shell at a location that minimizes cosmetic damage.

Use a jewellers saw with a thin/coarse blade. The blade will load up with plastic and must be brushed clean frequently. Saw along the joint between the upper and lower shells, using the broad shelf-like edge of the upper shell as a guide. The thickness of the plastic to be cut is about 4-5mm, and this will take quite some time. Avoid allowing the sawblade to penetrate more than about 6-8mm, to prevent damage to the internals.
View attachment 35872
The trickiest ones are XS2, not obvious to remove clocks covers, on the XS1 & XS1B the glass are screwed with a hard black plastic ring on glasses egdes, a light heating of black rings should help to unscrew the glasses, real issue could be day meter knob ...
Sure of this because I owned a XS1 a few years ago.
 
Update: Mailman's thread on replacing the rear needleshaft bushing.

TachD07.jpg

http://www.xs650.com/threads/1972-xs2-tachometer-repair.55901/
 
This is an excellent write up as many may have said.

Just for more calibration.

Who cares if zero RPM reads zero.

This is a good RPM spread to linearize the real numbers we look at. Zero to 200RPM is not needed unless one wants to measure cranking speed.
Sticktion, low accuracy and repeatability are eliminated in the zone not needed.

cliff

ps
I know this is an old post
 
......using "Lubriplate", a white lithium-based grease, supplied in a tube. This grease has just the right amount of 'cling', and has the consistency of chicken-fried-steak cream gravy, without the flavor.
How do you know? :er:


:laugh2:
 
Back
Top