Excessive timing chain slack?

Kgreenhaw

XS650 Enthusiast
Messages
92
Reaction score
0
Points
6
Location
Hayward, ca
I Just reassembled an XS1 engine and there seems to be a lot of slack on the back side of the timing chain. Before I installed the tensioner I was inspecting the chain and when I pushed on it, it moved until it was touching the lower/center chain guide. When I joined the cam chain both ends met up perfectly in the center of the cam gear.

Also, I don't know why I did this, but I rotated the engine a few degrees before I had installed the tensioner and I heard a pretty loud popping sound. I thought I had jumped a tooth or something, but my timing marks are still where they should be...

Anyway, Is it normal to have so much slack on the back of the chain?
 
... Is it normal to have so much slack on the back of the chain?
No. That's quite stretched.

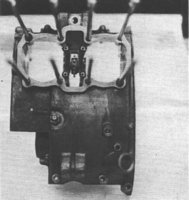
With enough slack, there's the risk of the chain sawing into the aluminum bridge between the cylinders. Plus, it retards your cam timing.

Replace it.

A new chain will be so tight that it's difficult to install...
 
MikesXS has both the DID and Tsubaki cam chains.

The Tsubaki is the heavy duty model, bigger pins.

I didn't know that when I replaced mine.
 
Sorry, I forgot to specify, it's a fresh rebuild. Brand new chain. I saw a lot of people having difficulty installing a new chain because it was too tight, but I didn't seem to have this problem. With the cam in place I pulled each end of the chain up from the bottom firmly, laid it over the cam gear, both ends met up correctly and I was able to install the master link without much of a struggle. There wasn't extra slack in either end at the time of install.

I've thought it could be possible I was sent the wrong chain, but isn't the pitch different? I figured it wouldn't have even matched the crank and cam gears if that was the case. Also I would assume I would've had overlap on the cam gear during install. I didn't count the links before I installed it.
 
Are you sure you are on the lower sprocket?

And the front cam chain guide is in place, right!

Early models 102 link.

1974 and on 106 link chain.

Better start counting.
 
I'm definitely on the crank sprocket. Front guide in also. After I installed the tensioner I rotated the engine a few times and adjusted the tension, it didn't seem like I had to over adjust it. I guess I'll pull the head cover off and do a count? One thing to mention, I used the old front guide cause the new mikes xs one didn't fit, it was too long and it was binding before it would sit flush where it's supposed to bolt up.
 
...I used the old front guide cause the new mikes xs one didn't fit, it was too long and it was binding before it would sit flush where it's supposed to bolt up.

There's something definitely wrong there. The new guides are about 1.5mm narrower than the XS1 guide, and have a smaller mounting boss. The new guides (rev -01) superceded the flat-faced originals long ago. Have a close look at these:

http://www.xs650.com/forum/showpost.php?p=384767&postcount=13

http://www.xs650.com/media/albums/1640/

I wonder if your cylinder base was shaved. Looking for cylinder dimensions now...
 
Do you have the correct lower slipper/guide installed? It actually pushes the camchain rearward a bit, and will take up some slack.
 

Attachments

  • XS1-CamChain03.jpg
    XS1-CamChain03.jpg
    83.5 KB · Views: 1,097
  • XS1-Tensioner-01.jpg
    XS1-Tensioner-01.jpg
    39.3 KB · Views: 538
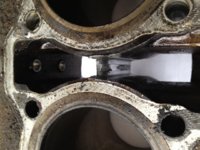
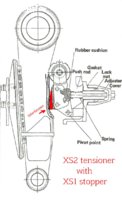
With the wrong combination of tensioner parts, there's the risk of sawing into the cylinder bridge, and/or the rear tensioner slipper.
 

Attachments

  • XS1B-CylTunnel.jpg
    XS1B-CylTunnel.jpg
    70 KB · Views: 526
  • XS1-XS2-Tensioner.jpg
    XS1-XS2-Tensioner.jpg
    97.7 KB · Views: 1,657
Thanks twomany, and thanks Brian. I will probably be pulling the head tonight to check everything and I'll take some measurements.

The chain did rub the cylinders, it had marks on it when I did the teardown. I bought an nos xs1 center slipper and it matched the one that was in there, although the original one had a notch in the top unlike the one you posted. I'll take pics tonight and give an update. Thanks again for all the info!
 
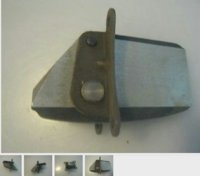
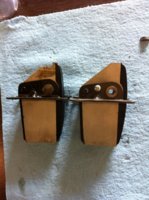
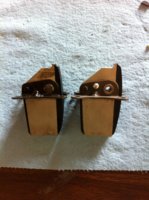
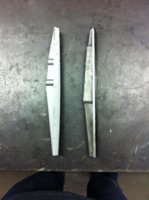
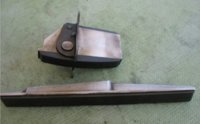
Here's the center slippers/guides old one on the left nos one on the right. The one i bought was supposedly for an xs1, but it didn't have that little notch on top. Everything else matched the original. when I was installing the cylinders they wouldn't seat all the way because they hit the guide, so I notched it to match.
IMG_1099.jpgIMG_1100.jpg

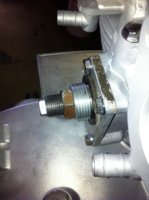
I counted 102 links and it fits cam sprocket perfect, so that rules out the chain being wrong. I adjusted the tensioner about halfway in until there was some resistance and the pin approached the end of the adjuster bolt.
IMG_1112.jpg

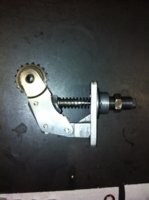
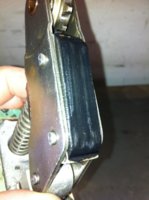
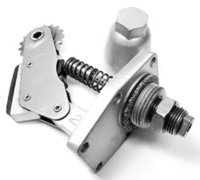
This is the tensioner I am reusing, there is some wear on the slider and the rubber is hard. Also there is some lateral play of the sprocket, it moves side to side a bit on the shaft. Should it be replaced?
IMG_1113.jpgIMG_1114.jpg
 
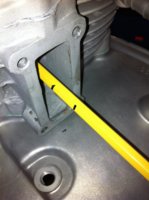
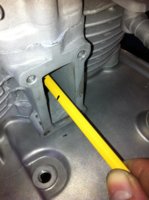
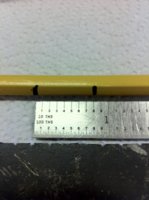
I took a pencil and marked it where it first touched the chain and made another mark where it stopped, it was about 0.8"
IMG_1115.jpgIMG_1116.jpgIMG_1120.jpg

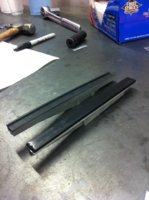
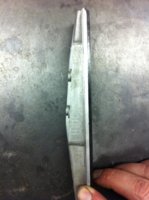
Here's a side by side comparison of the new and old front guide. The new one has a curved face, where as the old one is completely flat. new one is thicker and has a channel, it was also longer, but I cut it down to try and make it fit. I stopped modifying it once I realized it was a bad Idea.
IMG_1127.jpgIMG_1128.jpgIMG_1129.jpg

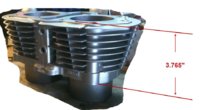
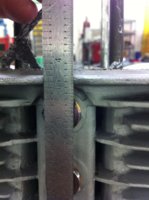
I also measured the cylinder height with base gasket intact. It's about 3.8"
IMG_1126.jpg

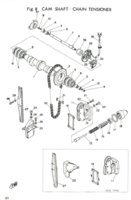
After looking at the diagrams and getting a rough measurement of the chain freeplay, I might have over reacted and maybe the only issue was a worn front guide and a worn tensioner. I think the new front guide I tried to install was the wrong part, but it was probably not the best Idea to try and reuse the old one. Even if I took the head off for no reason, oh well, at least I can replace the front guide.

Idk, I'll see what you guys have to say. Thanks.
 
Ok, I see what was going on Twomany, I didn't realize there was a "new' version of the early guide/ tensioner system. Does this mean I need to replace every guide and tensioner part I currently have on the engine? Crap. :doh:
 
Well, I'm learning something new here as well. Your slipper parts look like the super-early parts, even before rev -00. Here's my pic of those:

XS1-Tensioner-02.jpg

I had heard about super-early cylinders having a slightly longer bridge, at the bottom, between the cylinders, but only now realize that's why the super-early center slipper-block has that notch.

We both have the flat front slipper, but yours has the much larger mount boss, prior to rev -00.
Very interesting.

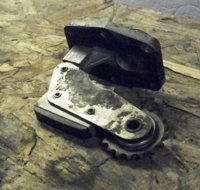
More interesting, even before yours, the center slipper block was actually a sprocket.
Be glad you don't have to chase one of those down...
 
Back 40 years ago, when I was goofin' with mine (an early version '71), I always had to deal with camchain tightness during reassembly. That's why I dread looking forward to the next rebuild, with the newer curved front slipper. Pretty much assumed that you would be experiencing the same.

Aside from your reported slack camchain, I can't yet see anything outrageously wrong with your setup.
Your pic of the adjusted camchain tensioner bolt has the right amount of protrusion for a new camchain.
So far, so good...
 
Last edited:
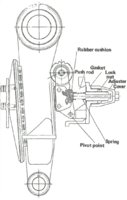
Now, with the late XS1B's and into the XS2, the tensioner system was updated to the type 'B'.

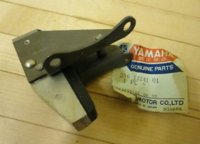
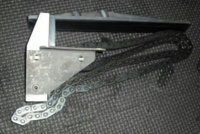
This implemented the arched front slipper, and moved the center block slipper from the inside, to the outside of the chain path. So now, instead of having the chain do a lazy-S serpentine path, the new center slipper would arrest any 'fling-off' of the chain from the lower sprocket.

The rear tensioner slipper block was shoved inward to accomodate this new geometry.
And, this new tensioner went to the 6-hole mount style.

What's unfortunate about this type 'B' tensioner system, is that I haven't found a side-view depiction of this setup, and the XS2-TX650 parts manuals show the center slipper mounted backwards/upside-down (last pic)...
 

Attachments

  • XS2-Tensioner-04.jpg
    XS2-Tensioner-04.jpg
    42.8 KB · Views: 533
  • XS2-Tensioner-02.jpg
    XS2-Tensioner-02.jpg
    76.4 KB · Views: 467
  • XS2-Tensioner-01.jpg
    XS2-Tensioner-01.jpg
    54.5 KB · Views: 473
  • XS-Tensioner-TypeB.jpg
    XS-Tensioner-TypeB.jpg
    9.9 KB · Views: 652
  • 70-72-Cam-Tensioner01.jpg
    70-72-Cam-Tensioner01.jpg
    80.9 KB · Views: 905
Ok, now with the worn slipper on your rear tensioner arm. Mine is similarly worn, but after a long search, finally found a used one in better shape. The only other thing I've found to help restore that tensioner is this eBay item, which is a replacement for the other side where the push-plunger presses on the arm.

Item: NOS Yamaha Chain Tensioneer Damper TX 650 TX650 1973 XS 1 XS1 1970-1971 XS 2

URL: http://pages.ebay.com/motors/link/?nav=item.view&id=371005560279&alt=web

Alt URL: http://www.ebay.com/itm/NOS-Yamaha-...50-1973-XS-1-XS1-1970-1971-XS-2-/371005560279

The sprocket on my old tensioner is (and always has been) a bit sloppy. Never an issue, worked fine thataway. My used replacement is just as sloppy, so not really worried about it.
 
Last edited:
Now, with your question about having to upgrade to the newer parts.

I believe the only sanctioned upgrade to the early type 'A' tensioner system is the superceded/newer arched front slipper. But, you're having a problem with that. Not sure what's going on there.

The next upgrade possibility is a complete conversion to the type 'B' tensioner system. This would require swapping all 3 major components, front arched slipper, center slipper, and rear tensioner.

You would probably be the lone pioneer in this adventure, but the factory documents make it look like an easy conversion. The availability of these type 'B' parts appears much better than our early type 'A' stuff.

But, your type 'A' stuff looks good enuff to work. So I wouldn't go that route yet...
 
Now, the trivia.

This is the only picture I have of the initial release XS1 central camchain tensioner sprocket.
It's not in any parts manuals.
Go figure...
 

Attachments

  • xs1-305.jpg
    xs1-305.jpg
    41.6 KB · Views: 466
Back
Top