First time build. cafe style.

Zombieki11a

XS650 Enthusiast
Messages
40
Reaction score
3
Points
6
Location
St. Paul, MN
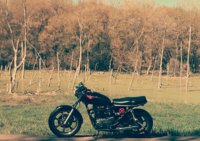
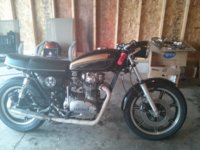
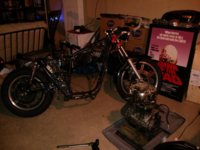
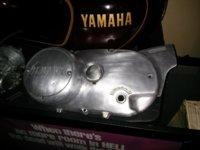
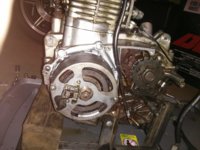
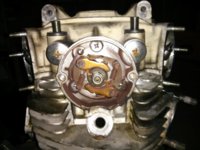
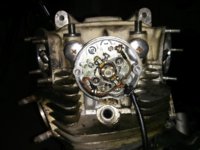
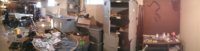
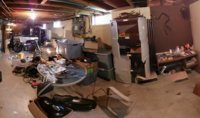
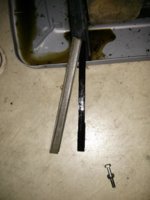
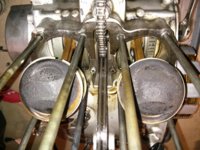
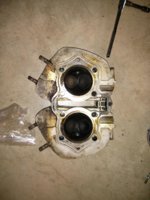
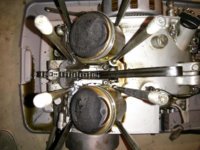
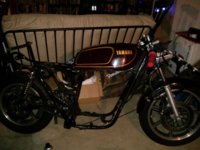
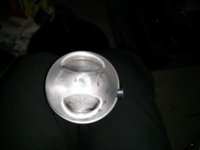
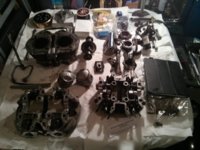
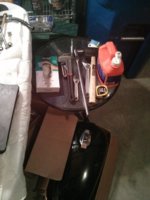
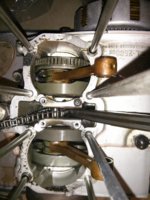
First pic is how I got the bike save for the seat and handlebars. 2nd and 3rd pic shows new clip ons and new headlight with speedo. 4th pic is the bike in my basement with the help of my roommate got the engine out. Last pic is the engine cover after a little sanding and you can see the 750 tank behind it. I'll be posting as often as I can. Any help or tips are welcome do to this being my first bike let alone my first build.
 

Attachments

  • IMG_20130510_164830.jpg
    IMG_20130510_164830.jpg
    245.8 KB · Views: 428
  • IMG_20130530_192043.jpg
    IMG_20130530_192043.jpg
    247.6 KB · Views: 409
  • IMG_20130530_192016.jpg
    IMG_20130530_192016.jpg
    202.5 KB · Views: 425
  • IMG_20130929_203342.jpg
    IMG_20130929_203342.jpg
    210.3 KB · Views: 371
  • IMG_20130929_203411.jpg
    IMG_20130929_203411.jpg
    139.1 KB · Views: 363
Question for all you gear heads. I got a PMA and pamco from Hugh and mike. I have a 1979 and I'm not sure if I need the auto advance rod. Here's some pictures to help. Thanks again guys.
 

Attachments

  • IMG_20131004_123429.jpg
    IMG_20131004_123429.jpg
    177.4 KB · Views: 304
  • IMG_20131004_123415.jpg
    IMG_20131004_123415.jpg
    225.4 KB · Views: 292
  • IMG_20131004_123354.jpg
    IMG_20131004_123354.jpg
    165.3 KB · Views: 299
  • IMG_20131004_123404.jpg
    IMG_20131004_123404.jpg
    186.5 KB · Views: 310
Yes, unless you also bought the E-advancer, you need the mechanical advance system in place and working properly with the PAMCO.
 
Zombie,

You need the rod but not the mechanical advancer. Please read the installation instructions on the site www.yamahaxs650.com I also suggest that you first get the PAMCO working just from a separate battery before installing the PMA. As soon as you get the PMA installed, check the voltage on the bikes battery or capacitor with the engine running to be sure the regulator is installed correctly before you hook up the PAMCO to the bikes electrical system.

Perfect! Thank you guys so much. I'm glad I didn't go with the kawi. Don't think I could get as much help online with those.
 
So I just read the install info and the watched a few videos. It looks like I already have an original rod. Will this work or will I have to buy a new one. I'll put pics up as soon as I am home.
 
Zombi...,

The original rod will work just fine. You may find that the locating pin on the end of the rod where the advancer replacement goes (the right side) may be a bit too long. If so, then just file it down to fit the aluminum advancer replacement.
 
Got a little bit of time this weekend to get at the engine. Also got my gaskets, seals, and o-rings from mikes. Still a lot to do but its looking good.
 

Attachments

  • PANO_20131012_155443.jpg
    PANO_20131012_155443.jpg
    76.5 KB · Views: 312
  • PANO_20131012_155312.jpg
    PANO_20131012_155312.jpg
    162.7 KB · Views: 327
  • IMG_20131012_155610.jpg
    IMG_20131012_155610.jpg
    177.4 KB · Views: 293
  • IMG_20131012_155625.jpg
    IMG_20131012_155625.jpg
    299 KB · Views: 315
  • IMG_20131012_155541.jpg
    IMG_20131012_155541.jpg
    219.9 KB · Views: 327
  • IMG_20131012_155634.jpg
    IMG_20131012_155634.jpg
    259.7 KB · Views: 329
Thanks rd. I've been watching your build as well. I think I'm going to steal your neutral light position. I like where you put it. As far as stuff I've been able to get done. I got the pistons off and soaked them in extreme green degreaser and went ape shit on them with some steel wool. I'll post some pictures tonight. Spent most of the weekend looking for a frost plug for the starter. Auto zone, ace hardware, and fleet farm looked at me like I was crazy. Going to order it online. Got a bussman fuse box, seal puller, and finally got a torque wrench too. Now to start pulling the rotor/stator and get to replacing seals. Going to try pulling the valves too see if I need to lap them.
 
loving the pics of the engine what condition is the frame in and I am making mine into a café racer if you want a retro look I would also research what the café racer style was all about when it came about and look for a stlye u like and then go for it I have had to change the tank on mine to look more original to the design its a long thin stretched tank I can show pics if u want
 
I'm all about pics!!! I got a xs750 tank in good shape off ebay. It's got the knee cuts and is nice and boxy. Still got to get petcocks for it and gas cap. Thinking about cutting out the bung so I can get any rust in the tank and off set the bung by an inch or two. Frames in good shape, still have to detab it. I'll get a pic of the frame with the tank mocked up tonight so you guys can check it out.
 
So here's the first piston cleaned. Any tips on getting it spotless? Also frame and tank as requested.
 

Attachments

  • IMG_20131023_212249.jpg
    IMG_20131023_212249.jpg
    179.9 KB · Views: 299
  • IMG_20131023_212208.jpg
    IMG_20131023_212208.jpg
    190.8 KB · Views: 292
  • IMG_20131023_212216.jpg
    IMG_20131023_212216.jpg
    79.7 KB · Views: 288
Thanks man. I most likely saw it from somewhere else and stole the idea!

As far as cleaning the pistons I'm not much help. I don't think bead blasting them would be a good idea. Maybe a wire wheel on a bench grinder to knock off the heavy stuff on the top. I'd probably use something less abrisive for the sides.

If you're sticking with steel wool maybe some WD or something of that sort will work better than the green degreaser?
 
So my landlord freaked out when he found out I had my bike in the basement. Even though I had no oil or gas in it and a tarp down he told me to get it off the property. So I just got finished moving every thing to my moms place. Decided to do some work. One of my bolts holding the cam chain tensioner in is striped so I busted out the drill and the easy out. The fucker snapped then fell into my lower case.... Yeah.
 
Pics. Last one is that striped bolt.
 

Attachments

  • IMG_20131030_153622.jpg
    IMG_20131030_153622.jpg
    193.8 KB · Views: 271
  • IMG_20131030_153634.jpg
    IMG_20131030_153634.jpg
    207.5 KB · Views: 267
  • IMG_20131030_153629.jpg
    IMG_20131030_153629.jpg
    213.3 KB · Views: 267
  • IMG_20131030_153518.jpg
    IMG_20131030_153518.jpg
    233 KB · Views: 278
So I finally got that striped screw out. Woooooo! I also got my parts from mikes, so I was able to get the gaskets scraped clean and the cam chain tensioner removed. Tonight I'm going to start laping my valves. Tomorrow is oil seals and frame detab and strip.
 
Back
Top