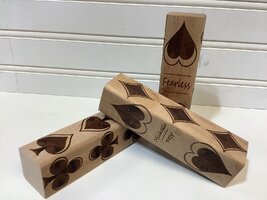
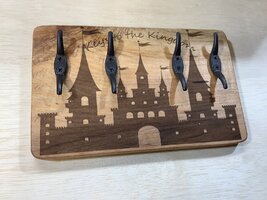
Full on excuse…….

Wingedwheel

If it wasn’t broke before, let me try it…
Top Contributor
Messages
2,612
Reaction score
5,517
Points
513
Location
Waterford, MI
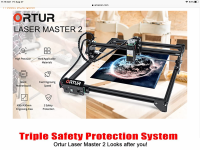
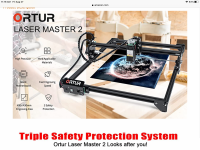
Ok guys, I know I started a build thread that has stalled for a minute and I’m guilty of putting some things off until it cools down outside but nobody ever really explained to me how much time I would have in retirement to pursue things I enjoy doing without schedule constraints. That being said I will get back to the “76 next month on another trip down to hang with pops but in the meantime I have to share my latest toy. I have always been an avid woodworker/furniture maker but used professional basic tools. I decided to up my game so I pulled the trigger on this. 4B292BFB-AEA1-40D9-BF0A-4700E7171710.pngI’m looking at options for software as I’d love to be able to run this with my tablet.
 

Attachments

  • 164498F0-74ED-4B75-ABD3-B983DDCEC6A3.png
    164498F0-74ED-4B75-ABD3-B983DDCEC6A3.png
    1.1 MB · Views: 152
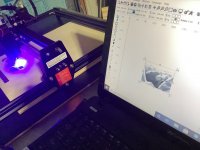
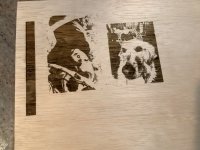
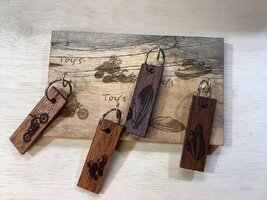
Alright, it showed up today and I’m having a blast! I had to assemble the frame, trolley, motors, belts and harnesses but it was easy, well constructed and I got a different software that was recommended by a lot of people that use these machines2DEC0EB8-65F0-4637-8DDE-514C03849C31.jpegE3B7F588-6DC2-460D-ADE4-DC30013EDA25.jpeg. Trying out some photos as well. I wish there was a way to load a vid directly on here.image.jpg
 
I’m making good progress with the laser program. I usually get through about half of a tutorial before I start falling asleep. I go play with the machine and come back later. That usually triggers something in the “Oh yea” section of my brain.
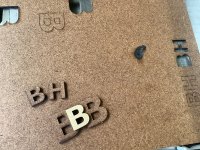
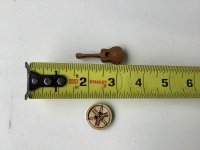
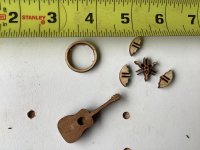
This thing is PRECISE, and I’m learning what works with what material. I’m not just getting out there and burning things now lol.B09D55B4-8EAE-439F-B6CE-EC81611AB09D.jpeglook at the individual pieces from this logo and keep in mind I can go smaller.4EC3C023-C936-491B-83A1-671F5744C09D.jpeg
 
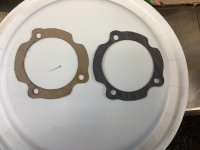
I tried something new today. I took a pic of a gasket, measured it and sent it to my laser program. After entering the vectors I was able to reproduce the gasket.After a few runs to determine power and speed I cut one from a sheet. Doing an overly proved it to be darn near perfect.image.jpg
 
When you get onto Perspex/Acrylic/Polymethylmethacrylate the laser does not burn or melt its way through. The heat from the laser causes the polymer to de-polymerize thus releasing methylmethacrylate vapors. These vapors are a sensitizer so make sure you are in a well ventilated room or use an extractor. The good part about Perspex it you get a nice clean cut free of any charring.
 
Thanks Paul, I am totally aware of what materials I should and should not be cutting. Funny thing is I can cut acrylic all day but am told not to cut lexan. I have to be careful with my power settings as well. I have a pretty well ventilated area in my garage I use this and I’m really considering installing an exhaust hood. I can make one with a bathroom fart fan and go right out the side wall of my workbench.
 
Just curious, can a laser cutter carve out designs in acrylic to specific depths, or does it just go straight through??? I was thinking of those acrylic badges on the XS1B.

Thank you.
 
Just curious, can a laser cutter carve out designs in acrylic to specific depths, or does it just go straight through??? I was thinking of those acrylic badges on the XS1B.

Thank you.
It does go right through however you can put a piece of reflective (white not shiny like chrome)material underneath and it will reflect and “burn” your design into the Acrylic. Lexan is a no-no due to fumes however regular plexiglass is considered safe. I do have an exhaust fan set-up over my laser bed though. I’m also looking at reversing that to a downdraft because as the fan pulls the smoke up around the components it leaves soot on everything. Not badly but enough to where it might eventually cause problems.
 
Last edited:
Almost all the files I use are created from images I find online using the program I run. Paul, send me a pic of what emblems you’re talking about and I’ll conduct an experiment.🧠
 
Here is an example of the early badge taken from Ebay:

https://www.ebay.co.uk/itm/302160361745?hash=item465a293911:g:pgUAAOSw-I9g5E-u

Front.jpg


Back.jpg


The word Yamaha is pressed/cast/moulded into the badge. Then the color, black and chrome are applied. These early badges seem very expensive now and I just wonder if there is a relatively easy way to reproduce them? In the past I have taken these, sanded the raised areas to remove the color and black, and then resprayed with the color I wanted.
 
Back
Top