Fun Electrical Issues (Headlight stopped working and turn signals stopped flashing)

AJMercer

XS650 Member
Messages
9
Reaction score
0
Points
1
Location
LA
On my way home this evening, my left turn signal stopped flashing, but the right one was working fine. Then the right one stops. As I get home I see my headlight start to dim. I turn the bike off, check to make sure nothing came unplugged behind the headlight, start it back up and the headlight no longer works at all.

Turn signals no longer flash and when I turn them on at idle, they kill the bike. Checked my grounds, and taillight still works fine, but the taillight indicator is now on between the speedo. Just seems like a related list of things that happened all at once. If these screams out something obvious to someone, please shout out me and call me dumb for not knowing, it would be much appreciated. All electrical had been working fine since adding new turn signals and taillight a year ago.

After looking around online, it seems it could be related to the Reserve Lighting Unit, Light Checker, or Safety Relay. Now i thought my bike was a '79 special, but there is not a 4 fuse box under the seat, so I guess it is just a standard? So doesn't seem like a fuse issues if the turn signals and light still come on.

Any help is much appreciated for this wiring rookie.
 
Your lights and your ignition system are independent of one another. Your motor would not cut out because of improperly working lights.

Your symptoms do sound like your battery is not charging. You should check to make sure you are putting out good voltage when running.
 
That's my guess to. Check battery voltage at idle, 2500 rpms and at 5000 rpms. report back what you find.
Leo
 
Put the battery on the tender all day, and checked when I got home. Everything was back in working order.

I'd like to hear what you think, but I am assuming the 3.5 year old battery isn't holding the charge it's given as well.

Voltage was
Idle: 13.5
2500: 14.1
5000: 14.5

Appreciate the comments.
 
Hi AJMercer and welcome,
Those are good numbers.
Also check the battery voltage with the engine stopped.
And check it again tomorrow to see if it's fading away.
As to whether the bike is a Standard or a Special, check it's frame number against Skull's ID list.
Note that XS650 parts swap like LEGO, (for instance, my Special has a Standard gas tank) about the only marker that can't be changed is that Standard rear shocks are more upright than Special rear shocks.
You could post a photo?
 
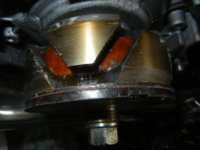
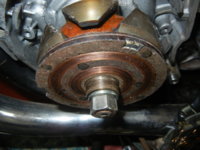
Check your alternator brushes. They are a normal wear item on the XS650. I just checked the brushes on a 79 with 9.4K original in really good conditon, the outer brush was worn to just above the wear limit mark, anywhere near that mark is too short. I always remove the stator, clean and sand the slip rings with 400 or 600 grit then clean again with carb or brake cleaner on a white rag. Check the ohms across the slip rings, while you are there, 5.6 ohms is ideal, anything below 5 and the rotor is leaving soon. Look at the insulation between the "fingers" on the side of the rotor, it should be medium brown and smooth, dark and bubbly is no good, rotor is or will be failed.

trailer and forks 011.JPG

trailer and forks 012.JPG
 
After a night on the tinder everything worked fine, except the battery was not holding a charge. Old battery, so got a new one. and everything was back to normal. Then, 2 rides later, I noticed my brake indicator was coming on, checked and the brake worked fine. But about 30 minutes into the ride the headlamp stopped working. Turn signals still worked fine. It came on again, once, but was off for the rest of the ride.

Checked voltage at lamp and it was not receiving power at the light, and the bulb in the lamp looked fine. So why would the brake light indicator come on when the headlamp isn't working. I don't think I mixed up any wires while checking the original problem. Going through the wiring diagram and checking voltage, but wanted to check here first to see if it raised any flags for people.

I will be checking the alternator brushes this weekend, but the numbers seemed to show thats ok, right?

Also looked up the numbers, and it is a special, is the fuse box under the battery box?
 
The diagram indicates the fuse box under the seat on the 79 special. It is common for 35 year old electrical connections to get corroded and intermittent. Open, clean, use a bit of dielectric grease and reassemble all the connectors you can reach. The fuse "clamps" in the fuse box often corrode and get weak resulting in little clamp pressure they often fall apart when you pop the fuse in and out. Most replace the whole box with a 4 or 5 fuse blade style box found at the auto store. The 79 has a "light checker" located just behind the battery under the seat. Odds are good that's where the brake/ tail light "issue" is, I need to futz with mine, the indicator is coming on even though the bulbs are lighting (now), I had to remove and reseat the tail/brake bulb.

Found in tech; the 79 special wiring diagram. News to me; the specials have the fuse box, the standards carried on with just one fuse, behind the RH side cover

View attachment 22984
 
Checking all the connections and cleaning them today, and found out there are no fuses on the bike, hence why I couldn't find them. Who ever owned the bike before me removed and bypassed the fuses. So, not sure how that effects the current situation. Is this something common for people to do? Should I add a fuse box back?

I cleaned all the connections in the headlight and near the battery, still no light. Checked the light with a battery and it is still good. Checked for power at the handlebar switch, voltage regulator, light checker and reserve lighting box, all 0 for headlight. So it isn't getting power but im trying to figure out where power should be coming from since it isnt being run through the fuse?

Also I am kicking the bike over a few times before checking for power at these connections to make sure there is power going to the light, is that good enough or should I do it with it running?

Thanks for the help.
 
Is this something common for people to do? Should I add a fuse box back?

It is a terrible idea to bypass fuses. You need at least one main fuse at the absolute minimum. And it is also nice to have your headlight, turn signals, and ignition on separate circuits.

Are you sure that the original fuse box wasn't replaced with modern style blade fuses?
 
Yea, searched high and low, no fuses. It is pretty clear where the previous owner just bypassed the fuse box. Going to add a fuse right after the battery, that was what they did pre '79, to my understanding.

After going through my bike again, I checked the alternator once more, and the numbers were not where they once were. Only at 12v when running, no matter the RPMs. After going over the wiring diagram, it looks the alternator is what powers the light, so that would make sense. Going to clean the brushes, and hopefully get the alternator back to charging.
 
One way to think about this is to think the batteery supplies all the power for the bike. The alternator just keeps the battery charged.
In the XS650 TECH section under the Electrical heading you will find a charging guide. You might want to read up on things, do some testing.
DON'T buy anthing untill yoiu have done the testing, well except new brushes. They are often a problem. Old brushes may look ok but after enough years go by the springs get weak. Weak springs won't push the beryshes against the rotor well enough to carry enough current to get things to charge.
You may find replacing the brushes fixes things, but go through all the testing, you may find other issues.
Leo
 
78/79 Specials had a built in alternator warning system hooked up the the taillight warning light. This was not reported any where in manuals or such. Check out the charging system.

Fuses first.............. And complete connecters, bullets and couplings, clean, dielectric grease reinstall and check and clean all earth connections. This helps get all power to where it is supposed to go without any resistance.
 
In going through gggGary's guide to checking the charging system, Everything was in order until I got to the rotor. Slap test wasn't working. In checking it with my multi meter on 200 ohms, rotor still on the bike and ignition off, I get no reading. The multimeter is only 2 weeks old, and works fine reading voltage, so I dont think it is the problem. Tried doing it according to the guide, then how people do it in videos, touching the leads to separate rings, and nothing across all.

I would have thought, it would still read something even if it was low. Am I testing it wrong? Just wanna make sure before I drop the cash for the new rotor.
 
Hi AJ,
your post#4 sez you were getting 14.1 Volts at 2,500 rpm so your rotor must have been working then, eh?
I'd suggest you double-check your meter's Ohm function and rotor testing methodology before deciding that your rotor is hooped.
 
The rotor can go (fail) open circuit, one culprit can be where the wires are soldered to the back of the slip rings. If you touch the meter leads together they read zero?
 
When I touch the meter leads together they read .3, which is the resistance of the meter itself, correct?

Yea fredintoon, I thought it was strange too, why I wanted to check here first. But maybe the previous bad battery put to much stress on the charging system, causing it to fail?

How can I test my meters ohm function? Also, what is the preferred method to test a rotor, each lead to a different ring, or single lead and ground? Either way, I doubt it will change my readings, checked a few different times, a few different ways. Will look into the wires on the wires on the back of the slip ring.
 
Have you checked the integrity of your loom in general as well as connections? Anywhere chafing that's worn through causing a short. Years ago I had a bike that suddenly lost head lights when I turned left... turn right and they came back on again. Steering had worn into the wiring. Is it possible you've had an overheat and fused some wires together? Another possible cause of a short.
 
when you say your headlight was flickering... how did it flicker? is it possible it flickered while your indicator was on and the flasher unit was leeching current from headlight due to short? just read your post again, sorry you said headlight went dim... not flickered.
 
On any meter you will get some sort of reading on the 200 ohm scale when you touch the leads together. This is the ohms of just the leads. On testing low ohms, of about 10 ohms or less you need to know this reading. You need to subtract this reading from the test reading to get the actual reading.
Using your meter as a example, you get .3 ohms on the leads. You test your rotor and get 5.8 ohms, You then subtract the .3 from 5.8 to get 5.5.
Now if you touch the leads and get a reading you have a good idea that it's working.
On testing the rotor it's easier to test with the stator off the bike. This gives you plenty of room to test. Test buy touching the leads to the slip rings. On a good rotor you should get around 5.5 ohms, it can be ok with as low as 4 ohms or as high as 7 ohms.
Now on a high ohm scale, like 20k touch one lead a lip ring, the other to ground. This should be an infinity reading.
You want current to flow from slip ring to slip ring but not from slip ring to ground.
Rotors can fail slowly or right now.
These test can be done by just removing the brushes, but your test leads may not fit in the holes to reach the slip rings. Removing the brush holder may help.
You can make extensions for your probes by straightening out paper clips and twisting them around the probes. If you have some solid copper wire around that will be easier to work with. Just do your lead check with the extensions on before you test.
Using some very fine steel wool or sand paper with electrical contact cleaner to clean the slip rings might help with the testing.
Leo
 
Back
Top