Fun with Bottom End Disassembly & Degreasing

YL82

Perpetual Restorationist
Messages
851
Reaction score
8
Points
16
Location
Goose Creek, SC
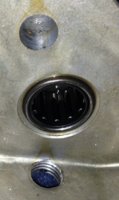
As I disassemble engine components (with the exception of the crankshaft which I just plan to degrease) such as the transmission shafts, starter motor gear parts, shifting mechanism, etc, I've got the following questions:

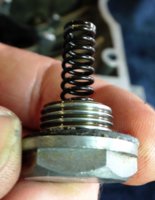
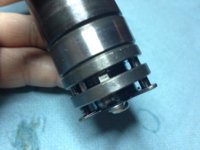
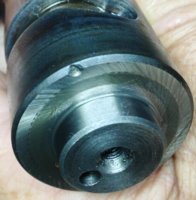
Transmission Bearings: I have completely taken apart the gears, etc. from both the Main Axle and Drive Axle. When are these bearings replaced? Only when there's a known problem? Are certain transmission bearings more prone to failure than others? I'm not aware of any issues with my bearings.

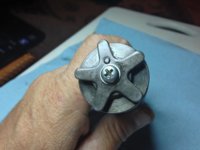
Selector (Gear) Mechanism: Any issues or concerns with complete disassembly? Any particular parts that tend to wear that one should replace (beyond cotter pins & springs)? Do I need to take note of the position of any specific parts prior to taking apart? Can these parts be degreased/cleaned well enough without removing from upper crankcase half?

Degreaser recommendations?

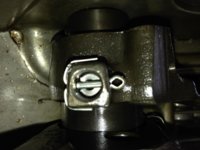
Is it OK to pressure-wash (3100 psi) the cases?
 
Last edited:
Not knowing the mileage on your engine and not seeing/feeling/touching parts, my best guess is they are probably okay.

However, if she ever experienced long storage periods with little or no lubricant, rust forms, or had a clutch disintegrate or catastrophic piston/rod/crank damage or transmission failure, then you probably would be advise to replace as many as you can.

If in doubt, clean the bearing thoroughly, then spin it when dry to listen for any noises, compare to a know good bearing. Then check for any gouging or pitting of the ball bearings, difficult on most because of bearing cage. Now lightly oil, just 2 or 3 drops and redo spin test listening for noises.

If ever in doubt, replace.

I worked at a motorcycle shop for year and standard procedure was to replace if in any doubt whatsoever. Too costly not to. Simple as that.

Shift forks, look for wear on the fork ends. Shiny surface on both sides should show equal wear. Wear on one side indicates bent fork. Replace.

Gas was always my best degrease. And kerosene seems to be a favorite of others on this site.

Pressure washers not matter how strong can be used with care. The more powerful ones like yours, don't hold as close and as long in one spot. A little common sense works great. Good old elbow grease works great and because you are applying the pressure often does less damage. I use a pressure washer lots. Another great tool.

Disclaimer;
Flammable liquids do explode.
No humans or animals where harmed during the rebuild of my engine.
 
I prefer safety solvent or kerosene for the scrubbing, then flush with isopropyl alcohol or MEK to flush clean. Either of the latter will require a light coat of oil on the steel parts afterward to prevent corrosion, but it rinses the solvent and grime away clean. On aircraft parts, we generally flush them clean, dry with compressed air, then the steel internals go in a zip lock with a small amount of hydraulic or engine oil, whichever is appropriate to the assembly until we are ready for them. Clean flushed aluminum parts keep just fine.
If I pressure washed the inside of a case, I'd blow it dry and flush it with a low flash point solvent, then blow it dry again to make sure any water in entrapment areas gets out of there.
On bearing inspections: In turbine engines we use a 90 degree hook scribe to "feel" the working face of the races inside for radial scoring. a 10X magnifier and a small magnet are your friend on inspecting the balls. inspect a face, then mark the center of the visible area of the ball with a sharpie. Roll it with the magnet to another area, and re-inspect. This is done until the bearing is rotated and you can't expose a full view without seeing a sharpie mark. Takes some time, but we typically only do 1 in 5 balls, so if you have 15 total, 3 will be done this way. Some more critical bearings are simply discarded (since they are usually only seen at overhaul) and some have radial and axial play test setups to check for wear.
Typically, for my own purposes, if I can't feel any radial grooves with the scribe and there is no spalling (pits, smears, dull spots)evidence on the face of the rollers or balls, I'm good with it.
 
Thanks, jd. Good stuff!

I've some acetone and denatured alcohol, but have used MEK before and will get more. Any issues initially flushing parts with chlorinated solvents like brake cleaner or electric parts cleaner that contain "Perc" (tetrachloroethylene) or TCE (trichloroethylene)??
 
Any advice removing and reinstalling (new) 3 cotter pins from the Shift Forks? The cotter pin on the middle fork (Shift Fork #2) looks to a tough one to remove since it's pointing downward. Perhaps removing #1 Shift Fork will make it easier to remove?

As far as replacement of the cotter pins, are there better alternative fasteners to go back with?
 

Attachments

  • image.jpg
    image.jpg
    153.3 KB · Views: 375
Any of those solvents would work in there, you just don't want the chlorinated stuff or any residues from it dwelling on the aluminum. A lot of brake cleaners are non-chlorinated these days. On the cotter pins, probably the most secure thing you can put in there. Even if you replaced them with a split roll pin, you'd want to safety wire through the pin for security.
 
only advice I'd have about the cotter pins is make sure that the head of the pin in the centre fork doesn't contact the adjacent fork when you run the gear selector drum through all the gears . You'll find the cotter pin head may strike the adjacent fork and prevent full gear engagement so I flattened the head of my cotter pin :laugh::wink2:
 
For the things we have to learn before we can do them, we learn by doing them" - ARISTOTLE

I successfully removed all of the gear selector parts, except for the little bearing that is tucked into the left side of the upper case. Not sure how to get it out for cleaning & inspection. There's a round dark cover thing visible on the exterior of the case. I decided to refrain from hammering on that. :)

The 3 cotter pins and 3 cylindrical shift cam pins were a little tricky to get out. I'm hoping that I can get the cotter pin ends wrapped around the forks as well as the originals were (see image in my previous post).

6958da9e-b4a4-4cc1-8144-7ddae283cbf1_zps532e0412.jpg
 

Attachments

  • image.jpg
    image.jpg
    242.9 KB · Views: 340
Last edited:
Does the Cam Stopper Spring and Cam Stopper Bolt Gasket ever need replacement?

Both parts appear to be difficult to find on the internet. If they are not prone to problems, I may just go with my current spring & washer.
 

Attachments

  • Cam_Stopper_Bolt_and_Starwheel.jpg
    Cam_Stopper_Bolt_and_Starwheel.jpg
    145.7 KB · Views: 318
  • Cam_Stopper_Spring_Washer_and_Bolt.jpg
    Cam_Stopper_Spring_Washer_and_Bolt.jpg
    147.1 KB · Views: 336
  • 90501_10068.jpg
    90501_10068.jpg
    49.2 KB · Views: 290
  • 90430_16047.jpg
    90430_16047.jpg
    39.9 KB · Views: 267
The bearing in the cover is a needle race with a very thin case and a blind end which you can see from the outside
.
Its too thin to drift out . If you want to replace it the best way to do that is to press it out from the inside of the crankcase using the gear selector drum..

Put the drum back in the bearing loosely and use a press placed on the star screw to push the selector drum which will press the bearing out of the case then use it again to press a new bearing back in.:thumbsup:


You should be able to buy a neutral detent spring, ball and washer at Mikesxs or http://www.boats.net/parts/detail/yamaha/Y-1T3-25371-00-00.html
 
Last edited:
.... and use a press placed on the star screw to push the selector drum.

Sorry to be dense, but what do you mean exactly when you say "use a press placed on the star screw"? I know what the star screw is, not sure about the press thing.

Perhaps a C-Clamp or Pipe Clamp?

Thanks, peanut!
 
sorry I didn't make it very clear.

You need to use a hydraulic press to push the needle race bearing out of the crankcase. Any garage will have a small press but I wouldn't trust anyone except a precision engineer to do this.

It should only cost a few dollars to get your local precision engineers to do the job .

Here is a video I did when I replaced the bearing in my engine.
 
Thanks for the video link, peanut!

I just watched several of your very informative videos! Great Stuff! Many of them are very germaine to the multiple tasks I'm dealing with currently.

I think I'll pass on the bearing removal job until I have a "pressing" (pun) need to replace it. I will be able to thoroughly flush it with petrol while it's still in place.
 
T

I think I'll pass on the bearing removal job until I have a "pressing" (pun) need to replace it. I will be able to thoroughly flush it with petrol while it's still in place.

thanks for the praise :thumbsup:

I think its a good idea to leave it if its still sound.

I actually bought my bike cheap in boxes because the previous owner had damaged the needle race and didn't know how to remove the bearing to replace it ! lucky me :D...
 
One man's misfortune is another man's gain, I guess. :). Right On!

Since 650's are much scarcer over there (I've read), that must have been especially sweet.
 
The Pan Head Screw on the star wheel is really freaking tight.

Looks like I'll have to bust out my vintage Vessel #2500 hand impact driver.

Edit: I was able to break loose the screw thanks to above tool. I completely disassembled the gear selector drum, so the following 2 questions have answered themselves. Both questions pertain to the selector plate.

Why is one of the Dowel Pins flat whereas the rest are cylindrical?

Is there any significance to the dimple on the face of the starwheel?
 

Attachments

  • image.jpg
    image.jpg
    124.8 KB · Views: 354
  • IMG_0468.jpg
    IMG_0468.jpg
    120.8 KB · Views: 317
Last edited:
you did take pictures and make notes before and during dismantling the selector drum I hope :wink2:
The star wheel needs to go back on correctly ,relative, to the selector drum or some of your gears will probably not be selectable. The dimple is presumably an alignment mark to ensure this.

'Perhaps someone will have a picture showing this ...I'll have a look through mine.

I didn't see any need to dismantle mine ...hope I don't regret that.

edit sorry I miss-read your post . You have already discovered the answers to the 2x questions you put yes ?
 
Last edited:
I use mineral spirits as a rough degreaser. A scotchbrite pad works well with it then a wash with citrus based degreaser Like Zep that is sold at Home Depot. I mix it strong but rinse it often. It will stain bare metal with time. Bio freindly as advertised. Final clean is done with brake cleaner spray cans. Iso alcohol works good too. As mentioned, protect the steel with oil. I use CRC marine spray i get by the gallaon and use an old Spray 9 bottle to apply. All cost effective.
 
you did take pictures and make notes before and during dismantling the selector drum I hope :wink2:
The star wheel needs to go back on correctly ,relative, to the selector drum or some of your gears will probably not be selectable. The dimple is presumably an alignment mark to ensure this.

'Perhaps someone will have a picture showing this ...I'll have a look through mine.

I didn't see any need to dismantle mine ...hope I don't regret that.

edit sorry I miss-read your post . You have already discovered the answers to the 2x questions you put yes ?


Yes. I threw them all in an Album on this site. I need to edit the part names and descriptions I quickly entered for each image.

http://www.xs650.com/media/albums/1933/

As far as re-assembling the drum incorrectly, I'm not sure that can really be done the way it is made - everything has its place.

I discovered a chunk of metal removed from the drum body that the bearing (and collar) rests upon. I don't know how this occurred or whether its anything to be concerned about.
 

Attachments

  • Gear_Selector_Drum_10.jpg
    Gear_Selector_Drum_10.jpg
    209.1 KB · Views: 311
Back
Top