Heads Up!

azman857

'80 XS 650SG Rider
Top Contributor
XS650.com Supporter
XS650.com Supporter
Messages
2,724
Reaction score
5,077
Points
513
Location
Tucson AZ
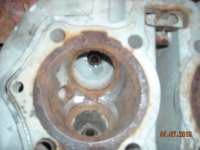
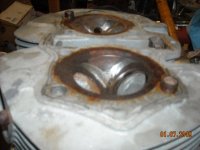
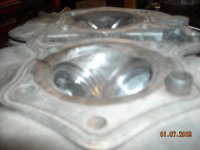
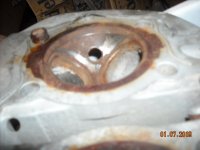
DSCN6127.JPG DSCN6131.JPG DSCN6132.JPG DSCN6135.JPG Like I was saying earlier...
I bought this spare head some months back. Found it at a friends shop in the yard. A pile of XS650 parts. Bought the whole pile. I recently disassembled the head starting with the valves. Seats and valves are in great shape. This head had very little wear since it was rebuilt. The rust was just on the surface and easily cleaned up. Dirt in the ducts was easily removed. Oxidation of the aluminum was tougher but not deep. Emery paper cleaned it right up.
Modifications
On XSCafe, I read about the 0 72 racing heads and they did not have the raised rings around the valves. They were ground off. I never liked them anyway. I imagine they were there to swirl the intake charge and promote a more complete burn. In my eyes, they also restricted the flow into the head. Out came the Dremel with a bead cutter head flattened that area out. I won't say it's all gone but most of it is. Wasn't hard to do. I practiced on a beater head I have.
On the exhaust end, where the pipes attached, There is a "lip" where the end of the pipe would be but, only about 1/2 of the way around. Both sides have this. Maybe this is to protect the end of the exhaust pipe from the flame of the exhaust stroke on that side of that side and not needed on the other or ??? Is this needed or can it be opened up for better flow. It's not a sealing joint. That's down the pipe on the outside of the tubes on the land where the studs are. The exhaust gasses would flow down duct and hit the pipe and have to go around the pipe end then down it. As it is now at least about 1/2 of the pipe end, there is a "guide" over it. I think I'll leave it alone. As for the lumps and bumps in the duct, I'm truing to flatten, smooth them over. Same in the intake duct. Just flatten/smooth them over. Nothing major. It's not to be a "Racing" head, just a city/back roads cruiser. Sometimes a "Spirited" run on the back roads. When needed. LOL.
Warning on the pics. The camera is not the best and worse so on the close ups.
DSCN6127.JPG
DSCN6127.JPG DSCN6131.JPG
 
Be very cautious on removing any thing from the ports............Some heads ports are already to big so when removing cast marks make sure to take the tops off and don't dig into the ports trying to make it smooth..............

Worth reading up on these threads

Pics of Jacks head porting, bottom of the page.........no write up, i got these pics off of 650 Garage and Jack has had Photobucket problems...........Second link is to jacks explanations from the 650 Garage...........may be able to associate the pics with his posts ........a good brain tester for the morning
http://www.xs650.com/threads/jacks-information-on-head-porting.12301/page-2
http://xs650temp.proboards.com/thread/119?page=1

Worth considering........any material removed from the head, piston chamber reduces compression ratios........on the XS1 the compression was 8.7 -1.........they bought out pistons with 1mm removed of the top to lower compression........this bought the compression ratio down to 8.1 -1

D porting
http://www.xs650.org.au/Technical Info/exhaust_port.htm
 
The step n the exhaust ports is to accept the stepped end of the stock headpipes. The problem is, it's deeper than it needs to be. How much the pipe inserts into the head depends on how much the seal ring gets compressed, but even with no seal ring, the pipe still doesn't fill the step completely. This leaves a groove around the port and that's supposed to be detrimental to flow.

As mentioned above, the ports are already borderline too big, so you wouldn't want to open them up to match the step. A better option is to fill the step with a pipe ring. But, how does one determine the ring's width if the amount of headpipe sticking into the port varies depending on gasket compression? Right, you really can't. I worked around the problem by cutting the ends off of some old beat up stock headpipes and inserting them into the head first. I stuck them directly in with some Yamabond and no seal gasket. That made the distance they inserted fixed and I was able to make a pipe ring to fill the rest of the step .....

vkoaWPS.jpg


I peeled the outer layer of pipe off the cut-off stock headpipe ends and that allowed them to fit inside my aftermarket headpipes. The seal ring was placed there, between the headpipe and the insert .....

1rc0sYU.jpg


Here's the whole stack of parts as fitted into the head .....

OGYLZGG.jpg


I did this originally because my aftermarket headpipes had a very narrow sealing lip on them. I couldn't get them to seal up to the head worth a shit. My inserts center the pipe on the port and on the seal ring. They seal up just great now. Although it wasn't my original intention, I think what I ended up with are homemade AR inserts. The bike runs good like this, much freer revving than it was before with the leaky pipes. Sealing them up probably helped with that but the AR insert part may be contributing to it too.
 
Enlarging the ports was never the plan. Just a quick clean up.

Warnings and cautions is all i mentioned..........Now you did ask if it was ok to enlarge the exhaust post by removing that lip............That is making it bigger so their was a question and maybe a plan...........In fact that exhaust port has to be restricted to a certain size for reversion. Especially if larger headers are used......It is all in that last link
 
Spend your money in other places. Clean up the head and have the valves and seat cut and redone and leave it alone. Not getting any big horsepower gain by porting on this head. Cam / larger Pistons / better carbs will give the gain you are looking for. Done some crazy stuff to these heads on port and polishing / cutting the valve guide for more fuel / cutting up ports and just ran into trouble time after time and had to putty up head for cracks from heat and got just about the same on a fresh cleaned up head. Now if you have ten heads to play with and a flow bench just maybe you can squeak a little horsepower out of one of these heads. I have found that this motor design is a great little motor for what it was made for and a dinosaur if done correctly. Three angle valve job / new valves / new springs / new guides and call it a day and go ride.
 
Back
Top