-
Enjoy XS650.com? Consider making a donation to help support the site.
XS650.com receives a small share of sales from some links on this page, but direct donations have a much greater impact on keeping this site going.
You are using an out of date browser. It may not display this or other websites correctly.
You should upgrade or use an alternative browser.
You should upgrade or use an alternative browser.
How the $#&!
- Thread starter G_YamTech_314
- Start date
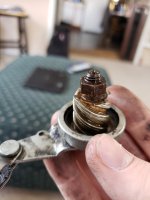
I prefer to put the cover back on, use an air wrench and 6point 12mm deep socket, takes it off every time.
The external threads won't get hurt?I prefer to put the cover back on, use an air wrench and 6point 12mm deep socket, takes it off every time.
Nope, done it to lots of em.
Damn. Where would I he without you guys? It worked well.
I kinda thought the same thing. I've dealt with screw and locknut clutch adjusters before, never remembered them requiring king kong strength to get em' loose. Gonna be sure to use my head and take preventative measures for next time.That screw and lock nut are just plain steel. Be sure to anti-seize the heck out of them when re-assembling so they don't seize up again. And the lock nut needn't be super tight.
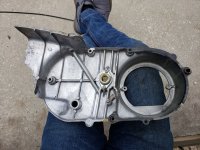
Yes you did. Liberally grease the worm and don't tighten the nylon part's mount screws too much or it will distort and bind up the worm rotation. You can check it's operation by hand before you install the cable and cover to see if it's binding. And as you've probably deduced, you need a new cover gasket. Large portions of yours are missing .....

Last edited:
That is Too Clean !In other news, got it to come pretty clean.
Good work, Im watching your project too.
Hey, this reminds me, do you have a chain guard ? I Didn't see one on your pics.
And is the black dirty one from a 77 thru 79 Standard on my garage floor the same as yours ?
-RT
Awesome advice. I'm finding lots of loose hardware from PO. Gonna invest in torque wrench set soon.Yes you did. Liberally grease the worm and don't tighten the nylon part's mount screws too much or it will distort and bind up the worm rotation. You can check it's operation by hand before you install the cable and cover to see if it's binding.
Also, is there a need to even take that out to begin with?
That is Too Clean !
Good work, Im watching your project too.
Hey, this reminds me, do you have a chain guard ? I Didn't see one on your pics.
And is the black dirty one from a 77 thru 79 Standard on my garage floor the same as yours ?
-RT
That is Too Clean !
Good work, Im watching your project too.
Hey, this reminds me, do you have a chain guard ? I Didn't see one on your pics.
And is the black dirty one from a 77 thru 79 Standard on my garage floor the same as yours ?
-RT
I do have it. It came still (half) attached. Removed it hecabese it was hitting chain and rear sprocket. Figured I'd leave it off until I was ready to ride. Gonna maybe clean that up today as well.
Not sure if it's the same as yours, I didn't see a picture attached
Attachments
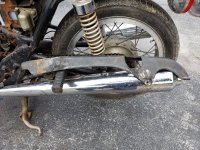
Got it , Ya, yours is as ugly as mine so have at it Lol..Figured I'd leave it off until I was ready to ride. Gonna maybe clean that up today as well.
Good work !
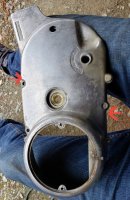
Where do you guys find your gaskets? I don't wanna try making one for the left side cover because I'd rather not risk letting water/dirt into the alternator passage.
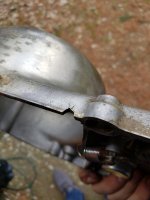
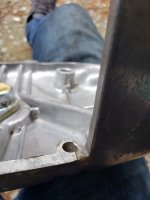
Also, do any of you know if the stock cover has these cut outs initially?
Also, do any of you know if the stock cover has these cut outs initially?
Attachments
LOL! I did notice that... The gasket had some tears so I decided it best to replace it entirely.Yes you did. Liberally grease the worm and don't tighten the nylon part's mount screws too much or it will distort and bind up the worm rotation. You can check it's operation by hand before you install the cable and cover to see if it's binding. And as you've probably deduced, you need a new cover gasket. Large portions of yours are missing .....

I like to wet sand the surfaces to make sure it seals well. Check out my post in the later section of the tread, the cut outs I posted look factory, but I can't tell after some of the damages.
I look up the gaskets on Partzilla to get a Yamaha price then shop eBay where I can usually do better. I think the Yamaha price for that one you need is about $15. Be aware that there were two different gaskets used here. The very early ones differ from your later style. A mounting screw and dowel location changed .....

Seen plenty made out of cereal box working just fine, (bran flakes is popular..) it's more of a spacer than a seal on this cover.
So what you're saying is, if I manage to get the cover on flush with the motor with no gaps I don't need it?? It seems like an important part for keeping dirt out of the alternator?Seen plenty made out of cereal box working just fine, (bran flakes is popular..) it's more of a spacer than a seal on this cover.