Introducing Me and my 1983 Heritage Special Restoration

Thanks Guys!
I have not opened the carb kit yet but got it from MikesXS at least 10 years ago... will post to check what I have is suitable before I reassemble.

LOL, Yeah, nice plan, but it would be an XS1000 then....

Ok, well I guess I hadnt thought it thru, but the paint is all chipped and peeling, so has to come off regardless...
 
Annnd, here we go!

C8FA41EE-AAF1-4DD0-A202-0A7871D4F5DD.jpeg
ED32B476-B5BB-4C0D-B6F6-795B2BC752F8.jpeg
F7B17299-DDCD-42C2-A66F-963E72D465E2.jpeg
ED32B476-B5BB-4C0D-B6F6-795B2BC752F8.jpeg
 
Having trouble separating the carbs because the support bar screws are tough. My impact screwdriver bit broke on another project so ordered another.
In the meantime, I stripped the carbs a bit more, bagging and tagging as I went.
Man, it’s crusty in there!

I have a question...
Don’t have much experience with vapor blasting, but understand the process.
Anyone have any input on blasting the main bodies?


0A38F6E8-EFB1-4C45-8916-8DFD1668868A.jpeg
EB8C3D28-5879-450D-964A-DBD6598D8B91.jpeg
 
In your last pic, I see you still have the caps in place on top of the mix screws. Those need to be removed so you can pull out the mix screw and it's associated parts (spring, washer, o-ring). You can't completely and properly clean the idle circuit with the mix screw still in it. It's point sticks down into and partially blocks one of the idle circuit passageways.

The P.O. of my '83 said he always had issues with the carbs. When I cleaned them up, I figured out why. He didn't go far enough, not all the way. He didn't replace the mix screw o-rings which were flat as a pancake and hard as rocks, and he didn't replace the butterfly shaft seals. I could see he attempted to do the seals but a couple buggered up screw heads on the butterfly plates showed me he never got them out. So far for me, these now 100% overhauled carbs are working great. Nice steady idle and the bike revs up from idle to redline with no stumbles, flat spots, or break-up.
 
Thanks for the input!
The screw head rounded off.
I gave to get at it and saw a slot now.
I tried getting the butterflies out but buggered one screw head before I stopped. I think the screws are peened over, am I correct?
What the correct procedure for getting them out?
 
Something else you're going to want to check while you're cleaning is the choke feed jet in the bowls. It's located near the bottom of a bored passageway along the edge of the bowl .....

HYNwXFs.jpg


With it's fuel inlet being so low, near the bottom of the bowl, any crud sitting in there will get sucked in when you apply the choke and clog up the jet. With the jet clogged, the choke won't work, and the bike will be very hard to start cold. The jet is pressed in place so you can't take it out for cleaning, you'll just need to flush and blow it clear with compressed air. Here's how to check if it's clear .....

IzS1tsu.jpg
 
This is where your mix screw is hiding, under this plug .....

6w594s8.jpg


To get it out, you need to drill into it, thread a small sheet metal screw into it, then yank it out .....

1He45qM.jpg


imPf1SZ.jpg


Careful you don't drill too far and go through the plug, you'll damage the screw slot on the top of the soft brass mix screw. Notice the small vent hole through the cap to begin with. Drill a little into it and check that hole, drill a little more and check it again, etc. As soon as you see that little hole begin to get larger, stop drilling, you're almost through the plug. And blunt the sharp tip of the screw you're going to use .....

WwXCtog.jpg
 
Last edited:
F52C61A4-46D5-4070-9E8D-4FD13ADF00B9.jpeg
Then went to town on the butterfly screws.
Ground the backs off with a Dremel, as shown... It was the only way I could get at them!

One came out easy, but the other one that I had already chewed fought me for 20 mins before succumbing to a flathead screwdriver on the edge tapped with a hammer.

92D0A093-6257-41A2-A3E0-D120842109A9.jpeg
F9DE425A-FE75-41A1-913D-526D59022BAD.jpeg
1674C265-708B-4540-A937-D927DB9FFC94.jpeg
 
Last edited:
OK, I see you got the mix screw out but did you also pull out the little washer and o-ring (like pictured in that MikesXS link)? You can get that kit from Mike's but there's really no need to. The o-ring is a common 1mm x 3mm size and you won't be putting the plug back in so no need to buy another. These are the mix screw parts and you can usually re-use all but the o-ring .....

50uwrYZ.jpg


As far as the butterfly shaft seals go, don't buy them from Mike's, they're repops of questionable quality. The originals are still available and may actually be cheaper. Many of us use the Suzuki seal now, same part but even cheaper than the Yamaha one .....

https://www.partzilla.com/product/suzuki/13651-51010

Mike's charges $3.50 each for them.
 
Got it!
I assume it would be wise to put something in the hole, like a plastic cap to keep the crap out?
Still have to blast the carb body some more, as there is still some black showing.
Is corrosion an issue?
Wondering if I should clear powdercoat it or the like..

As a backdrop to my next statement....
I'm a pretty handy guy... with a pretty well equipped shop, and I will tackle pretty much anything..
Getting reasonable with the English wheel, Planishing Hammer, Bead roller, Shrinker/Stretcher, and of course the bag and the stump...
Built this sheet metal station last year to make some panels I need for my Airstream.

IMG_6488.JPG


More of me over here...
https://www.garagejournal.com/forum/showthread.php?t=403443


Trying to decide a direction for the build still.
I was thinking a stock build/resto, but wondered about some custom touches.
It may well end up as my girls ride, as its a bit small for me as I'm 6' 4" and 250lb.
She is 5' 5" and 120...
I don't want to chop it up at all, and want it all to be able to put back to stock, and keep all the stock parts...
Dang, even the original saddle is in good shape!

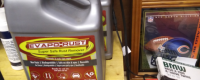
I'm leaning toward some bling, with the engine vapor blasted, maybe keep the main case black, and a few details. Maybe some billet bling too.
Tank is already panted glass black and straight, so maybe some pinstriping...
Maybe, add some rake to the stance with some fork extensions, and maybe lower the rear a touch...
Maybe build a better/sculptured/lower saddle, with better foam and a stitched leather cover... I have the skills to shape foam and stitch a custom cover.
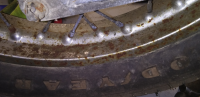
Wide rear tire, and skinnier front... Keeping the spoked wheels, and maybe a drilled rotor up front....
Is any of the above stupid/sacrilege?
Open top suggestions and crit!
 
Yep, that's them, lol. And as if you couldn't tell, that o-ring is toast. You can't get a good idle adjustment if the o-ring is no good.
 
Yup!

So, my carb tops are not great.
Rust has broken thru the chrome.
Are these available anywhere or should I scuff and powdercoat?
0272A746-0A81-4541-8E7D-612FBE719670.jpeg
 
I would clean and degrease them and then soak overnight in Evapo-Rust. I've had good luck with it. Won't make them perfect, will make them better.
121962-920a0e1aab5fbf365322ec66e6b97a5a.jpg


121963-c4c62e7dd3eaf10ce6722f2363ab2ec4.jpg
121961-3d20413fa04310f801a2a2023a134e74.jpg
 
The chrome tops are N.L.A. but there is another option. You can replace them with the alloy tops from XS400 or XS750 triple carbs .....

WnsPM6d.jpg


PdIAVoM.jpg


Being so much thicker, it is possible you then won't have enough freeplay in your throttle cable. If that's the case, a small mod to the throttle twist grip tube will be required. Grind a few MM off the throttle stop area so the tube rolls closed a little more.
 
You are a talented guy! I'd kill to live next to you your english wheel :lmao:
Might as well throw the needle jet washer mod in here.
The one slot american spec needles tend to be a bit lean with stock jets, creating a flat spot about 3000RPM. A washer inserted between pill and E-clip fattens it "just enough to get rid of the flat spot. Only use ONE washer, a second will raise the needle far enough that the tension spring coil binds, causing some bizarre issues (ask how I know) :redface:

needle washer mod (1).jpg


needle washer mod (3).jpg
needle washer mod (5).jpg


Specs for the washer found in 5T's post (#3) in this thread
http://www.xs650.com/threads/the-gr...ut-bolt-sizes-used-on-the-xs650-thread.51957/
 
Last edited:
Back
Top