-
Enjoy XS650.com? Consider making a donation to help support the site.
XS650.com receives a small share of sales from some links on this page, but direct donations have a much greater impact on keeping this site going.
You are using an out of date browser. It may not display this or other websites correctly.
You should upgrade or use an alternative browser.
You should upgrade or use an alternative browser.
Is it my turn? Anything to do with lathes, mills and other shop tools
I'm a troll for sure... just West of Gaylord by 30 minsAre you north of the bridge or with us trolls under the bridge?
View attachment 132247 View attachment 132246 View attachment 132245 View attachment 132242 View attachment 132248 View attachment 132242 View attachment 132245 View attachment 132246 View attachment 132247 View attachment 132248 View attachment 132248 View attachment 132247 View attachment 132245 View attachment 132247 Need opinion/input from the experts. I'm still relatively new to this forum but have been hiding in the shadows and have enjoyed reading all the threads from everyone. Own two XS650's and in the process of building a third. Not much for posting on social media, so I'll apologize in advance for not including my work with pics. Quite frankly, the work I see being done on this forum is a bit intimidating, and my work wouldn't hold a candle to what I see being done. Anyway, the blue 81 in the pic I totally restored from reading this forum. Wish I had before pics, as it was in rough shape. The list of work done to this bike would take up three pages. Just got done repainting the tank. The 77 in the background was a PO attempt at a cafe bike, which runs great and am leaving as-is for now, but have all orig parts to put it back stock. I've been getting more into metal working and have an opportunity to buy the lathe, and mill in the attached pics for $1,800. The lathe is an old South Bend, 48" bed. Comes with some tooling. Not real sure on the mill, but owner said it works great. Lathe is converted to single phase, mill is 3-phase. Just wanted to get the "experts" to chime in here, as I'll admit I am very much in the learning process and do not want to make a purchase mistake, or get myself in deeper than I should. Owner is 87 and said the lathe was completely gone through, nice and tight, re-painted. You know how that goes. Anyway, comments would be much appreciated. What should I look for, what questions should I ask before buying? Also has a surface grinder available for $600.
Hi 2XSive,
if you can afford it, buy the lot, surface grinder and all. Anything you can't get running or find you don't need can be sold on.
Sacaps
XS650 Member
Does anybody have one of these mills? An x/y bed with no z. The head moves up and down on a six inch post.
The problem is the quill only has a short travel so after you find an edge and maybe put a centre drill into the chuck, (I setup dial indicators to move the bed around) you have to raise the head to put in a longer tool. The head rotates around vertical post and the zero point is lost.
Has anyone ever come up with a stop or a way of indicating the head to come back to the zero?
Thanks in advance.
Stephen
This sub-forum may have something.
https://www.hobby-machinist.com/forums/enco-rong-fu-imports.135/
There's other subforums in there that may be of interest.
Somewhere in there a fellow came up with a "quick tram" that referenced to a large plate affixed to the column base.
I hear you on the juggling of finders, center drills, mill bits, drill bits, taps, ...etc. I have to carefully pre-plan the operation/sequence and get the head at the right initial height. Short drill bits are available. Having a variety of toolholders (collets, chucks, extensions) can be handy...
Stubby drills are handy even if you have full size machines.
Maybe once you get dialed in, use a mag base on the table with a dial indicator on the head. Then when you swing it over you can bring it back to zero, and remove the mag base so it is out of the way while working.
Maybe once you get dialed in, use a mag base on the table with a dial indicator on the head. Then when you swing it over you can bring it back to zero, and remove the mag base so it is out of the way while working.
Sacaps
XS650 Member
Thanks for all of your replys. Pre planning is the key. I did find the link on the hobby-machinist site and will try and read through it later. (Just so few hours in the day). I have been working on a vertical height gage idea with an indicator on it to pick up the same point on the head. It all just adds another long process to drilling and reaming a simple hole.
Maybe take the arm off a second mag base(cheap harborfreight/ebay/amazon) and have 2 arms on one base, use one for height and one for swing. That way you get both functions for coming back to zero, and its easily pulled off for working.
A while ago I bought a Sino 3 axis DRO for my mill. I have a few sprockets and hub to drill so I thought I would experiment with the PCD function.
Looking on Youtube there is a good walk through video on how to do this , so after reading the manual and combining the two lots of info plus some more info from machining forums I drilled a test.
80mm dia PCD 6 holes to match a brake rotor I was using as the test.
At first I could not even program the unit using the manual supplied a key step in the routine was missing.
After I discovered that I was away,or so I thought ,many failed attempts later
I managed to programme it to do what I wanted, For others here is what I did :
Set the centre of the PCD with the DRO in the ALE mode and zero it.
X=0, Y=0
Change to PCD mode
Set radius of PCD , press enter and then press down arrow
Set start angle 0, press enter and then press down arrow
Set end angle 360 press enter and then press down arrow
Holes number use the NUMBER +1,press enter and then press down arrow
Direction 0 (anticlockwise) press enter and then press down arrow
Start drilling.
I am sure ore experienced people would have worked this out faster than I did but it took some time experimenting with number of holes and end angles.
On the bright side bring on the sprockets as this will be faster than the rotary table.
Never thought of going +1 on number of holes & leaving end angle at zero. I always end up doing the math for my end angle, ie. 6 holes = start at 0 - end at 300. Otherwise pretty much the same sequence.
Beags64, I am a dunce. I was using 320 degrees as end and of course that is wrong. Will try again using the correct angles and correct number of holes tomorrow.
Thank you for your comment it made my mistake very obvious.
Thank you for your comment it made my mistake very obvious.
Oh trust me, math is not my strong suit for sure. I keep a calculator in my tool box plus my DRO has one on it also. Always checking, re-checking and doubting my math. Your +1 method should still produce the same results.
Now as far as the rest of the things that DRO is capable of I haven't gotten into a whole lot. I've used the straight line hole spacing a time or two but the radius and other stuff still eludes me.
Oh trust me, math is not my strong suit for sure. I keep a calculator in my tool box plus my DRO has one on it also. Always checking, re-checking and doubting my math. Your +1 method should still produce the same results.
Hi Beags,
Robert Heinlein has one of his characters say:-
"Mathematics is easy. Arithmetic is difficult."
Tried the correct number of holes and end angle and it worked a treat. Drilled a blank sprocket in no time, much faster than with the rotary table.
Justa little doo-dad.
A 2" piece of 2-1/4" round aluminum.
Drill a 1/4" hole near the side, and slot it.
Press a 3/8" hardened drill rod into it.
Oops.

Too much interference.
Cut that off, try the other side, less interference.
Chuck it up by the shank, true it up, face it off.

Much better.

I have a lot of 9", 80 grit, PSA sanding discs.
Mark out the cut lines.

Stick one end of the sanding strip into the slot. Keeping everything square on a flat plate (glass here), roll the strip around the drum, shove the end into the slot.

Run a screw into the sandpaper retaining hole.
Add the circular piece to the drum's bottom.
A precision 2-1/4" sanding drum, 80 grit, 3/8" shank.

A 2" piece of 2-1/4" round aluminum.
Drill a 1/4" hole near the side, and slot it.
Press a 3/8" hardened drill rod into it.
Oops.
Too much interference.
Cut that off, try the other side, less interference.
Chuck it up by the shank, true it up, face it off.
Much better.
I have a lot of 9", 80 grit, PSA sanding discs.
Mark out the cut lines.
Stick one end of the sanding strip into the slot. Keeping everything square on a flat plate (glass here), roll the strip around the drum, shove the end into the slot.
Run a screw into the sandpaper retaining hole.
Add the circular piece to the drum's bottom.
A precision 2-1/4" sanding drum, 80 grit, 3/8" shank.
I know there are many different levels of knowledge on here, but this book is kinda nice for any level. https://www.amazon.com/Machine-tool...ice/dp/0070203695?ref_=mw_olp_product_details
I say that because it has almost 50 different blueprints in the back. All the way from simple scribes to a gyroscope or arbor press. I got it for the prints, but someone starting out can get a bunch of useful info from it. Mine was used in new jersey schools back in the day and looks new.
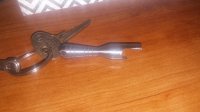
I made the bottle opener so far.
I say that because it has almost 50 different blueprints in the back. All the way from simple scribes to a gyroscope or arbor press. I got it for the prints, but someone starting out can get a bunch of useful info from it. Mine was used in new jersey schools back in the day and looks new.
I made the bottle opener so far.
Attachments
Similar threads
- Replies
- 9
- Views
- 898
- Replies
- 24
- Views
- 7K